KE2010.Instruction Manual.Ver.2.01,Rev.08.pdf - 第392页
6 − 16 (4) Execution modes Each production mode has two kinds of execution modes. No. Execution mode D escription 1 Continuous Keep on placing components on PW Bs until the specified production ends or the production is …
6 − 15
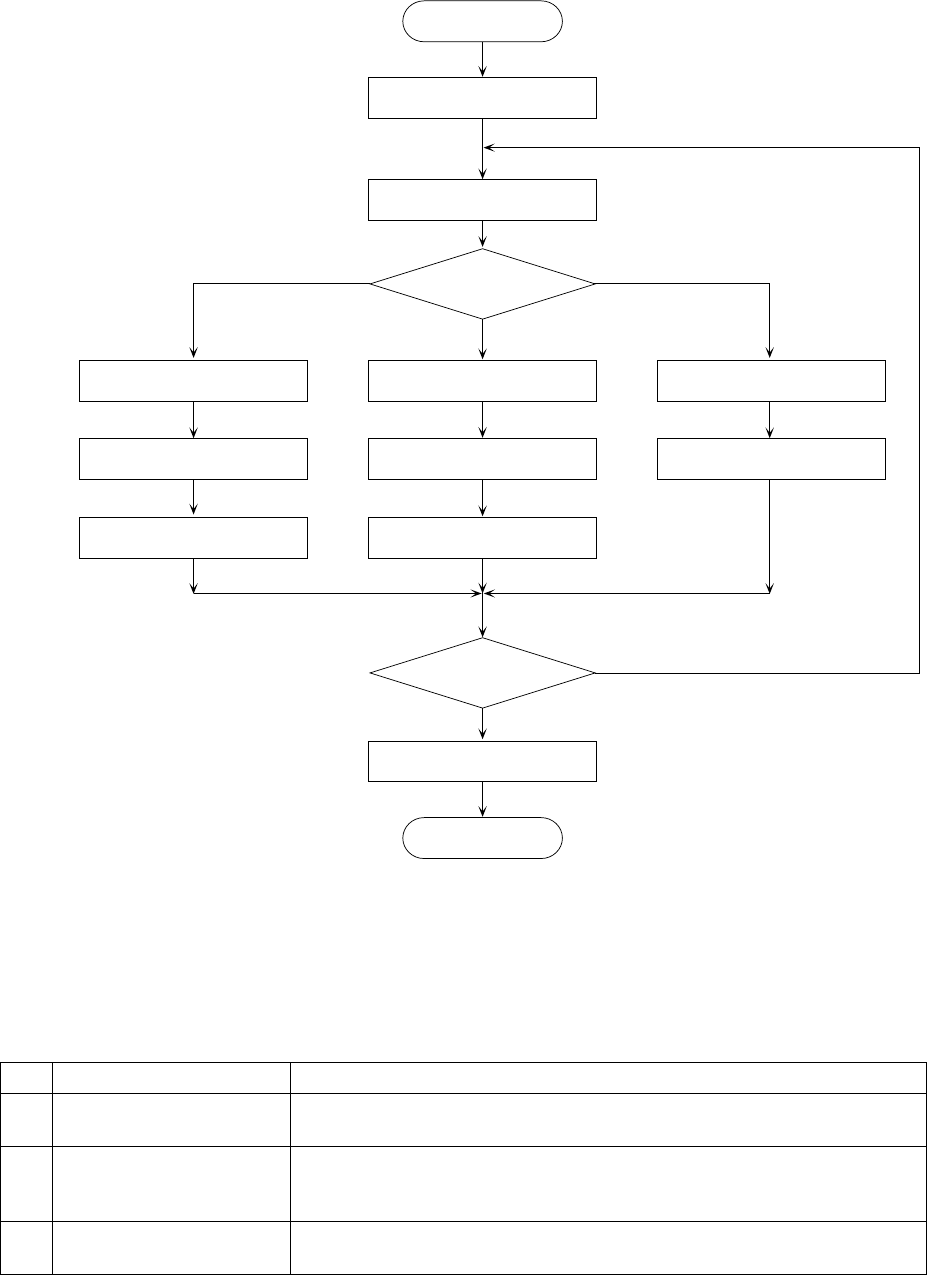
(2) Operation flow before the start of production
Select the producing conditions.
START
Specify the execution mode.
Execution mode?
Setting of
actual producing conditions
Setting of the number
of components to be placed
Board production
End?
N
Y
End
END
Setting of test-run conditions
Setting of the number
of components to be placed
Trial run
Setting of blank-run conditions
Blank run
Trial run Blank run
Board production
Figure 6.2.1 Production flow
(3) Production mode
There are three types of production modes.
No. Production mode Description
1 Board production mode Determines the number of PWBs on which components are placed, and
actually places components on the PWB.
2 Trial run mode Test-places a preset number of components on a PWB, check the status of
placement of components on the PWB. In case the placement is found not
satisfactory by the camera tracking function, teaching can be performed.
3 Blank run mode Test-runs the machine without using component. This mode is used to
check the pickup and placing operations of the machine.
Each of the above operations can have its operating conditions (production
condition, test-run condition, or blank-run condition).
6 − 16
(4) Execution modes
Each production mode has two kinds of execution modes.
No. Execution mode Description
1 Continuous Keep on placing components on PWBs until the specified production ends or the
production is terminated by pressing the <STOP> switch in Pause mode.
2 Step Pauses production at the end of every production step.
The pause positions are as follows:
1) After reaching the pickup position
2) After reaching the placing position
3) After reaching the bad-mark position
4) After reaching the fiducial position
5) After reaching the component discarding position
6) After the X- or Y-axis moves (except the cases above)
To restart the production, press the <START> switch.
Even in Continuous mode, when you press the <STOP> switch once, the machine
pauses temporarily.
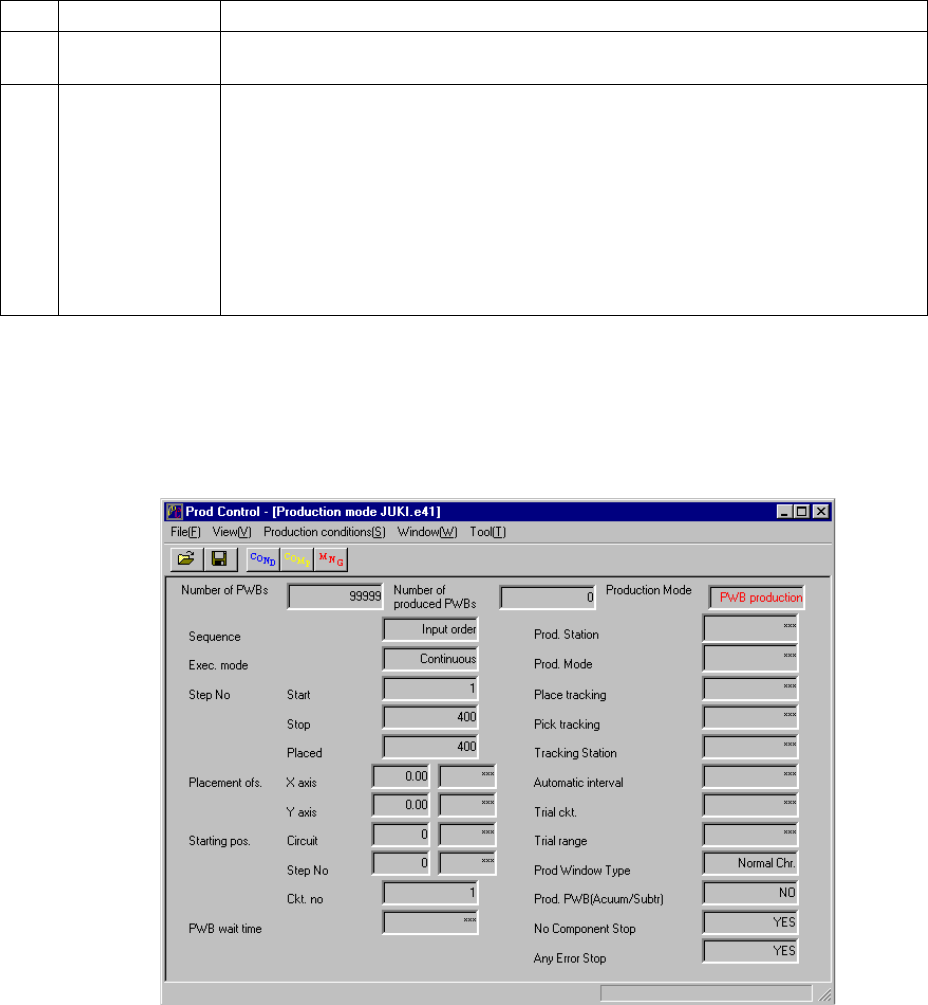
(5) At start of production, values specified on the Production condition dialog box and
those specified on the Operation option dialog box are displayed.
Figure 6.2.2 shows the screen displayed at start of production.
Figure 6.2.2 Production conditions screen (displayed before production starts)
6 − 17
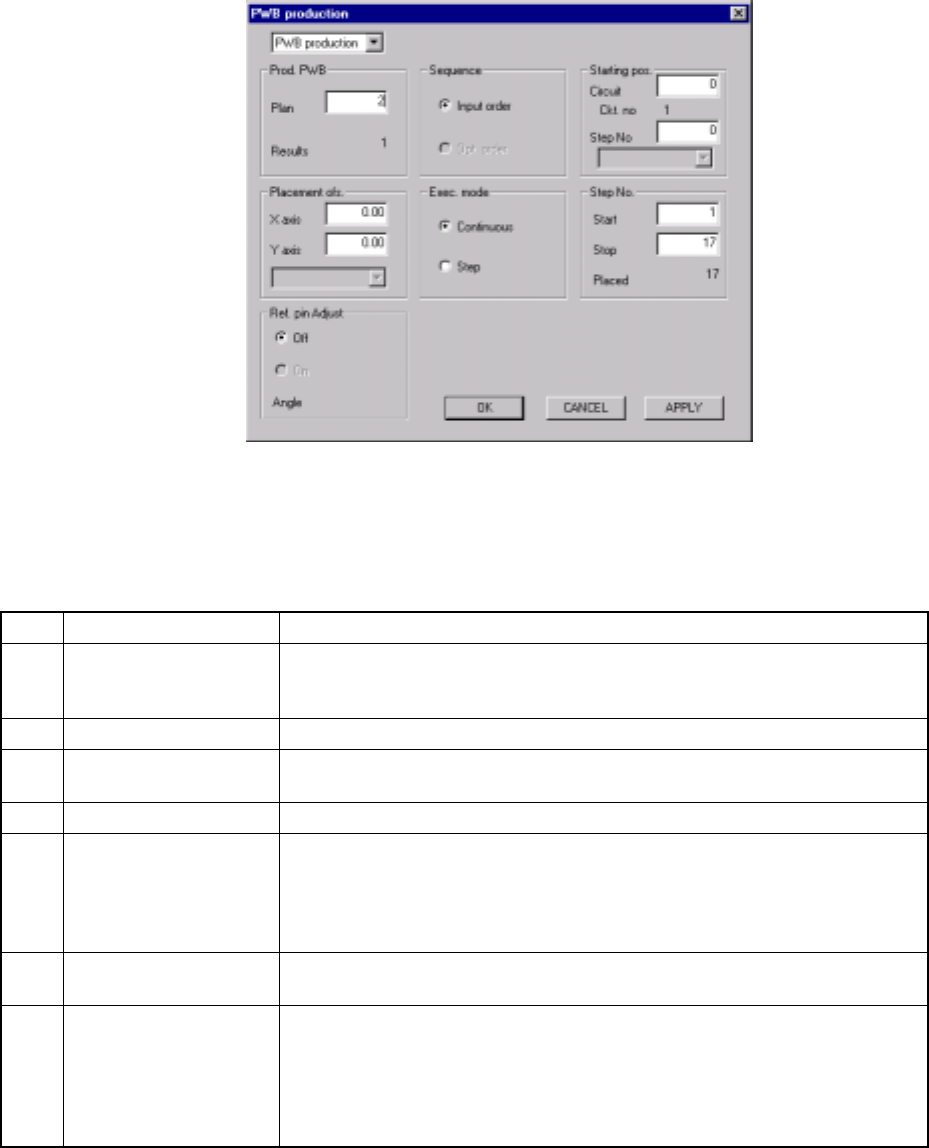
6.2.1 PWB production
When you select the [Production conditions] command from the menu bar, then the
[PWB production] command, the PWB production conditions dialog box appears on
the screen as shown in Figure 6.2.1.1.
Figure 6.2.1.1 At start of production (PWB production conditions dialog box)
6.2.1.1 Production conditions
(1) Setting items
No. Item Description
1 Setting items selection Switches the dialog box to be displayed among the PWB production conditions
dialog box, Trial run conditions dialog box, and Blank run conditions dialog
box.
2 Prod. PWB Set the number of boards to be produced.
3 Sequence Select either “Input order” or “Opt. (Optimization) order” as the placement
sequence.
4 Exec. mode Select either "Continuous" or "Step" execution mode.
5 Step No. Specify a range of placement data with the placement start line and the
placement end line.
Specify the data in the order of "Input order".
When the item "Sequence" is set to "Opt. order", you cannot enter any data
here.
6 Placement ofs. Specify total offsets for all placement positions. This adds the set offset to the
placement data for actual placement.
7 Starting pos. This item is available only for the board fed initially after start of production.
Specify the circuit and placement number where the first placement is
performed. If, for any reason, board production on the machine is put in a halt,
this setting continues the production.
This is effective to place the remaining components on the board to which
placement was put in a halt.
* For the item of "Ref. pin Adjust", the status set on the Operation Options menu is displayed only. It cannot be
changed here.