KE2010.Instruction Manual.Ver.2.01,Rev.08.pdf - 第518页
6 − 142 3) <INSP.> button (< START> button) This butt on starts cont inuous check oper ation. 4) <BACK> butt on This butt on returns you to t he previous screen (ESC key). 5) Short -cut k eys On the &qu…
6 − 141
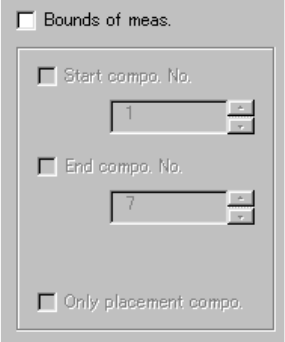
2) Bounds of meas. (measurement)
Check this check box if you want to check components whose number are
specified here among the components already selected with the setting
item "Component of meas." above. When you check this check box, you
can set the following items.
① Start compo. No.:
Check this check box to specify the first component number in
Component data to be checked. Then, change the first component
number displayed in the edit box.
② End compo. No.:
Check this check box to specify the last component number in
Component data to be checked. Then, change the last component
number displayed in the edit box.
③ Only placement compo:
Check this check box to check components specified in Component
data which are also specified in Placement data.
6 − 142
3) <INSP.> button (<START> button)
This button starts continuous check operation.
4) <BACK> button
This button returns you to the previous screen (ESC key).
5) Short-cut keys
On the "Continuation inspection" dialog box, the following short-cut keys
are provided:
Keyboard Operation panel key HOD key Action
START Starts continuous check.
ESC Returns to the previous screen.
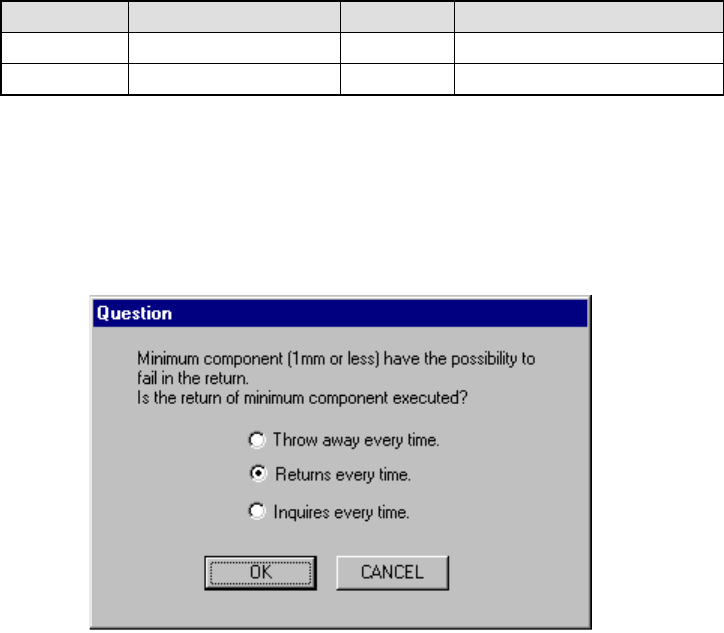
6) Question
Immediately after the system starts continuous check, it displays the
dialog box which asks you how to handle a component whose size is 1
mm or less after check.
Figure 6.7.2.5.2.1 "Question - to return minimum component" dialog box
① Throw away every time.
The system discards a component in the way you specified every
time.
② Returns every time
The system returns a component onto its original position.
③ Inquiries every time
The system displays the "Question" dialog box every time it finishes
measuring a component whose size is 1 mm or less.
6 − 143
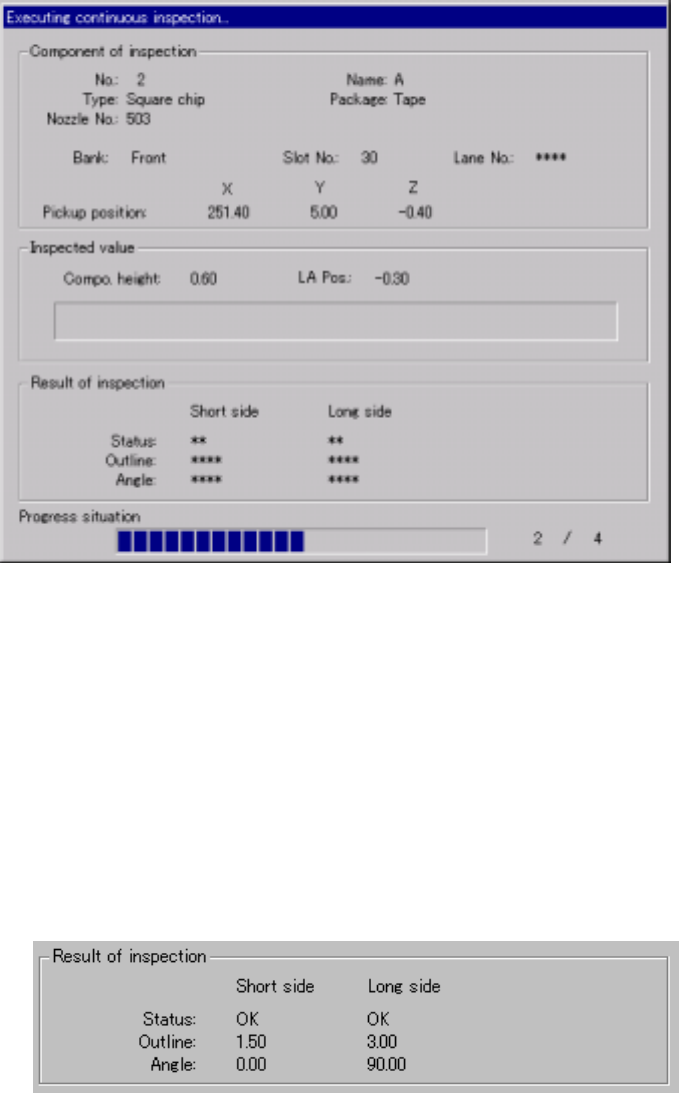
(2) Screen displayed during continuous check
While the system is checking laser height continuously, the following dialog
box appears on the screen. The description of a component being checked,
component pick-up position and the result of inspection are displayed on this
dialog box. In addition, the progress condition of the continuous check
appears also.
Figure 6.7.2.5.2.3 Laser height continuous check dialog box
1) Result of inspection
After checking laser height, the results are displayed in this "Result of
inspection" column.
The "Short side" and the "Long side" indicate the data when the system
detects the minimum width of a component for the first time and second
time respectively.
The results are valid only if the status of both "Short side" and "Long side"
is "OK".