KE2010.Instruction Manual.Ver.2.01,Rev.08.pdf - 第605页
8 − 16 ② O peration you select “Bad m ark sensor ” as the cont rol unit (1) XY move Operate in t he same manner as descr ibed under the section “ Head control”. (2) Sensor con. The contr ol item “Sensor cont.” t urns on …
8 − 15
2) Light cont.
The control item “Light cont.” turns on and /or off the OCC light.
When the control item “Light cont.” is checked, click one of the <ON>,
<OFF> and <ON/OFF> buttons, or press one of the F3, F4 and F5
keys.
When the control item “Light cont.” is checked and you click the
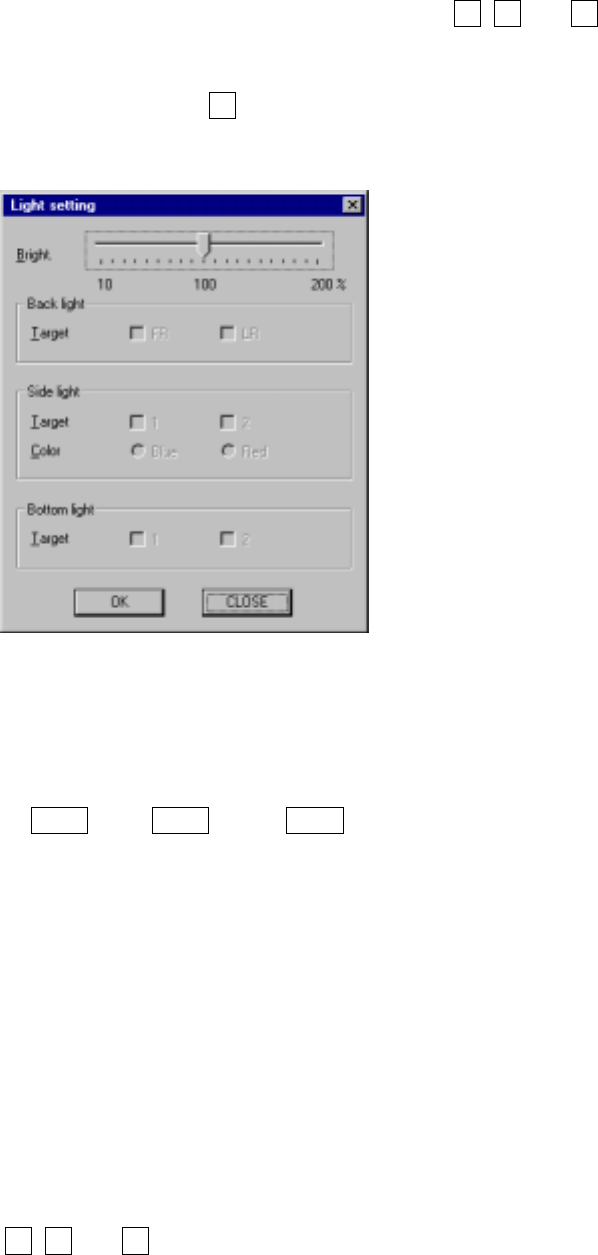
<SET> button or press the F6 key, the Light setting dialog box appears
on the screen.
Figure 8.2.3 Light setting dialog box
3) Bright.
Move the slide bar to set the amount of light.
With the arrow keys, PgUp key, or PgDn key, you can move the slide
bar.
When you click the <OK> button, the light of the amount specified
turns on the next time.
When you click the <CANCEL> button, your setting becomes invalid.
The light state display is updated when the light is controlled
completely.
4) Polarity control
The control item “Port. cont.” controls positive and negative of the
polarity of the OCC.
When the control item “Port. cont.” is checked, click one of the
<Positive>, <Negative>, and <Positive/Negative> buttons, or press one
of the F3, F4 and F5 keys.

8 − 16
② Operation you select “Bad mark sensor” as the control unit
(1) XY move
Operate in the same manner as described under the section “Head
control”.
(2) Sensor con.
The control item “Sensor cont.” turns on and / or off the bad mark
sensor.
When the control item “Sensor cont.” is checked, click one of the
<ON>, <OFF>, and <ON/OFF> buttons, press one of the F3, F4 and
F5 keys.
The display of the sensor status is updated when the sensor is
controlled completely.
③ Operation when you select “HMS” as the control unit
(1) XY move
Operate in the same manner as described under the section “Head
control”.
(2) Measurement
Height measurement device
When the control item “Measurement” is checked, click the <EXEC>
button or press the F3 key.
The display of the measurement result is updated when the HMS is
controlled completely.
8 − 17
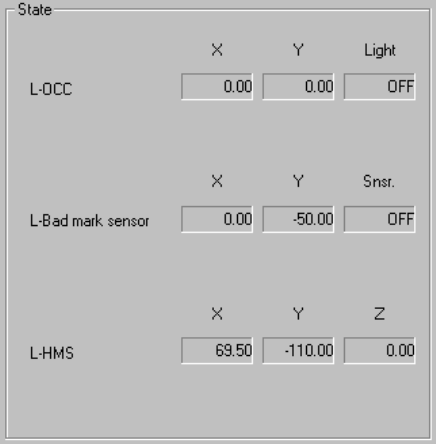
(4) State display
① OCC
The X and Y coordinates and ON and OFF setting of the light are displayed
when the OCC is controlled completely.
② Bad mark sensor
The X and Y coordinates and ON and OFF setting of the sensor are
displayed when the bad mark sensor is controlled completely.
The sensor setting is always displayed.
③ HMS
The X and Y coordinates and Z coordinate are displayed when the HMS is
controlled completely.