KE2010.Instruction Manual.Ver.2.01,Rev.08.pdf - 第642页
8 − 53 (2) Contr ol head Select the head to be cont rolled f rom t he combo box. This selection does not affect the setting s of the “Device enable” menu invoked fr om the Machine Setup menu: this m eans that a not -chec…
8 − 52
8.6 Others
8.6.1 ATC control
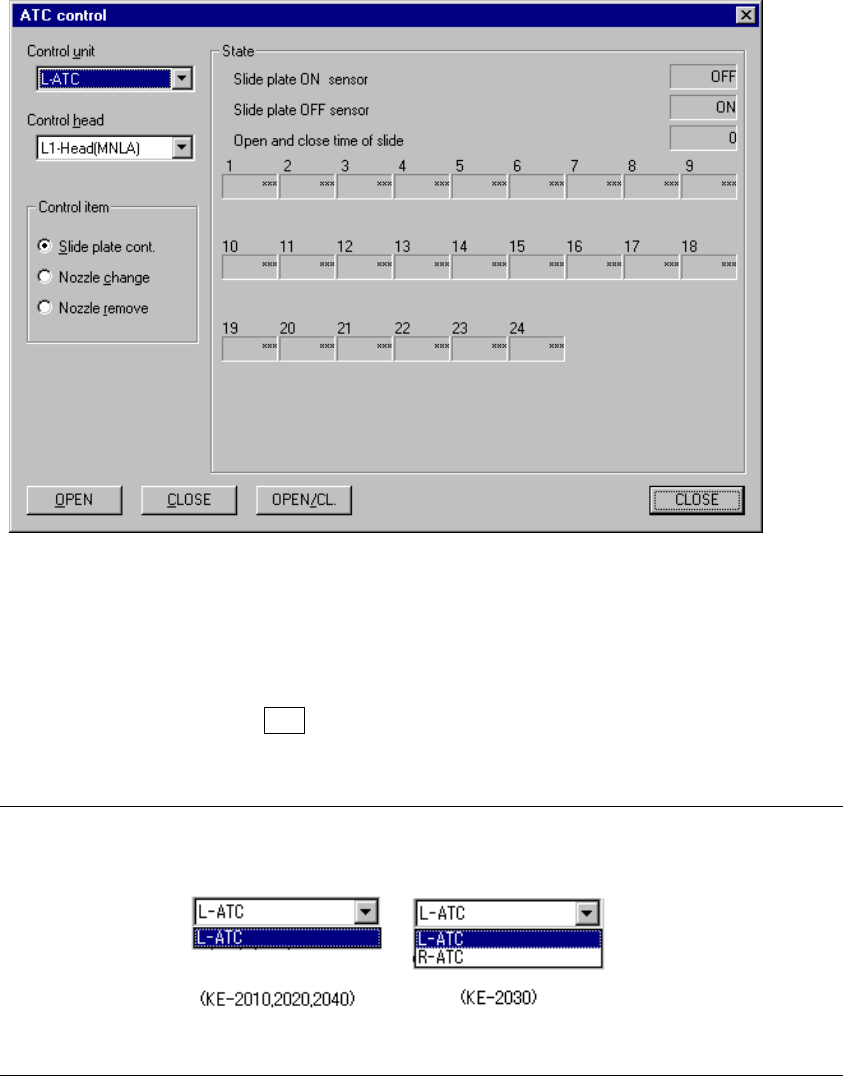
When you select the [Others] command from the [Ctrl] menu, then the [ATC control]
command, the following ATC control dialog box appears on the screen.
Figure 8.6.1.1 ATC control screen
(1) Control unit
Select the unit to be controlled from the combo box.
When you press the ALT key and down arrow key at the same time, the
following list appears on the screen.
Note: You can select “R-ATC” only when you use a KE-2030.

8 − 53
(2) Control head
Select the head to be controlled from the combo box.
This selection does not affect the settings of the “Device enable” menu invoked
from the Machine Setup menu: this means that a not-checked (not used) unit
can be selected.
− When you press the ALT key and down arrow key at the same time, the
following list appears on the screen.
Note: You can select only a head located on the selected ATC side for a KE-2030.
(3) Control item
Select a control item with the corresponding radio button.
(4) Control button
Each control item can be executed with the corresponding control button.
The display of the control buttons varies depending on the control item you
selected.
1) Slide plate cont.
This item controls open/close the ATC slide plate.
- When the control item “Slide plate cont.” is checked, select the <OPEN>,
<CLOSE> or <OPEN/CL> button, or press the F3, F4 or F5 key to
control the slide plate.
The state display of the sensor is updated when the control is completed.
8 − 54
2) Nozzle change
This item changes the nozzle.
- When the control item “Nozzle change” is checked, select the <EXEC>
button, or press the F3 key to control the nozzle change.
- <EXEC> button, F3 key:
Returns the nozzle, if it is attached to the specified head, to the ATC.
Fetches the nozzle from the specified ATC.
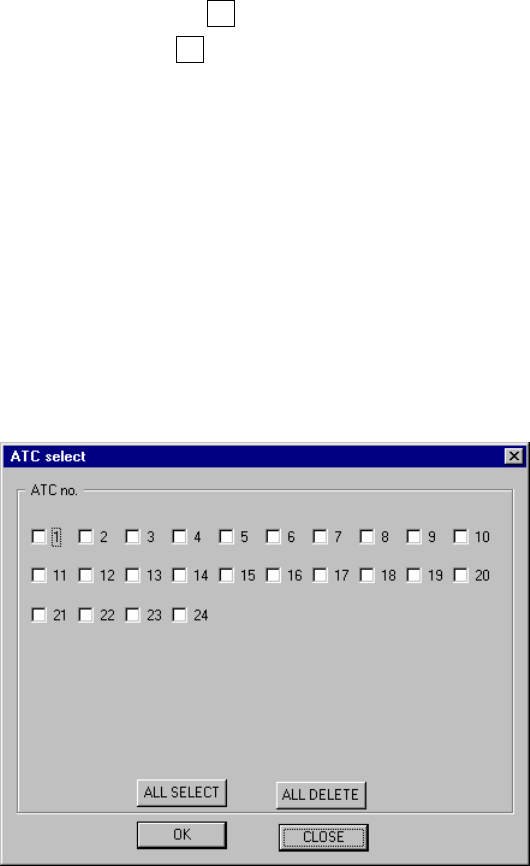
− The ATC select dialog box appears as shown in Figure 8.6.1.2 when
“Nozzle change” is selected.
- When you click the <All select> button, all available ATCs are selected.
- When you click the <All delete> button, all selected ATCs are canceled.
- When you use the radio button to select the ATC number whose nozzle
is to be replaced, then click the <OK> button, the nozzle of the selected
ATC is replaced with a new one.
Figure 8.6.1.2 ATC No. select screen
− When a nozzle is installed successfully, the head mark (“L1” to “L4”,
“R1” to “R4”) is appended to the ATC number of the state display.
- The nozzle number appears below the ATC number.
- The state display is updated when the nozzle is controlled completely.
- When you press the <STOP> switch while a nozzle is being replaced
with a new one, the confirmation dialog box appears on the screen.
When you select the <Yes> button, the machine terminates the nozzle
replacement operation. When you select the <No> button, the
machine continues replacing a nozzle.