KE2010.Instruction Manual.Ver.2.01,Rev.08.pdf - 第77页
3 − 4 3.2 Tur ning Pow er ON 3.2.1 Operation sequence from pow er-on Turn on the pow er switch (break er). Press the ORIGIN k ey . T o execute the warm-up oper ation, select [W arm-up] f rom [Maintenance] which is select…
3 − 3
3.1.2 When using the HLC
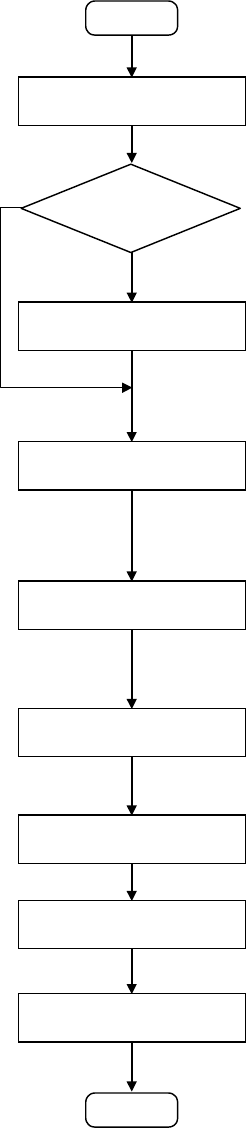
The operation flow for producing PWBs with using the HLC is shown below.
START
Editing a production
program
(1) Editing a production program
•
Create and edit production program data required to produce PWBs.
•
When you are to create or edit a program, you do not have to decide which
component is to be placed on a board or which machine station is to be used.
•
Program all placement positions on a board at a time.
•
After creating a program, execute the Optimization utility to allow the HLC to divide
the created placement data automatically.
•
Pick data on which optimal feeders assignment is specified is created at the same
time.
(Refer to "HLC Instruction Manual".)
Production
by several production
programs
Reserving production
programs
Down-loading a production
program onto each station
Preparations for production
(changeover)
Teaching
Checking the trial-run
operation
Continuous production
Post process
(2) Reserving production programs with the Production Planning utility and executing the
Optimization utility
•
Reserve the program to be used for producing PWBs. When you are to use just
one program, you do not have to reserve it with the Production Planning utility.
•
When you are to use two or more programs, reserve them with the Production
Planning utility to optimize them at a time. Note that you can use the option for
lessening the number of times feeders are replaced via these programs also.
(Refer to "HLC Instruction Manual".)
(3) Down-loading the reserved program(s) onto a station with the Production utility
•
Directly specify the file(s) reserved with the Production Planning utility or program
data created with the Program Editing utility.
•
When you select the [Start] menu command, the data which was divided with the
Optimization utility is down-loaded onto each station.
•
The HLC enters the Line Monitoring mode until the preset number of PWBs are
produced.
(Refer to "HLC Instruction Manual".)
(4) Production preparations (Changeover)
•
With the machine station, adjust the width of the PWB transport path, position and
adjust the reference pin or stopper pin, adjust the backup support pin, check the
nozzle assignments, and install feeders.
•
After installing a component pick-up device, check and adjust the component
pick-up position.
(See Chapter 6 "PRODUCTION PROCEDURES".)
(5) Teaching
•
Be sure to perform the teaching operation to use a BOC mark or IC mark.
•
Teaching operation is not necessary for the program which has been already used
for production.
(See Chapter 5 "TEACHING".)
(6) Trial run
•
Before starting continuous production, perform a trial-run operation once or twice
to check and/or adjust the result of component placement.
(See Chapter 6 "PRODUCTION PROCEDURES".)
(7) Continuous production
•
Produce the preset number of PWBs. When the preset number of PWBs are
produced, the program data is automatically uploaded to the HLC.
•
If the stocked components run out, supply components one by one.
(See Chapter 6 "PRODUCTION PROCEDURES".)
(8) Post process
•
Register the data of production programs which can be reused onto the database.
•
Check and collect the production management information. To evaluate this
information, execute the Result Summarizer utility.
(Refer to "HLC Instruction Manual".)
START
NO
YES
3 − 4
3.2 Turning Power ON
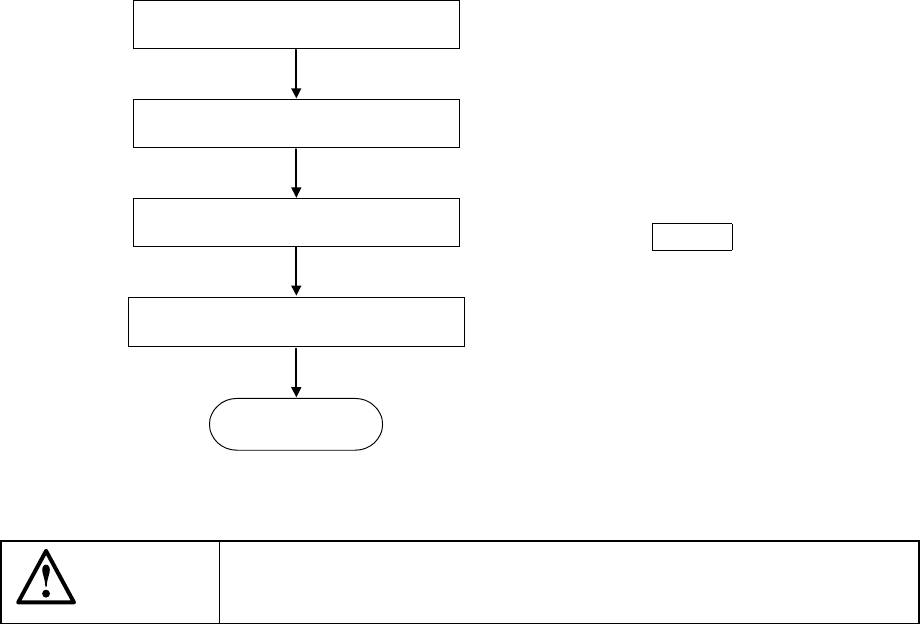
3.2.1 Operation sequence from power-on
Turn on the power switch (breaker).
Press the ORIGIN key.
To execute the warm-up operation,
select [Warm-up] from [Maintenance]
which is selected from the main menu.
(See Chapter 10 "MAINTENANCE".)
CAUTION
Never operate the machine with any power voltages other than
those specified by the company.
Power ON
Menu on display
Zeroing
Select warm-up
READY
3 − 5
3.3 Basic Operations
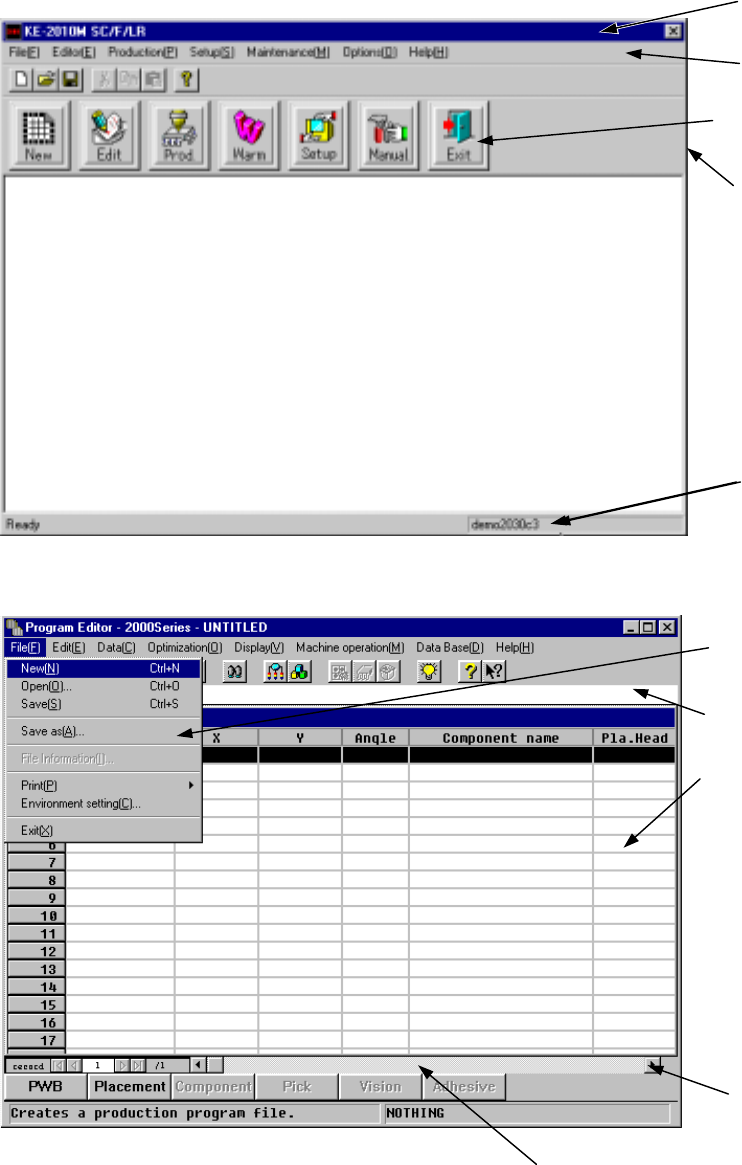
3.3.1 Screen organization
Here is a rundown of the basic components making up a screen.
①
Title bar
③
Menu bar
⑩ Command button
⑤
Work area
⑧
Scroll arrow
⑨
Scroll box
②
Pull-down menu
⑦
Formula bar
④
Window border
⑥
Status bar