KE2010.Instruction Manual.Ver.2.01,Rev.08.pdf - 第776页
13 − 20 13.3.6 A TC bracket 1 5 6 8 7 9 10 11 12 4 3 2 13 17 18 20 19 21 22 23 24 16 15 14 ① ATC brack et ⑥ ATC O FF sensor ② Slide plate ⑦ AT C ON sensor ③ Nozzle outer support ⑧ ATC no. ④ Air cylinder ⑨ Nozzle ⑤ Speed …
13 − 19
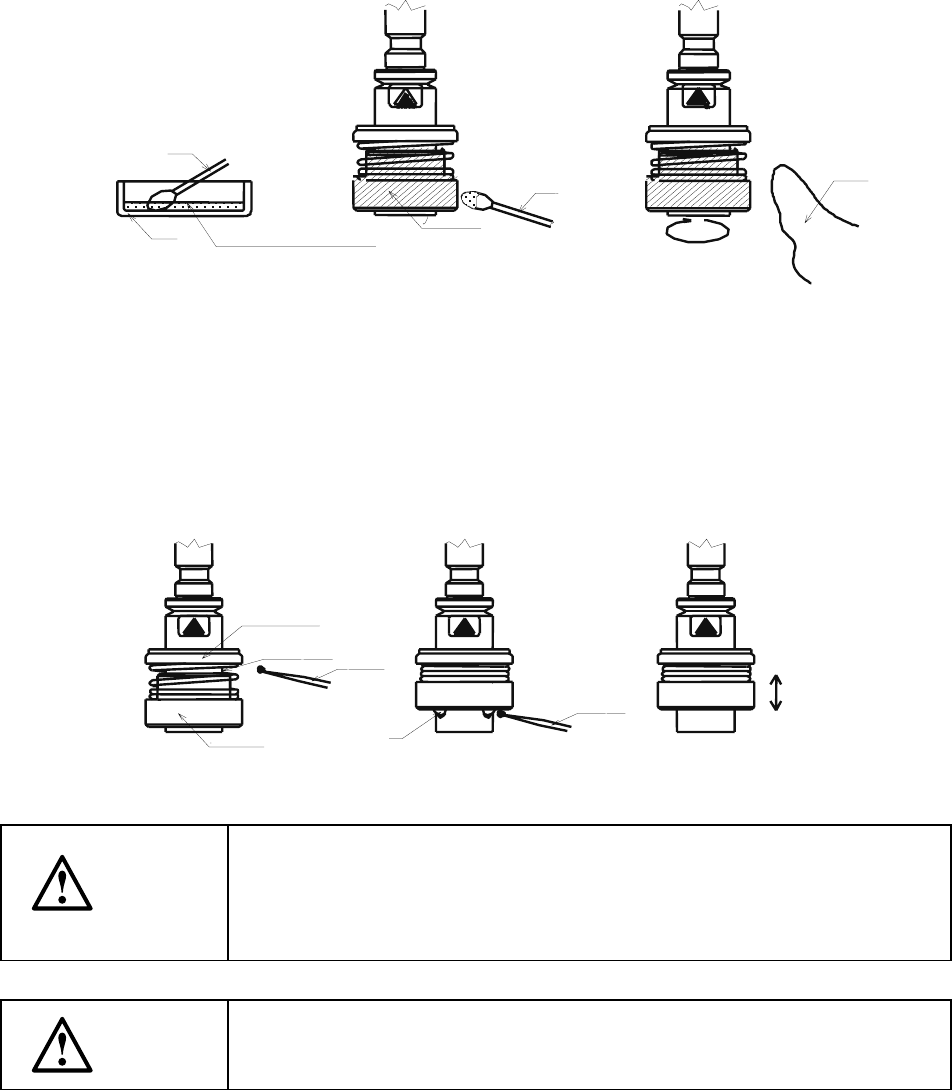
13.3.5.1 Applying oil or grease to a nozzle after cleaning
After using ethanol or isopropyl alcohol (IPA) to clean a nozzle with an ultrasonic
cleaner, use a cotton swab to apply New Deflex Oil No. 1 (JUKI P/N:
MDFRX1001L0) between the nozzle outer and the outer SP holder. After
greasing, use an air gun or similar device to blow excessive oil and remove the
remaining oil with a wiping rag.
To make the nozzle outer slide smoothly, first apply Albania grease
(a-rice-grain-sized amount) to the tip of a toothpick, and apply this grease to the
area shown in Figure 2 (area between the nozzle outer and the outer SP holder).
Push up the nozzle outer, and apply grease (ball-sized amount of grease) to each
of three balls respectively. Move the nozzle outer up and down 20 to 30 times to
apply grease over the nozzle outer uniformly.
Be careful not to apply any oil or grease to the shaft label.
Figure 2 How to apply grease
WARNING
Solution is flammable. Be careful to handle it.
Never use acetone. It may discolor the nozzle diffuser.
During greasing, be sure to wear a protective mask for organic gas. IPA
contains substances harmful to human bodies.
WARNING
To prevent the body from injury which can be caused by accidental
activation of the machine, cut off the power to the machine before starting
to work.
Cotton swab
S
ma
ll
tra
y
New Deflex Oil No. 1
Nozzle outer
Wiping rag
Cotton swab
Outer SP holder
A
rea to be
g
reased
Tooth
p
ick
Tooth
p
ick
20
30
13 − 20
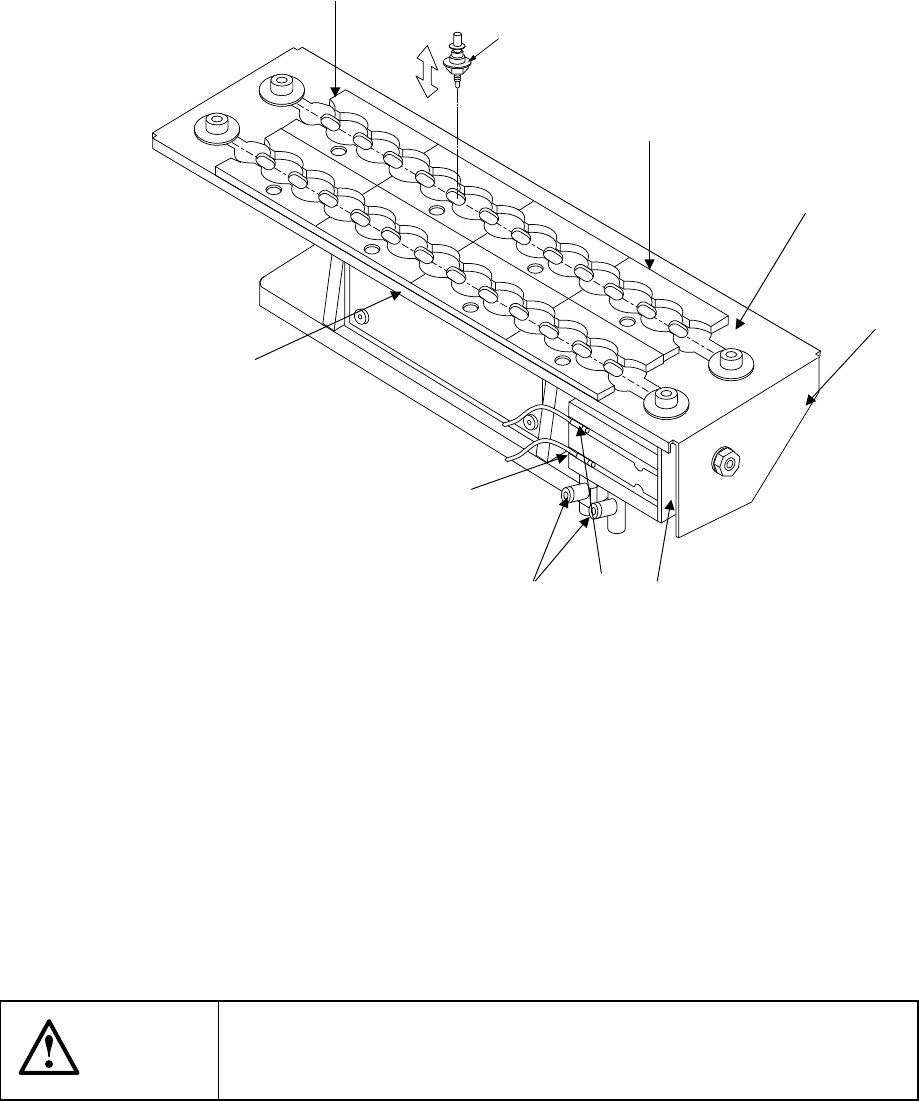
13.3.6 ATC bracket
1
5
6
8
7
9
10
11
12
4
3
2
13
17
18
20
19
21
22
23
24
16
15
14
① ATC bracket ⑥ ATC OFF sensor
② Slide plate ⑦ ATC ON sensor
③ Nozzle outer support ⑧ ATC no.
④ Air cylinder ⑨ Nozzle
⑤ Speed controller
If chips or dirt remains on the ATC bracket ①, nozzle mounting may fail.
Clean the ATC bracket with gauze or similar material lightly damped with alcohol.
WARNING
To prevent the body from injury which can be caused by accidental
activation of the machine, cut off the power to the machine before
starting to work.
②
④
③
⑤
⑥
⑦
⑧
⑨
⑩
13 − 21
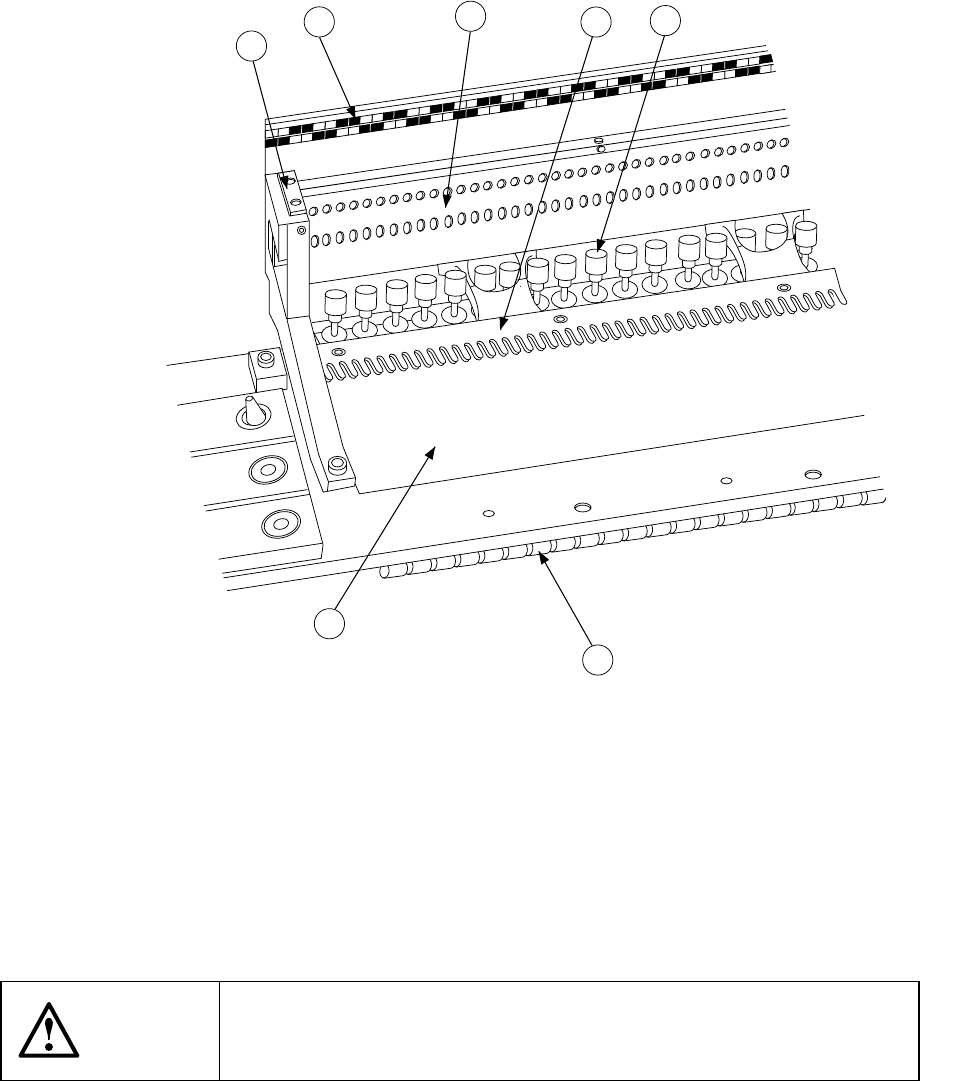
13.3.7 Feeder bank
Clean the surface of the feeder bank with dry cloth before mounting feeders such a
tape feeder there.
Clean the feeder bank with dry cloth so that the fixing plate B ③ is free from
obstacles.
Using a vacuum cleaner, clean the feeder bank if there are chips or some foreign
matters remained on it.
6
2
4
1
5
3
7
① Feeder bank ⑤ Drive cylinder
② Fixing plate ⑥ Position label
③ Fixing plate B ⑦ Bank mark
④ Lock shaft
WARNING
To prevent the body from injury which can be caused by accidental
activation of the machine, cut off the power to the machine before
starting to work.