00193790-01.pdf - 第101页
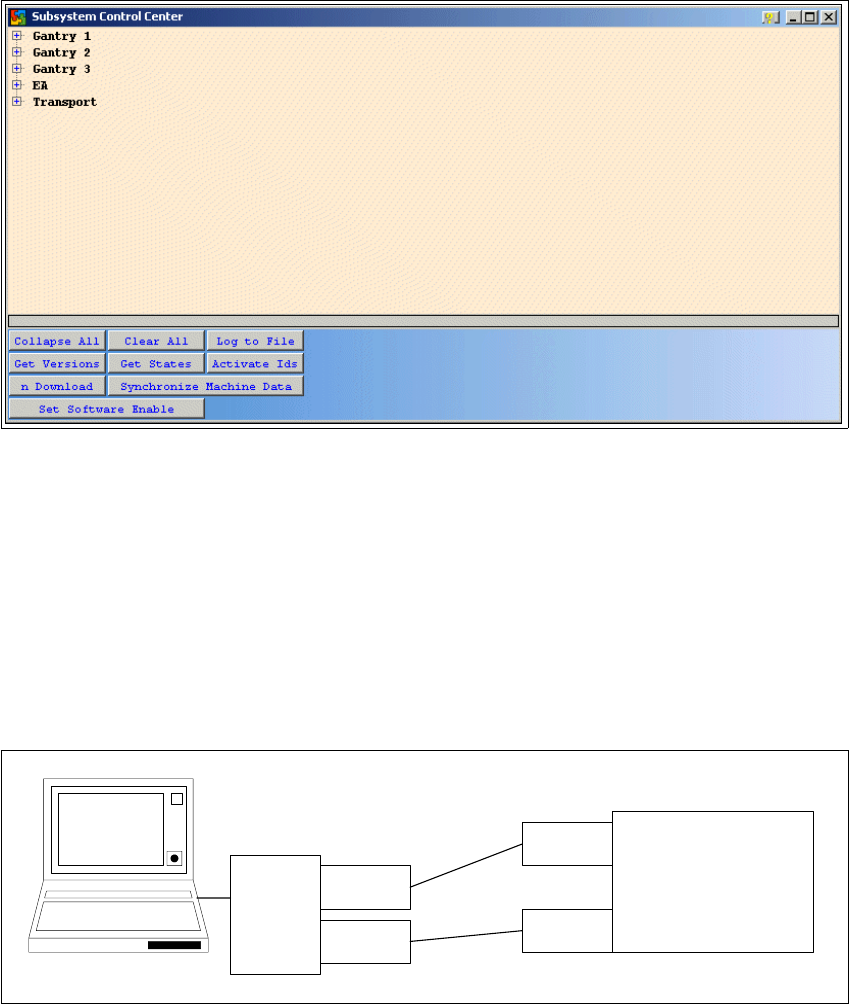
Installation and Getting Started with CACCIA 2 English Issue 07/2004 2.7 Connecting CACCIA with SIPLACE 35 → The Subsystem C ontrol Center dialog box will ope n. Fig. 2 - 30 CA CCIA - Subsystem Control Center → Thi s dia…
2 English Installation and Getting StartedwithCACCIA
2.7 Connecting CACCIA with SIPLACE Issue 07/2004
34
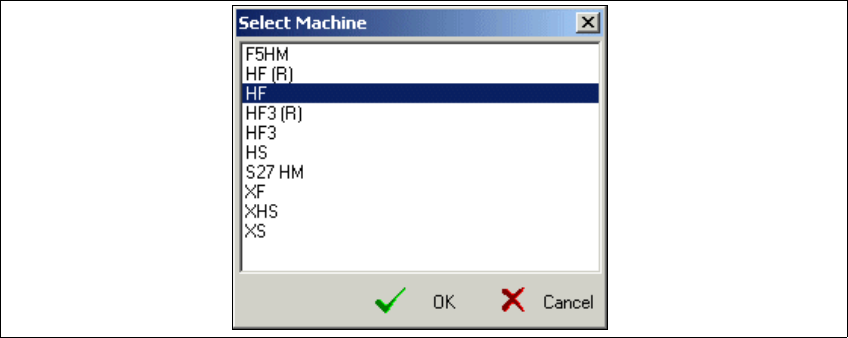
The Select Machine dialog box will open and you can select the required SIPLACE machine:
Fig. 2 - 29 CACCIA - Select Machine
→ Select the relevant machine and confirm your choice with OK.
A selection menu for configuration of individual machine subsystems will appear in the
Machine Control dialog box. The list boxes will only show those subsystems available for the
selected machine.
→ If you have chosen the SIPLACE HF machine, you will also need to select thesoftware version
installed on the machine from the Type list box.
→ Select the correct head type for each gantry and the appropriate component table.
→ Select the conveyor type for the chosen machine from the Conveyor list box.
→ Select the camera for the chosen machine from the PCB Camera list box. The following op-
tions are available:
–UP
Under-gantry camera (standard PCB camera)
–MC
Multicolor camera
→ Once you have entered the required data, confirm your entries with Save Config.
Installation and Getting Started with CACCIA 2 English
Issue 07/2004 2.7 Connecting CACCIA with SIPLACE
35
→ The Subsystem Control Center dialog box will open.
Fig. 2 - 30 CACCIA - Subsystem Control Center
→ This dialog box shows the subsystems as configured.
→ Now connect CACCIA to the SIPLACE machine.
→ The CAN service plugs for nets 1 and 2 can be found in the control unit.
→ Connect the CAN bus cable to the COM card of the SIPLACE machine, in line with the CAN
bus structure. For a detailed description of the CAN bus structure see “Overview of the CAN
Bus Structure in SIPLACE Machines” on page 4.
→ You can now work with the CACCIA service and monitoring software.
Fig. 2 - 31 Example: CACCIA with SIPLACE
SIPLACE
network 1
network 2
CAN card for
the laptop
PCMCIA
network 1
network 2
CACCIA

2 English Installation and Getting StartedwithCACCIA
2.8 CACCIA - Program Overview Issue 07/2004
36
2.8 CACCIA - Program Overview
Fig. 2 - 32 Overview of CACCIA Functions
Main View
Overview of the grafical Interface of CACCIA Version 1.0
Issue 07/2004
Menu File
Command Window Net 1
Command Window Net 2
Firmware
Download
Calculator
Can Scope Net 1
Can Scope Net 2
Base
Converter
Clear Recent List
Recent Workspaces
File Info
Send To
Print
Execute Ctrl+F5
Close All
Exit
Menu View
Full Screen Ctrl+F11
Status Bar
Main Menu
Document Bar
Menu Debug
Reload Script Ctrl+R
Script Info Ctrl+I
Menu Tools
Caccia Update
Macro
Options
Device Manager
File
Plug-Ins
Menu Window
Open File withBrowse
Arrange Icons
Tile
Cascade
Close All Ctrl+A
Windows ...
Menu Help
Copyright
Caccia on the Web
Technical Support
Development Links
Index
Search
Content F1
About Caccia
Change
Properties
Change Machine
Configuration
Subsystem
Control Center
Selftest