00193790-01.pdf - 第94页
2 English Installat ion and Getting Started with CACCIA 2.6 CACCIA Installat ion Issue 07/2004 28 → The Project Optio ns dialog bo x will o pen: Fig. 2 - 24 Project Options - General Settings → Se lect t he General Setti…

Installation and Getting Started with CACCIA 2 English
Issue 07/2004 2.6 CACCIA Installation
27
2.6.3 Update Installation
There are two ways to install an update for CACCIA:
– Manual update installation from the installation CD
– Automatic update installation via the server
The following steps are performed with both options:
– Registration of new CACCIA components
– Installation of a new Toolbox folder
– The new version of CACCIA is started automatically after successful installation.
2.6.3.1 Manual Update Installation
→ Select the "Update.exe" file from the Update folder on the installation CD and doubleclick to
open. The CACCIA update installation will begin.
→ The steps listed at Section 2.6.3 Update Installation will be performed.
2.6.3.2 Automatic Update Installation
The following conditions need to be fulfilled to allow automatic update installations to be run on
your computer:
– Access to the "mchrm19a" server
– The update notification option must be set in CACCIA. To do this, proceed as follows:
→ Start CACCIA. Open the Windows Start menu and select Program Files → CACCIA →
CACCIA or use the icon on your desktop.
→ Select the menu Tools → Options.
Fig. 2 - 23 Set update notification option
2 English Installation and Getting StartedwithCACCIA
2.6 CACCIA Installation Issue 07/2004
28
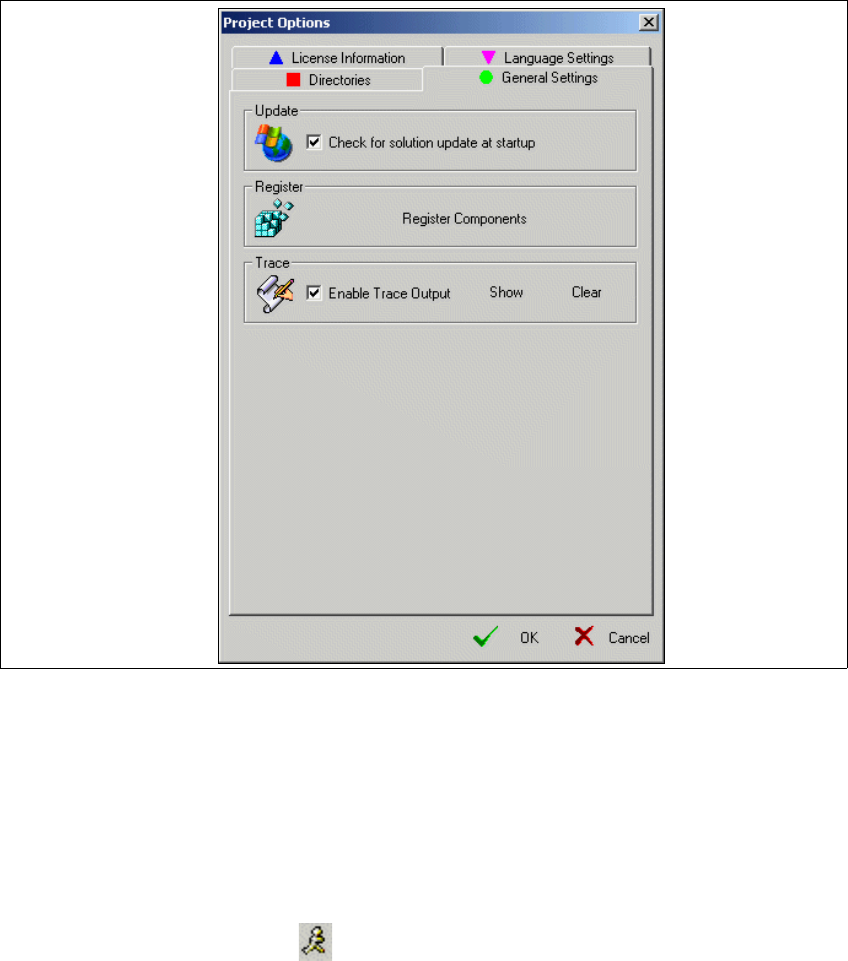
→ The Project Options dialog box will open:
Fig. 2 - 24 Project Options - General Settings
→ Select the General Settings tab.
→ Enable the "Check for solution update at startup" option with a tick.
→ Confirm your entries with OK.
→ If there is an update version of CACCIA available at the next program start, the system will
issue an update notification message.
→ Click on the Update button in the symbol bar. The CACCIA update installation will be-
gin.
→ The steps listed at Section 2.6.3 Update Installation will be performed.

Installation and Getting Started with CACCIA 2 English
Issue 07/2004 2.6 CACCIA Installation
29
2.6.4 Installation Troubleshooting
2.6.4.1 Scripts are not available
You will see the following error message:
ERR_SCRIPT_ECOLL_NOT_FOUND
Possible causes and solutions:
1. Check whether the script folders are correct. To do this, proceed as specified at: “Linking In-
stalled Scripts” on page 29
2. If you receive this error message with a supplied and tested script, this means that Microsoft
Script Debugger has not been installed on your computer. Install Microsoft Script Debugger
and try again. Read the section “Preconditions and Preparation for Installation” on page 18.
Linking Installed Scripts
→ Start CACCIA. Open the Windows Start menu and select Program Files → CACCIA →
CACCIA or use the icon on your desktop.
→ Select the menu Tools → Options.
Fig. 2 - 25 Adding Toolbox Scripts