00193790-01.pdf - 第98页
2 English Installat ion and Getting Started with CACCIA 2.7 Connecting CACCIA with SIPLACE Issue 07/2004 32 2.7 Connecting CACCI A with SIPLACE In order t o access S IPLACE fr om the lapto p or PC, the co mputer co ncern…
Installation and Getting Started with CACCIA 2 English
Issue 07/2004 2.6 CACCIA Installation
31
2.6.4.2 Desktop Does Not Appear
Possible causes and solutions:
1. Check whether the scripts have been installed and whether their folders are correct. Perform
the following steps in the specified order:
2. Install the Toolbox scripts (see page 25)
3. Link the installed scripts (see page 29)
2.6.4.3 Could Not Execute CACCIA Functions
Incorrect CAN card selected.
Possible causes and solutions:
1. Check whether you have selected the correct CAN card on the CACCIA user interface.
2.6.4.4 Could Not Start CACCIA (Only in Windows NT)
Possible causes and solutions:
1. Check how CAN card installation and its connections.
2. Check the CAN driver status.
The CAN driver must be automatically loaded each time the PC/laptop is booted.
→ To ensure this happens, set the CAN driver start mode from Manual to Automatic in the
Windows NT Start → Settings → Control Panel → Devices menu.
→ The CAN driveris activatedeach timethe PC/laptop isbootedand can be used withoutthe
need for administrator rights.
3. Interrupt or address conflict (only with KVASER for laptop)
Check the interrupt settings and the port address. These details can be found at Windows NT
Diagnosis.
→ This function can be accessed from the Windows NT start menu, at Start →Program Files
→ Administrative Tools (Common) → Windows NT Diagnosis
→ Select the Resources tabtoviewtheinterrupt(IRQ) assignments and the port address
(Port).
→ To change these settings, you will need to rerun the CAN driver setup.
2 English Installation and Getting StartedwithCACCIA
2.7 Connecting CACCIA with SIPLACE Issue 07/2004
32
2.7 Connecting CACCIA with SIPLACE
In order to access SIPLACE from the laptop or PC, the computer concerned must be connected
to SIPLACE and the station. To do this, proceed as follows:
→ Start CACCIA. Open the Windows Start menu and select Program Files → CACCIA →
CACCIA or use the icon on your desktop.
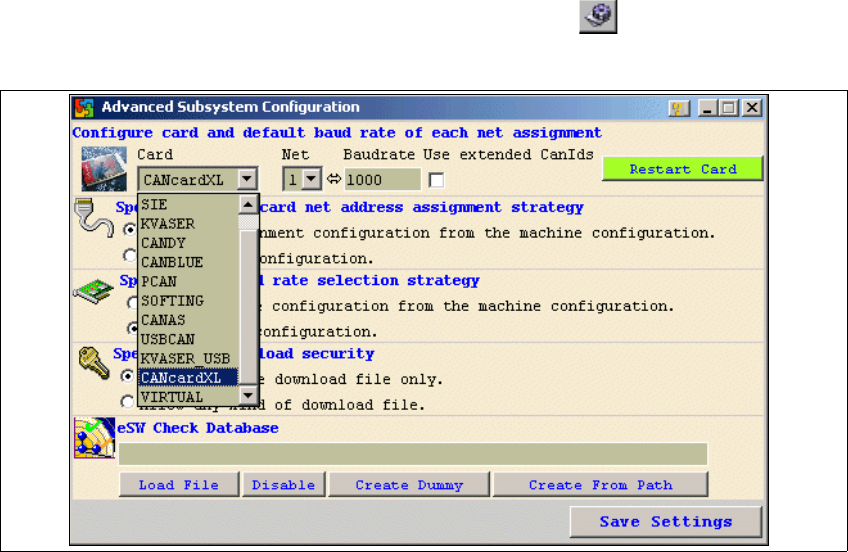
→ Selectthe CANcard installedon yoursystemby clickingon the icon inthe main view. The
Advanced Subsystem Configuration dialog box will open.
Fig. 2 - 27 CACCIA - Advanced Subsystems Configuration
→ Select the CAN card installed in your laptop /PC from the Card list box.
→ Select the appropriate net for your chosen CAN card from the Net list box.
Installation and Getting Started with CACCIA 2 English
Issue 07/2004 2.7 Connecting CACCIA with SIPLACE
33
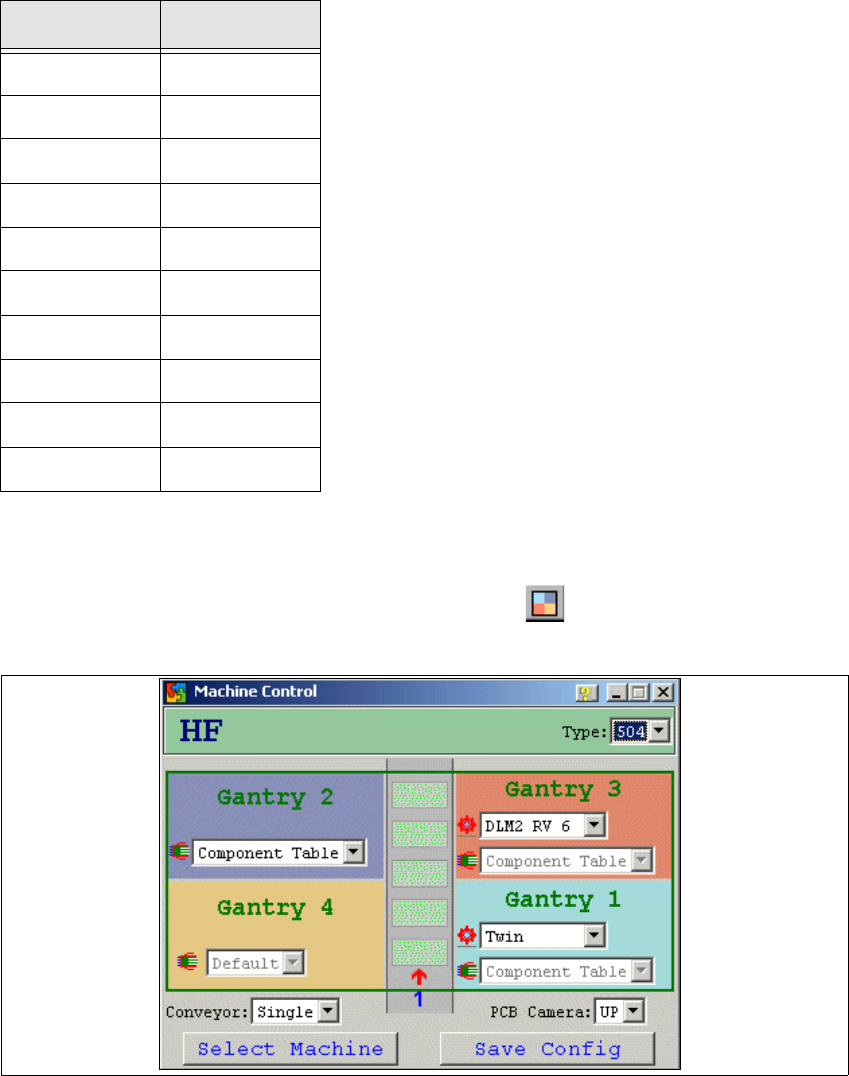
The table below lists the various CAN cards and their corresponding nets.
→ Once you have entered the required data, confirm your entries with Save Settings.
→ Now configure the SIPLACE machine by clicking on the icon in the main view. The
Machine Control dialog box will open:
Fig. 2 - 28 CACCIA - Machine Control
→ Click on Select Machine.
CAN card Net
ESD 2
SIE 2
KVASER 2
CANDY 1
CANBLUE 1
PCAN 1
SOFTING 2
CANAS 2
USBCAN 1
KVASER-USB ?
Table: CAN Card - Net