00193790-01.pdf - 第99页
Installation and Getting Started with CACCIA 2 English Issue 07/2004 2.7 Connecting CACCIA with SIPLACE 33 The table belo w lists th e vario us CAN card s and thei r cor respondi ng nets. → Onc e you hav e entered the r …
2 English Installation and Getting StartedwithCACCIA
2.7 Connecting CACCIA with SIPLACE Issue 07/2004
32
2.7 Connecting CACCIA with SIPLACE
In order to access SIPLACE from the laptop or PC, the computer concerned must be connected
to SIPLACE and the station. To do this, proceed as follows:
→ Start CACCIA. Open the Windows Start menu and select Program Files → CACCIA →
CACCIA or use the icon on your desktop.
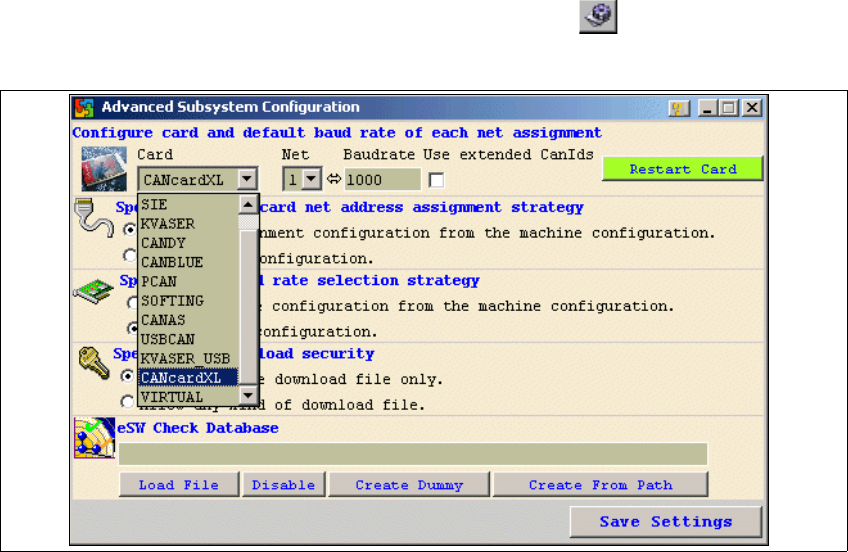
→ Selectthe CANcard installedon yoursystemby clickingon the icon inthe main view. The
Advanced Subsystem Configuration dialog box will open.
Fig. 2 - 27 CACCIA - Advanced Subsystems Configuration
→ Select the CAN card installed in your laptop /PC from the Card list box.
→ Select the appropriate net for your chosen CAN card from the Net list box.
Installation and Getting Started with CACCIA 2 English
Issue 07/2004 2.7 Connecting CACCIA with SIPLACE
33
The table below lists the various CAN cards and their corresponding nets.
→ Once you have entered the required data, confirm your entries with Save Settings.
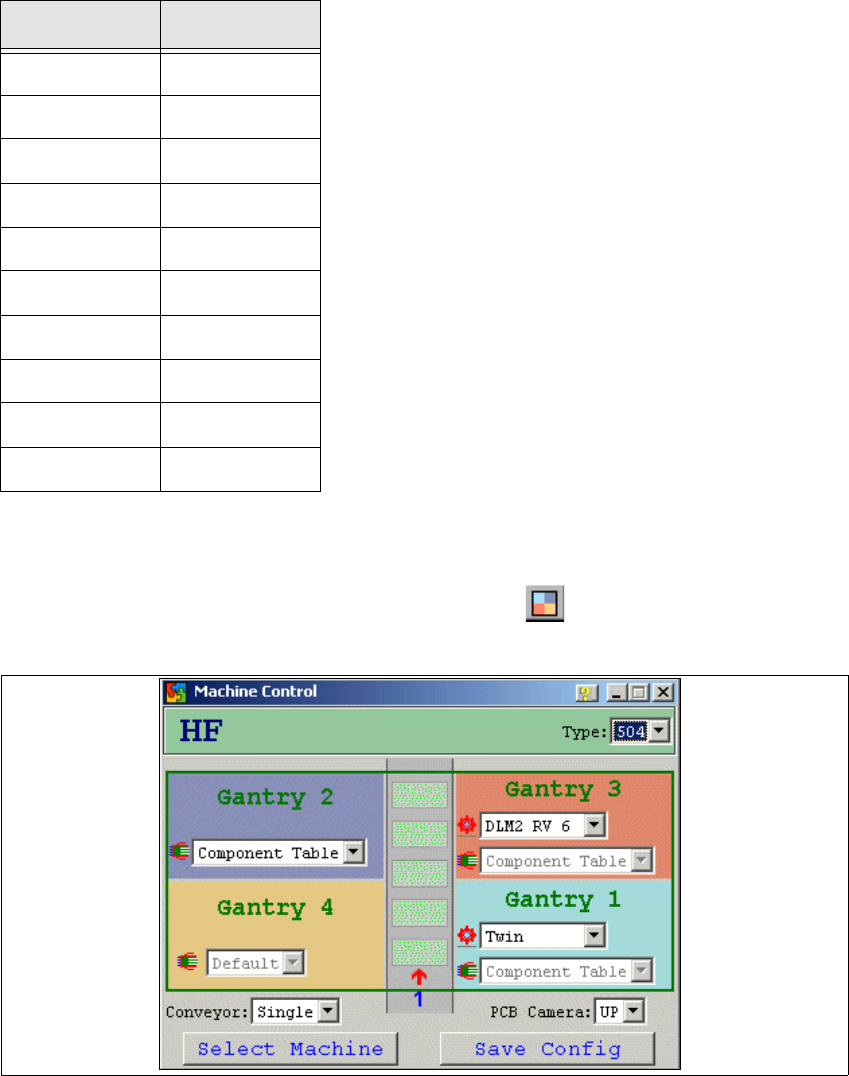
→ Now configure the SIPLACE machine by clicking on the icon in the main view. The
Machine Control dialog box will open:
Fig. 2 - 28 CACCIA - Machine Control
→ Click on Select Machine.
CAN card Net
ESD 2
SIE 2
KVASER 2
CANDY 1
CANBLUE 1
PCAN 1
SOFTING 2
CANAS 2
USBCAN 1
KVASER-USB ?
Table: CAN Card - Net
2 English Installation and Getting StartedwithCACCIA
2.7 Connecting CACCIA with SIPLACE Issue 07/2004
34
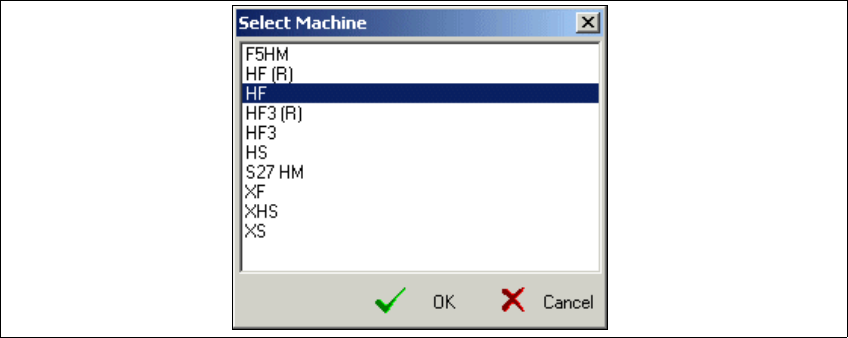
The Select Machine dialog box will open and you can select the required SIPLACE machine:
Fig. 2 - 29 CACCIA - Select Machine
→ Select the relevant machine and confirm your choice with OK.
A selection menu for configuration of individual machine subsystems will appear in the
Machine Control dialog box. The list boxes will only show those subsystems available for the
selected machine.
→ If you have chosen the SIPLACE HF machine, you will also need to select thesoftware version
installed on the machine from the Type list box.
→ Select the correct head type for each gantry and the appropriate component table.
→ Select the conveyor type for the chosen machine from the Conveyor list box.
→ Select the camera for the chosen machine from the PCB Camera list box. The following op-
tions are available:
–UP
Under-gantry camera (standard PCB camera)
–MC
Multicolor camera
→ Once you have entered the required data, confirm your entries with Save Config.