00197044-02_IM_706_1_DE_EN - 第51页
Station S oftware 706. 1 / Install ation Man ual Ausgabe 11/2012 E dit ion 51 7.10 Storing C alib ratio n D ata in the EEPRO M In order t o use the fas t head exc hange f eature, th e he ad specif ic cal ibratio n data h…

Station Software 706.1 / Installation Manual Ausgabe 11/2012 Edition
50
7.9 Necessary Calibration Steps
After upgrading from station software 70x and first booting of the station software, some calibration
steps are required.
Requirements:
– The eSW versions have been updated.
– The reference run has been sucessfully performed.
– A calibration nozzle (1235) has to be available on every C&P20A placement head at segment
1.
Figure 7-10: Required calibration steps
► Select the calibration steps that are highlighted in the figure and click on Next.
► Select all possible components in the following input masks (all conveyor lanes, all gantries, all
nozzle changers).
Station Software 706.1 / Installation Manual Ausgabe 11/2012 Edition
51
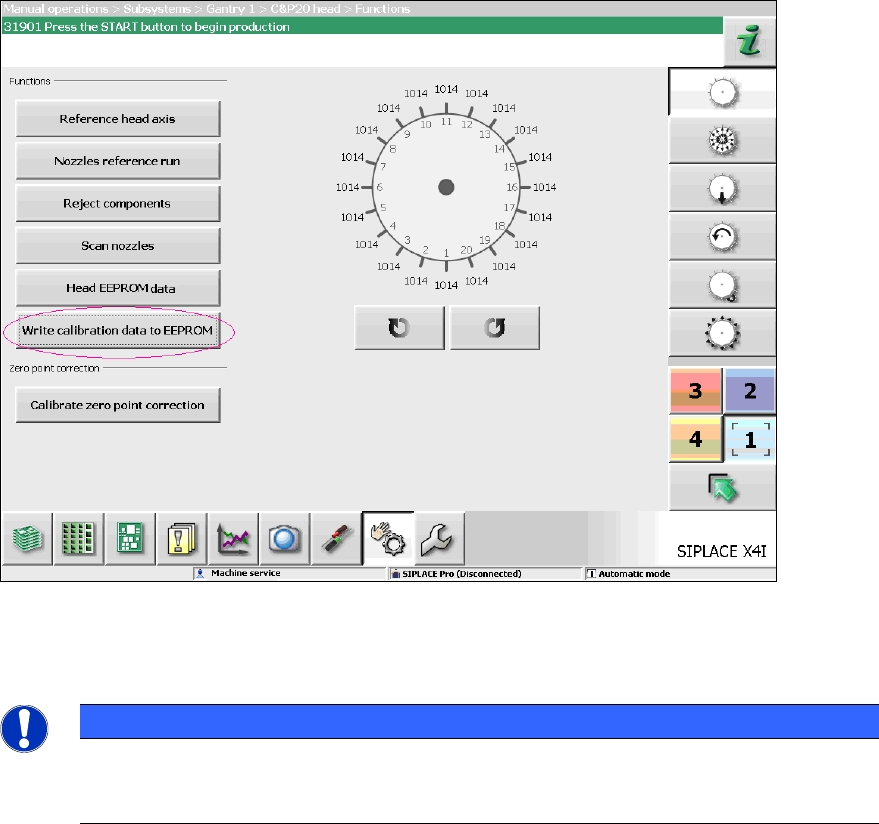
7.10 Storing Calibration Data in the EEPROM
In order to use the fast head exchange feature, the head specific calibration data has to be stored
in the EEPROM after upgrading from station software 70x. For placement heads with no head
specific calibration data stored within the EEPROM, the available data on the station computer will
be stored in the EEPROM of the respective placement head as follows.
Requirement:
The eSW versions have been updated.
Figure 7-11: Storing calibration data in the EEPROM
► Perform the highlighted function for each placement head.
NOTICE
After the storing calibration data step, the message 37200 Changed heads
detected should disappear. Otherwise you will have to reboot the machine. If the
message still is displayed after rebooting, please inform the SIPLACE Service.
Station Software 706.1 / Installation Manual Ausgabe 11/2012 Edition
52
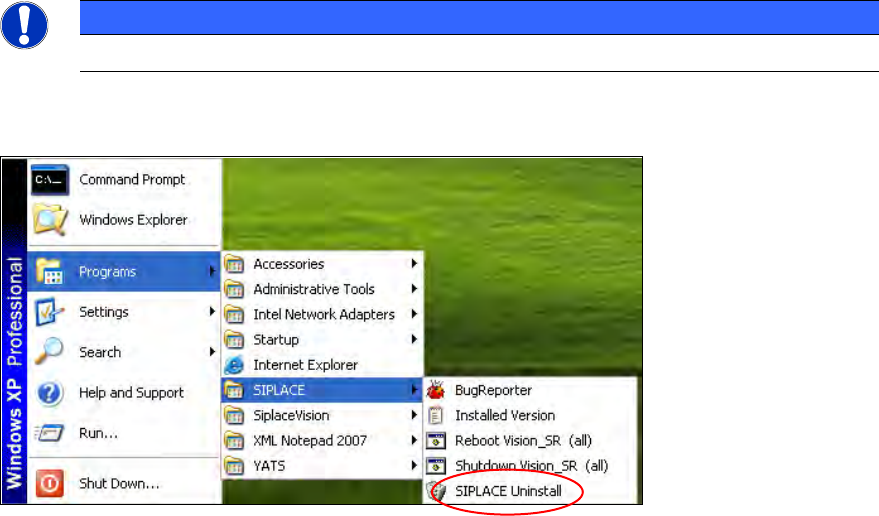
8 Uninstalling the SIPLACE Software
NOTICE
You must be logged in as Administrator to uninstall the software.
► Open the Start menu and select Programs
SIPLACE
SIPLACE Uninstall.
Figure 8-1: Starting uninstallation (alternative 1)
Or:
► Open the Start menu and select Settings
Control Panel.
► Double-click Add/Remove Programs.