00193431-03.pdf - 第28页
2 Assembly instructions Long Board Option SIPL ACE HS-50 HS-50 Modification Long Board Option 03/2007 Edition 28 : Remove the two screws on the guide pillars. 2 : Push the guide pillars to the right (viewed in the tran s…
HS-50 Modification Long Board Option 2 Assembly instructions Long Board Option SIPLACE HS-50
03/2007 Edition
27
2.5 Hardware
: Switch the placement system off at the main switch.
2
Follow the correct shut-down routine. 2
2
2
2
Follow the ESD regulations! 2
2
: Open the protective hoods on the output side.
: Remove the transmission lever that clamps the PCB when the lifting table is raised.
: Remove the lifting table.
2
The cable for the stopper BEROs is fixed with quick-drying adhesive. Make sure that you do not
damage the cable insulation when you remove the cable. 2
2
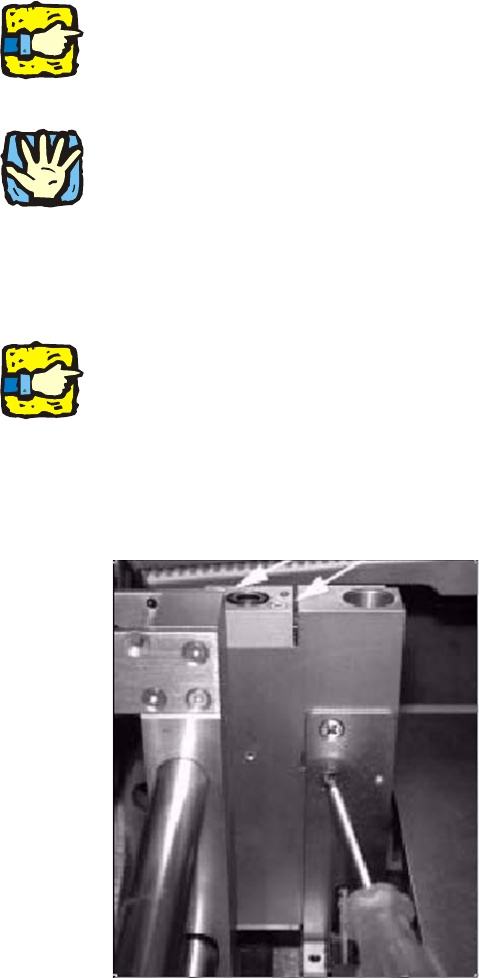
: Loosen the screw used to fix the BERO (see diagram below).
: Unscrew the plate on the side of the BERO.
2
2
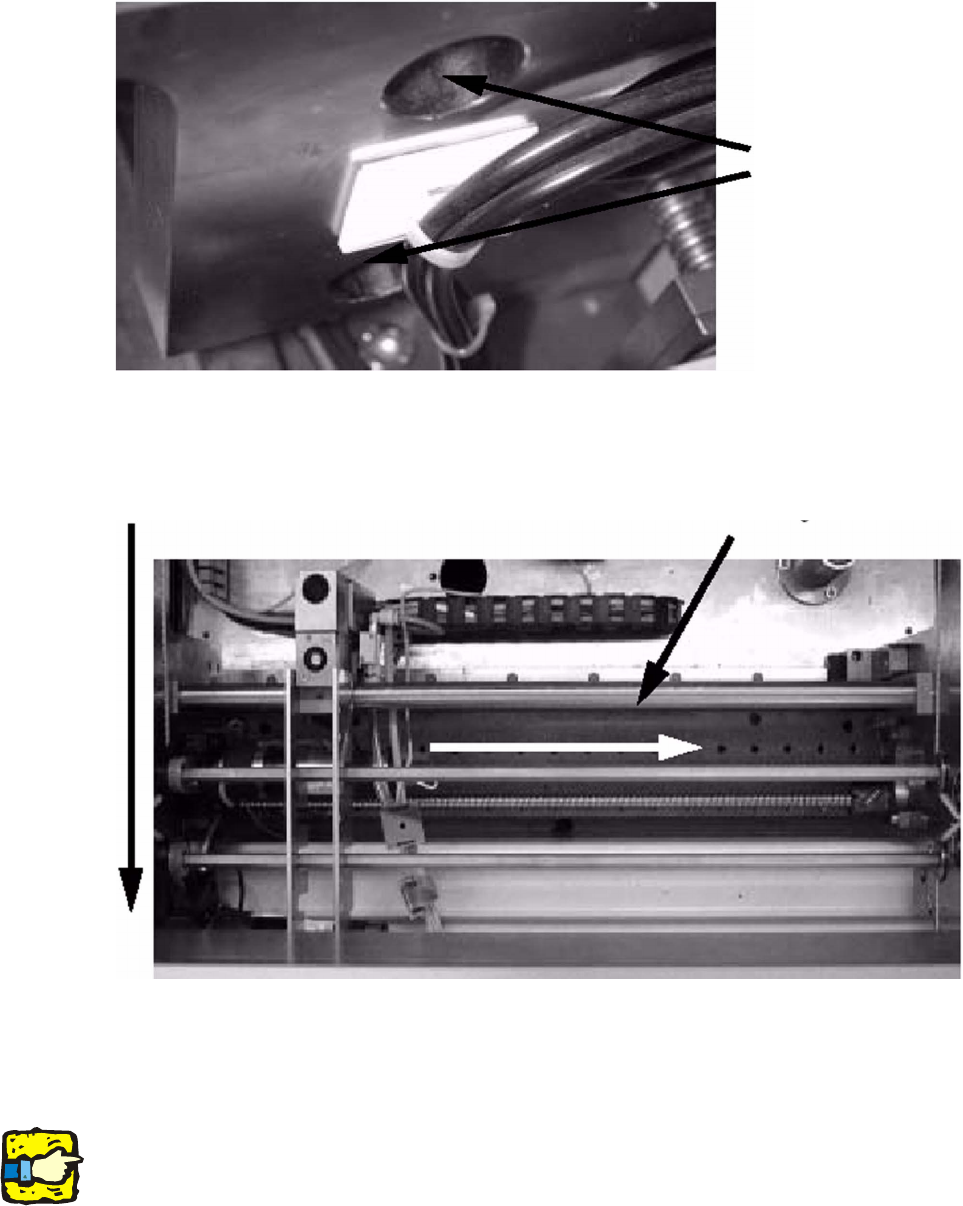
: Unplug three cables (2x BERO, 1x valve connection) and one air hose.
: Fold down the power chain as a retainer.
2 Assembly instructions Long Board Option SIPLACE HS-50 HS-50 Modification Long Board Option
03/2007 Edition
28
: Remove the two screws on the guide pillars.
2
: Push the guide pillars to the right (viewed in the transport direction).
2
2
: Remove the old stopper. This is no longer required.
: Push the new stopper unit for long PCBs onto the pillars, and fix the pillars in place once more.
2
The stopper BERO must not be activated when the stopper is retracted. 2
2
Screws on the
guide pillars
Transport direction
Guide pillars
HS-50 Modification Long Board Option 2 Assembly instructions Long Board Option SIPLACE HS-50
03/2007 Edition
29
: Pull out the BERO until the LED on the BERO goes out.
2
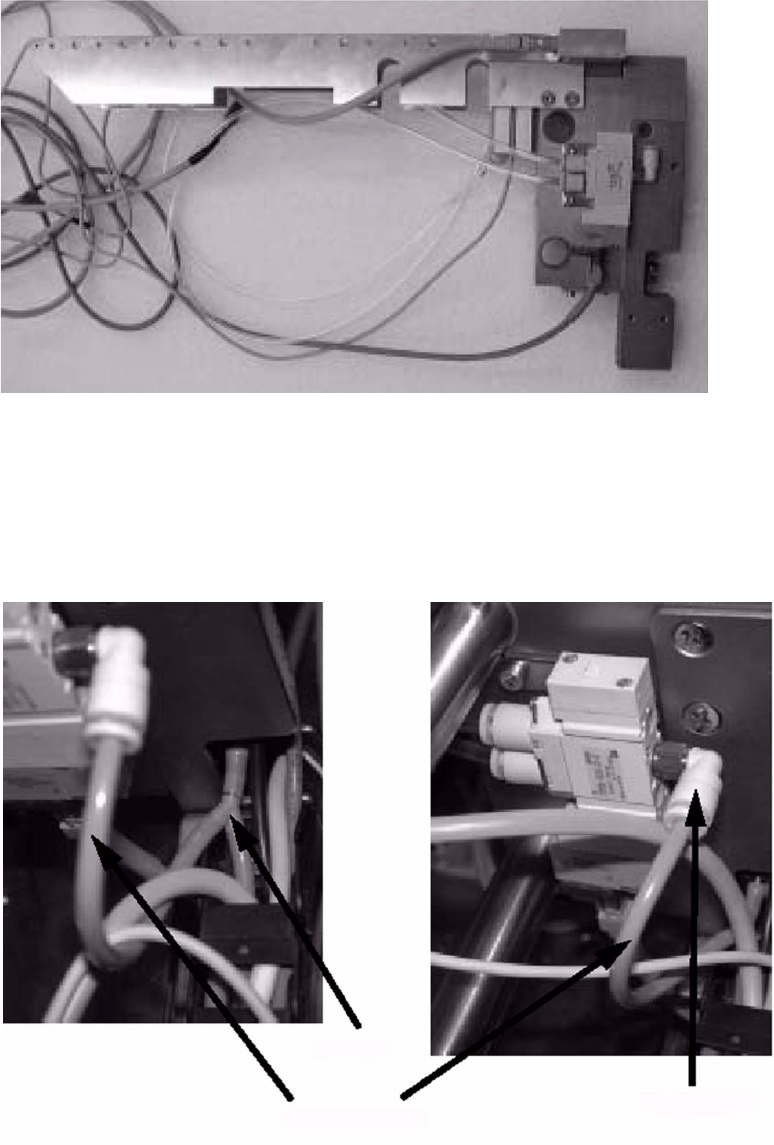
Fig. 2.10 - 1 New stopper unit
: Disconnect the air hose.
: Fit the Y adapter with the additional hose, and connect the additional hose to the new valve.
2
2
Y adapter
Additional hose
New valve