YS100_Mainte_E.pdf - 第107页
3-42 3 Periodic maintenance items 4 Apply grease to spline shaft. Apply the specified grease to finger slightly. Spread the grease uniformly over the sur face of the shaft. 53385-L1-00 5 Wipe aw ay grease. 1. Move the sp…
3-41
3
Periodic maintenance items
4.5.3 Lubricating the spline shaft (as needed)
n
NOTE
Basically, the lubricating the spline shaft (Z-axis) is not required. However, the grease on the spline shaft surface is
removed by touching with hand or by sprinkling solvent. As a result, the spline shaft gets easily rusted. Apply the
specified grease (NSL) slightly for anti-rusting as needed.
e
1
Move the head unit.
1. Press the emergency stop button and
then open the machine safety cover.
2. Move the head unit forward.
2
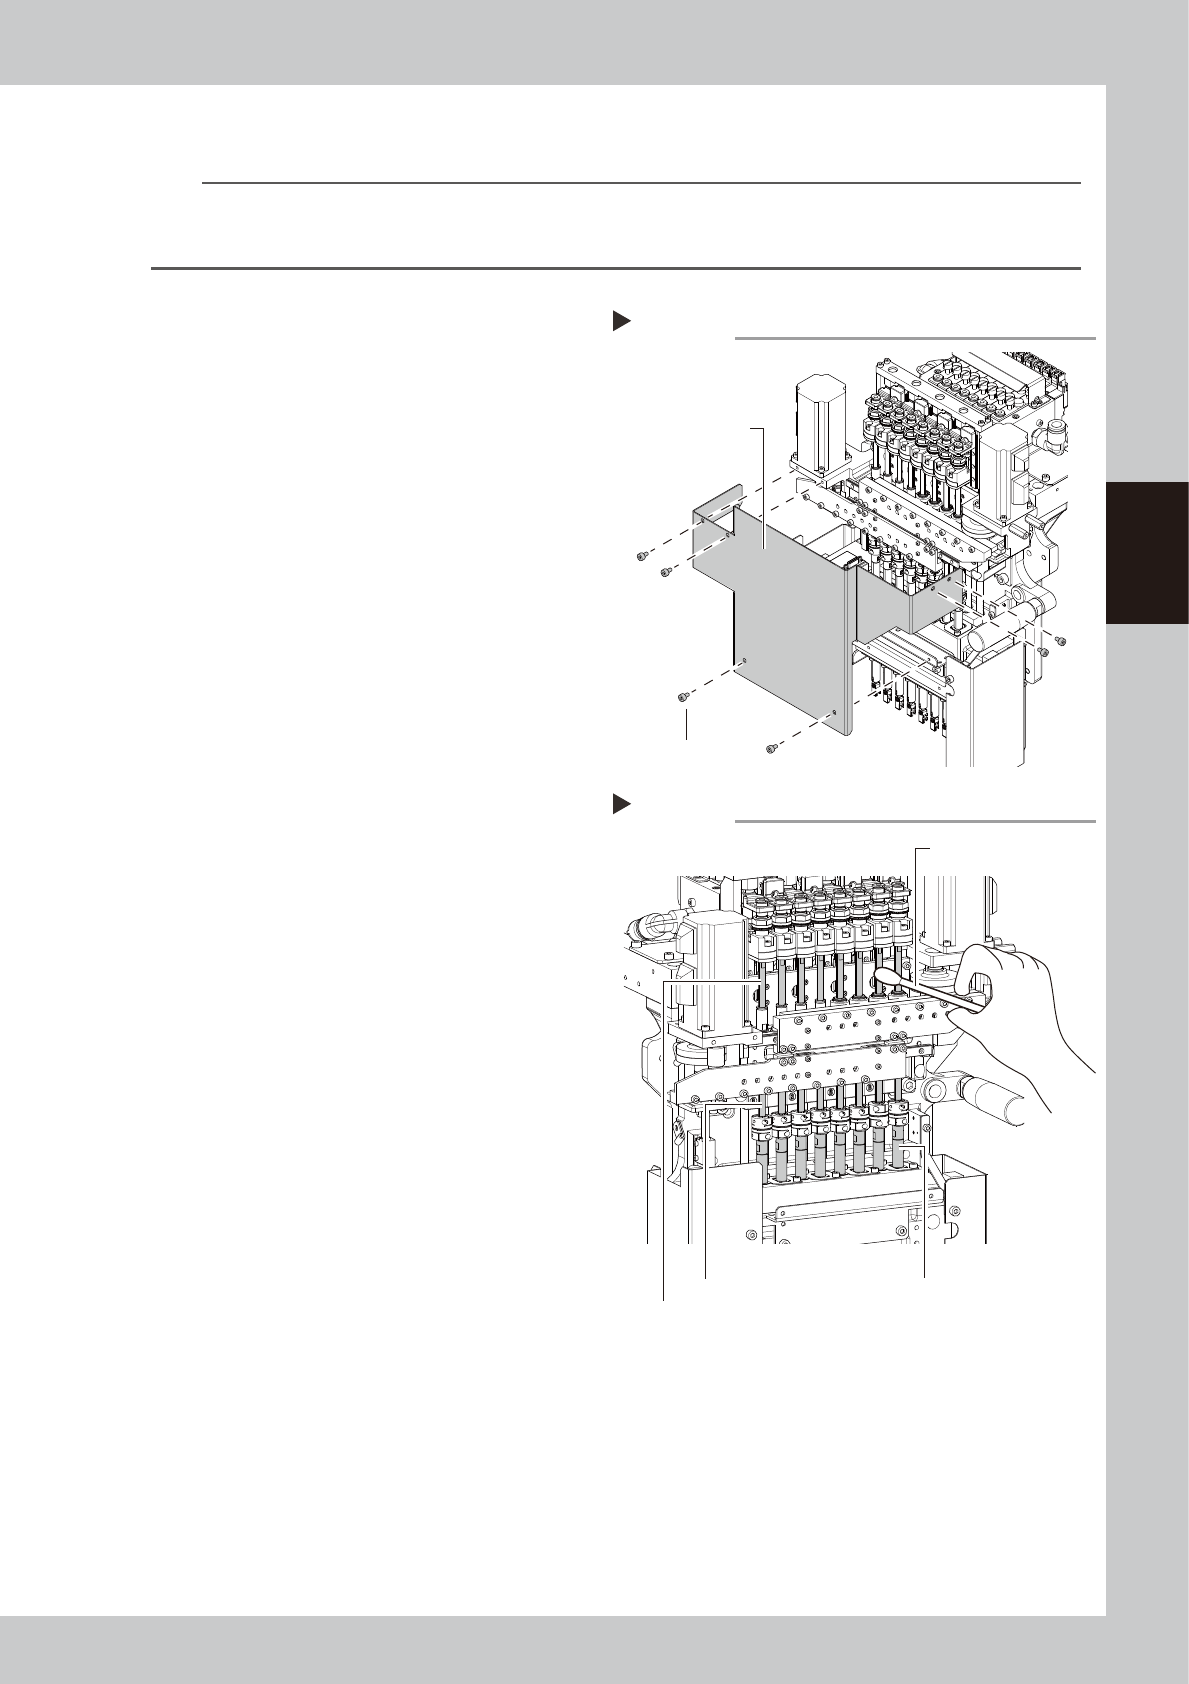
Remove the head cover.
Remove the fixing bolts (six locations) of the
head cover with the hex wrench (3).
53382-L1-00
3
Clean the spline shaft.
If dust or dirt is found on the spline shaft,
wipe it with a lint-free cloth or a cotton
swab.
Move the head up and down with your
hand, and wipe the dirt on the upper,
middle, and bottom sections of the spline
shaft respectively.
53384-L1-00
Removimg the head cover
Step 2
Head cover
Head cover
mounting bolt
Step 3
Cleaning the spline shaft
Cotton swab
Spline shaft (upper section)
Spline shaft (middle section) Spline shaft (bottom section)
3-42
3
Periodic maintenance items
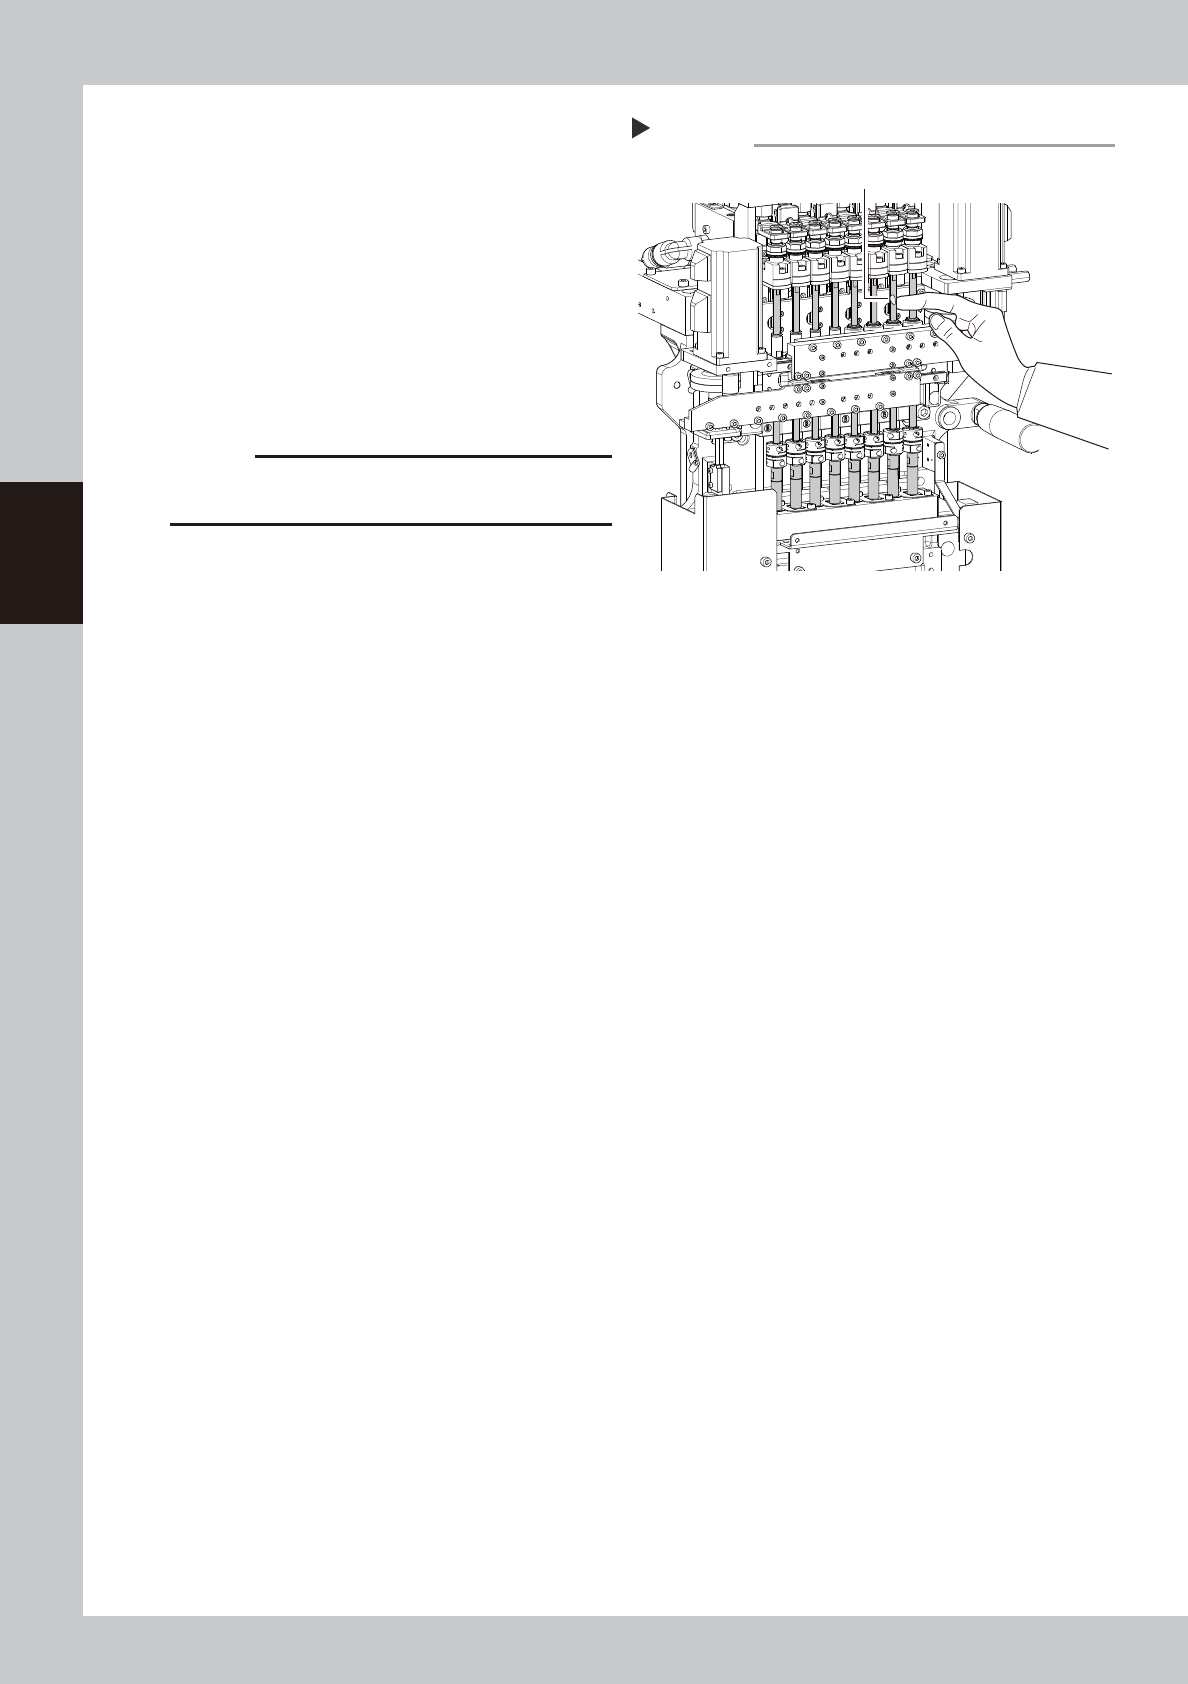
4
Apply grease to spline shaft.
Apply the specified grease to finger slightly.
Spread the grease uniformly over the
surface of the shaft.
53385-L1-00
5
Wipe away grease.
1. Move the spline shaft up or down
manually.
2. Wipe away excess grease on the upper
and lower area of the shaft with a
lint-free cloth or a cotton swab.
c
CAUTION
Make sure not to wipe away the grease on the surface
of the spline shaft completely.
6
Put the head cover back.
Lubricating the spline shaft
Step 4
Grease
(Apply grease in a uniform manner.)
3-43
3
Periodic maintenance items
4.6 Inspecting and replacing the air and oil mist filter
The air filter and oil mist filter are used in this unit to prevent oil, water, impure objects in the air compressor
from entering into the machine. In this section, inspection and cleaning of these filters, and replacing method
of the inside filter element are shown below. In order to perform this work safely, always remove the air
coupler at the air supply connection unit.
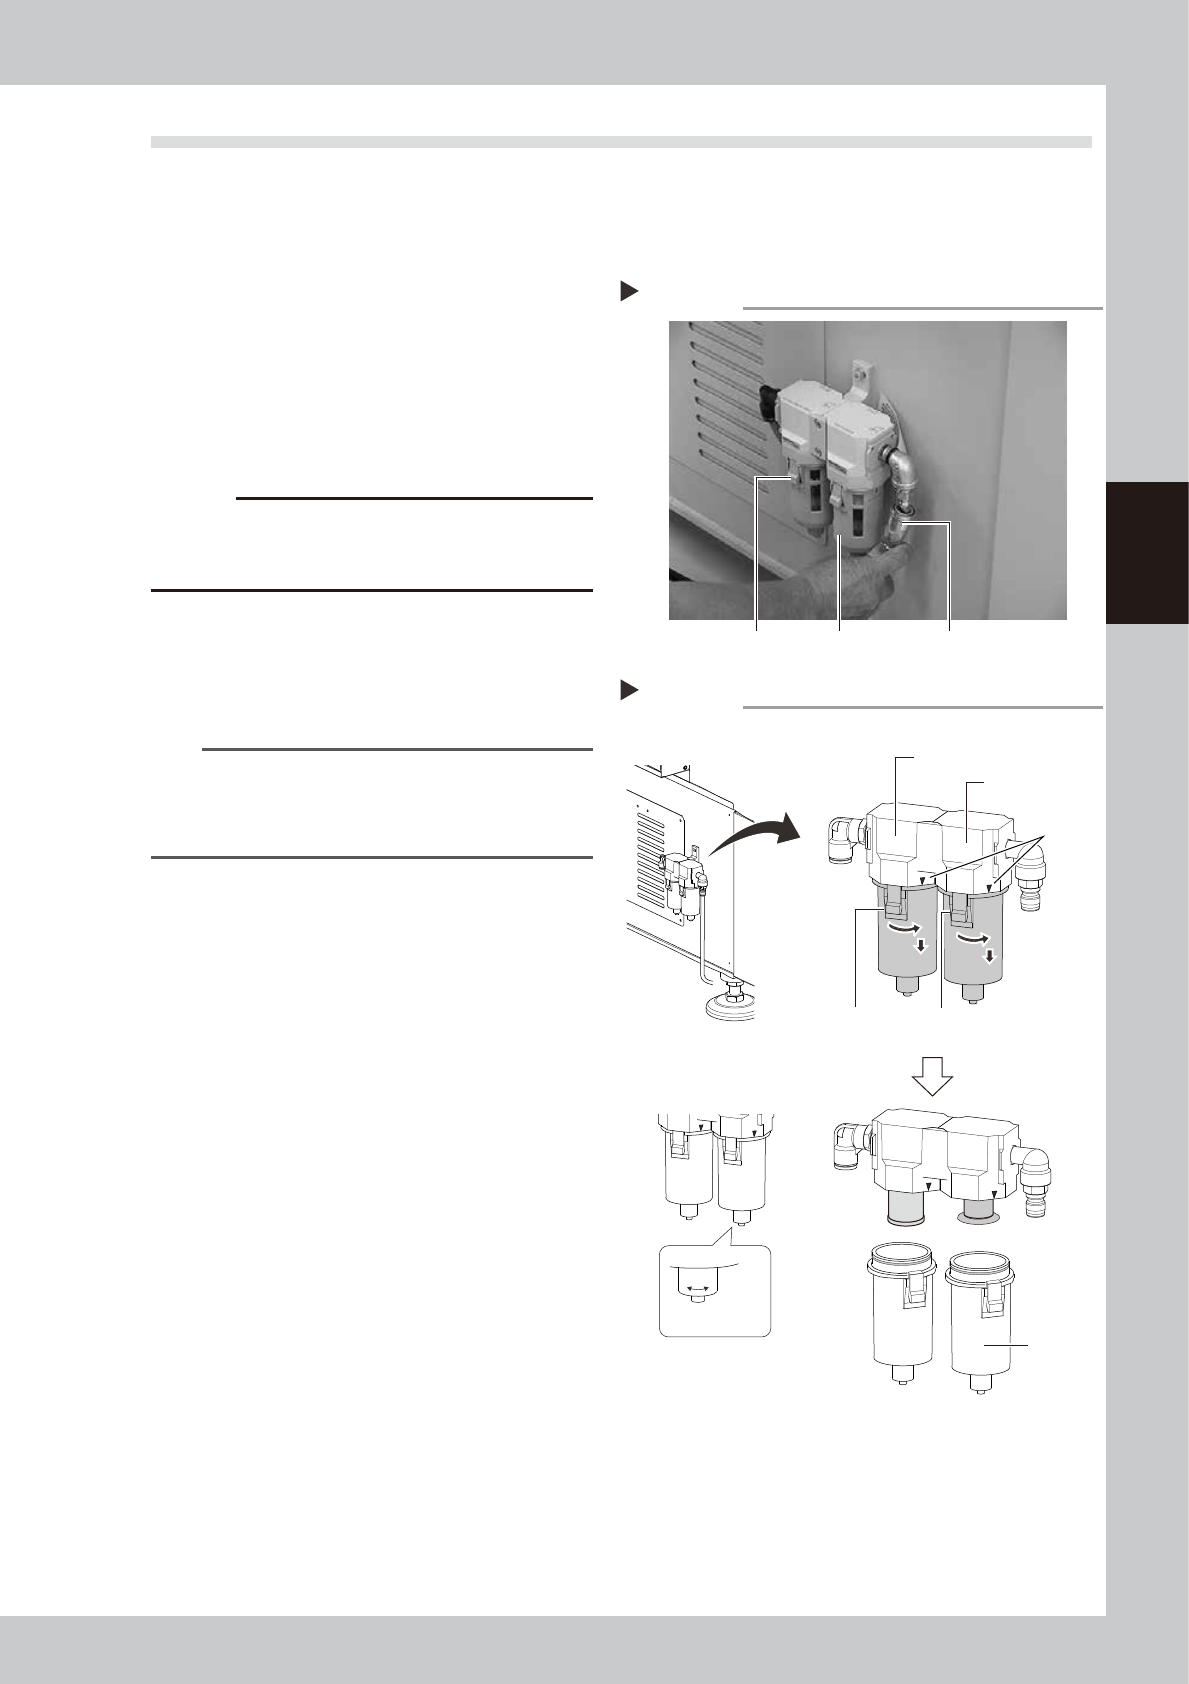
1
Remove the air coupler of air
supply.
1. Turn the “Air supply/exhaust” switch
clockwise to turn air supply OFF.
2. Remove the air coupler on the air supply
connection unit.
53367-L1-00
c
CAUTION
Be aware that a loud air exhaust sound is heard when
disconnecting the air coupler. Use care to prevent oil,
water, and impurities, etc., from being sprayed out.
2
Check the inside of the filer cup.
Check if oil or water is in the cup. When oil
or water is dirty, clean it by following Step 3
to 4.
TIP
This machine’s cup is not the auto-draining type. The
filled water can be discharged by loosening the nut on
the bottom of the cup, which should be performed
every time the air supply coupler is removed.
3
Remove the cup.
1. While pressing the button on the filter
cup, turn the cup clockwise.
2. Match the button of the cup with the
mark on the filter housing, and pull the
cup downward.
53368-L1-00
Removing the air coupler
Step 1
Filter cup Air couplerButton
O : Open
S : Shut
O S
Removing the filter cup
Step 3
Button
Air filter
Oil mist filter
Mark
Button
Drain cock
Filter cup