YS100_Mainte_E.pdf - 第116页
Chapter 4 How to replace consumable par ts Contents 1. Nozzle 4-1 1.1 Replacing the nozzle tip and spring 4-1 1.2 Replacing the nozzle O-ring 4-2 2. Replacing nozzle leaf springs 4-3 3. Ejector unit 4-5 3.1 Replacing an …
3-50
3
Periodic maintenance items
6.2 Checking the nozzle station sensor condition (option)
When the machine is equipped with a nozzle station (option), check the nozzle station sensor condition.
c
CAUTION
If a nozzle station sensor fails to detect a nozzle, the nozzle change cannot be performed correctly and the machine
operation may be interrupted due to a nozzle detection error.
1
Open the nozzle station shutter.
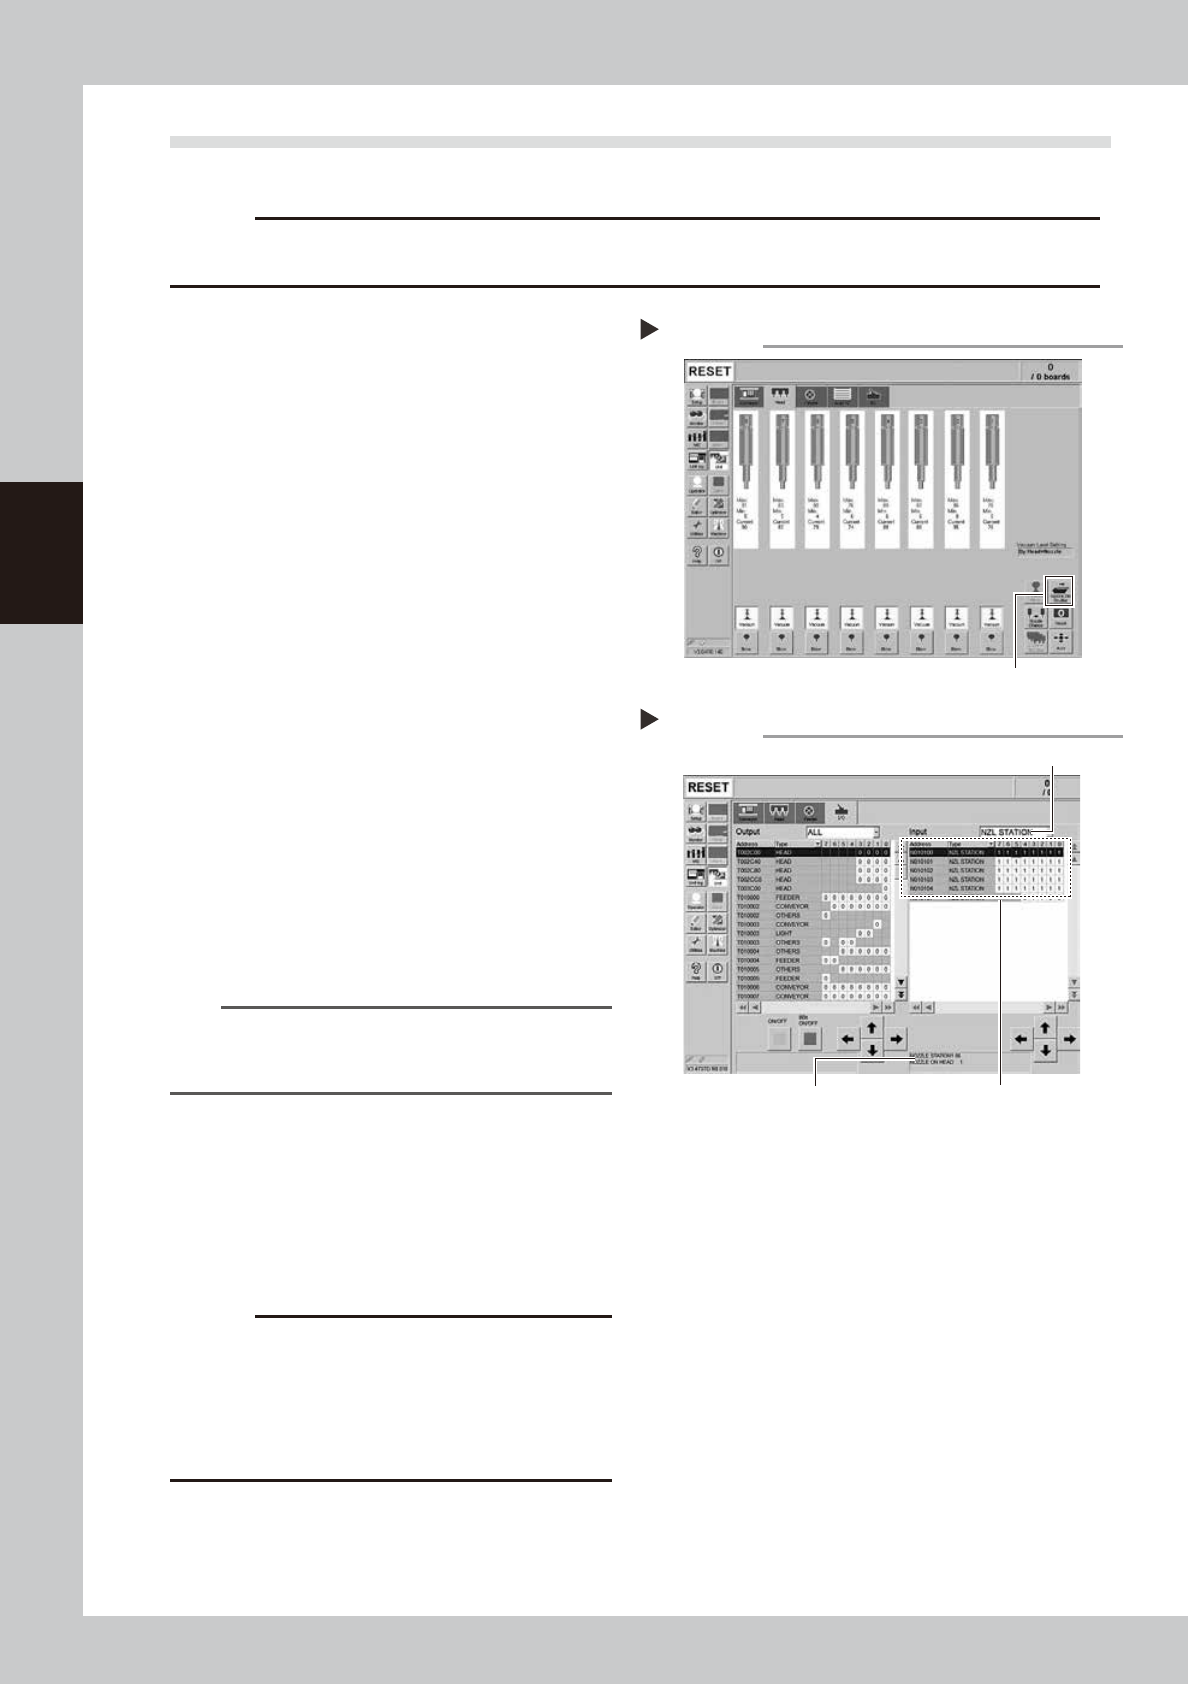
1. Open the [Unit]-[Head] screen.
2. Press the [Nozzle Stn Shutter] button to
open the nozzle station shutter.
e
3. Press the emergency stop button and
then open the machine safety cover.
54310-L1-10
2
Check the detection status of the
nozzle station sensors.
Check to see if the nozzle station sensors
detect the presence or absence of nozzles.
1. Open the [Unit]-[I/O] screen.
2. From the "Input" drop-down list, select
"NZL STATION".
3. While extracting a nozzle from the nozzle
station and returning it to the same
position, check whether the
corresponding sensor detects the nozzle
correctly.
The detection status on the screen should
read "1" when the nozzle is extracted
from the nozzle station, and should read
"0" when the nozzle is in the nozzle
station.
54311-L1-10
TIP
The nozzle station position No. where a nozzle was
extracted or inserted is displayed on the lower part of
the "Input" status screen.
3
Clean the nozzle station.
If the nozzle detection status is different from
the actual nozzle presence status, remove
the nozzle and visually check the nozzle
setting position. If any dust or chip is found,
remove it and clean the inside of the nozzle
with the vacuum assembly.
c
CAUTION
If the nozzle detection status inside the nozzle station
does not become stable for a reason other than clear
reason, such as dust, etc., or if the nozzle cannot be
detected, contact YAMAHA sales representative.
Disassembly and cleaning of the nozzle station sensors
by the user will void the warranty.
4
Close the nozzle station shutter.
On the [Unit]-[Head] screen, press the
[Nozzle Stn Shutter] button to close the
nozzle station shutter.
Opening the shutter
Step 1
[Nozzle Stn Shutter] button
Checking the nozzle detection status
Step 2
Select "NZL STATION".
Nozzle station position No. is
displayed here.
Shows the presence or absence
of nozzles detected by sensors.

Chapter 4 How to replace consumable parts
Contents
1. Nozzle 4-1
1.1 Replacing the nozzle tip and spring 4-1
1.2 Replacing the nozzle O-ring 4-2
2. Replacing nozzle leaf springs 4-3
3. Ejector unit 4-5
3.1 Replacing an ejector bit 4-5
3.2 Replacing a valve (solenoid valve) 4-6
3.3 Replacing a cleaning blow valve 4-9
4. Replacing the conveyor belts 4-10
4-1
4
How to replace consumable parts
1. Nozzle
If the nozzle tip or O-ring is worn out due to the long-term use, this may cause the pickup and mounting error.
Additionally, if the spring-action is not smooth even after cleaning and lubricating the nozzle, the spring may
need to be replaced.
1.1 Replacing the nozzle tip and spring
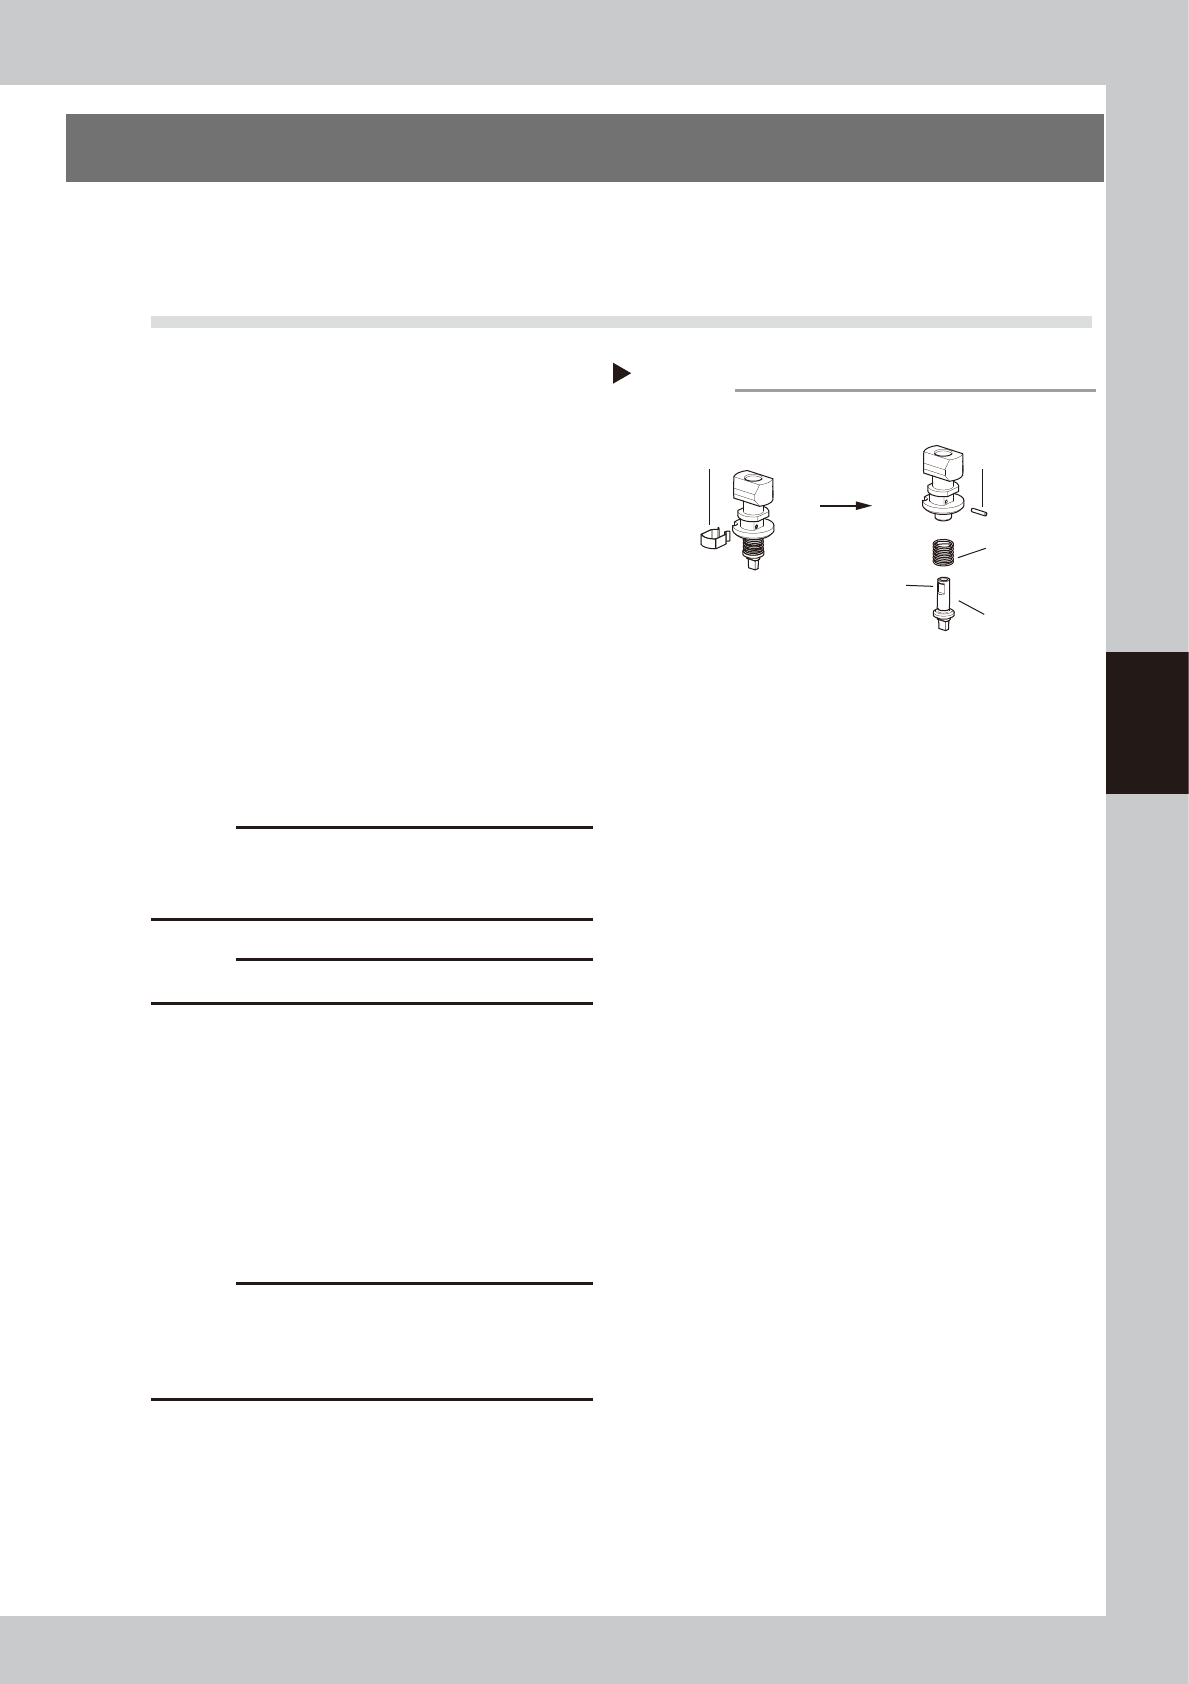
e
1
Remove the nozzle.
1. Press the emergency stop button to put
the machine in the emergency stop
state.
2. Remove the target nozzle manually.
2
Replace the nozzle tip and spring.
1. Detach the clip.
2. Pull out the nozzle pin.
3. Replace the spring or nozzle tip.
4. Secure the nozzle tip with the pin. A
groove is provided on the nozzle tip.
Insert the pin along the groove.
5. Attach the clip. If the clip is loose or
deformed, replace it.
53422-L1-00
c
CAUTION
See chapter 1, "2.1.2 Nozzles", and check that the
nozzle marking (example: 301A, 303A) printed on the
nozzle’s main unit side and the tip shape matches.
c
CAUTION
Be careful not to deform the clip.
3
Lubricate the slide section.
Lubricate the nozzle slide section referring to
"
n
Cleaning the slide section"of "1.1.1
Inspecting and cleaning the slide section" in
Chapter 3.
4
Return the nozzle to its original
position.
Return the nozzle to the original head.
c
CAUTION
Be sure to return the nozzle to its original head. When
the nozzle has been removed from the nozzle station
(option), return it correctly to the storage position where
the nozzle was removed.
Replacing the nozzle tip
Step 2
Detach the clip.
Pull out the pin.
■ Detaching/attaching the tip
Spring
Nozzle tip
Groove