YS100_Mainte_E.pdf - 第122页
4-6 4 How to replace consumable parts 3.2 Replacing a valve (solenoid valve) 1 T urn OFF the air supply and power OFF the machine. 1. Quit the software and power OFF the machine. 2. Turn the "air supply/exhaust"…

4-5
4
How to replace consumable parts
3. Ejector unit
3.1 Replacing an ejector bit
1
Shut off the air supply.
Turn the air supply/shutoff switch inside the
machine lower left panel to the right, to stop
the air supply.
53417-L1-10
e
2
Move the head unit forward.
1. Press the emergency stop button and
then open the machine safety cover.
2. Move the head unit forward.
3
Pull out the ejector bit by hand.
Remove the cap by turning it to the left with
a hex wrench. The end of the bit is seen
sticking out of the ejector unit. Pull out the
bit by hand.
53418-L1-00
c
CAUTION
The removed bit cannot be reused. Reuse may cause
component pickup errors.
4
Clean the bit installation hole.
Remove dust or grime in the installation hole
using an Air blow tool (available as an
option), lint-free cotton swab, etc.
5
Install a new bit.
Fit an O-ring to the new bit and install one
end of the bit into the cap. Then insert the
bit into the installation hole and close the
cap by turning it to the right.
53419-L1-00
c
CAUTION
If the bit is not installed in place, it may fly out when
vacuum is turned on. Always make sure that the bit is
securely installed.
c
CAUTION
When closing the cap after inserting the bit, be careful
not to let the O-ring come out.
6
Supply air to the machine.
Turn the air supply/shutoff valve inside the
machine lower left panel to the left, to start
the air supply.
Removing the bit
O-ring CapBIT
Step 3
Bit installation hole
Installing the bit
Not installed in place
Step 5
Shutting off the air supply
Step 1
“Air supply/exhaust” switch
4-6
4
How to replace consumable parts
3.2 Replacing a valve (solenoid valve)
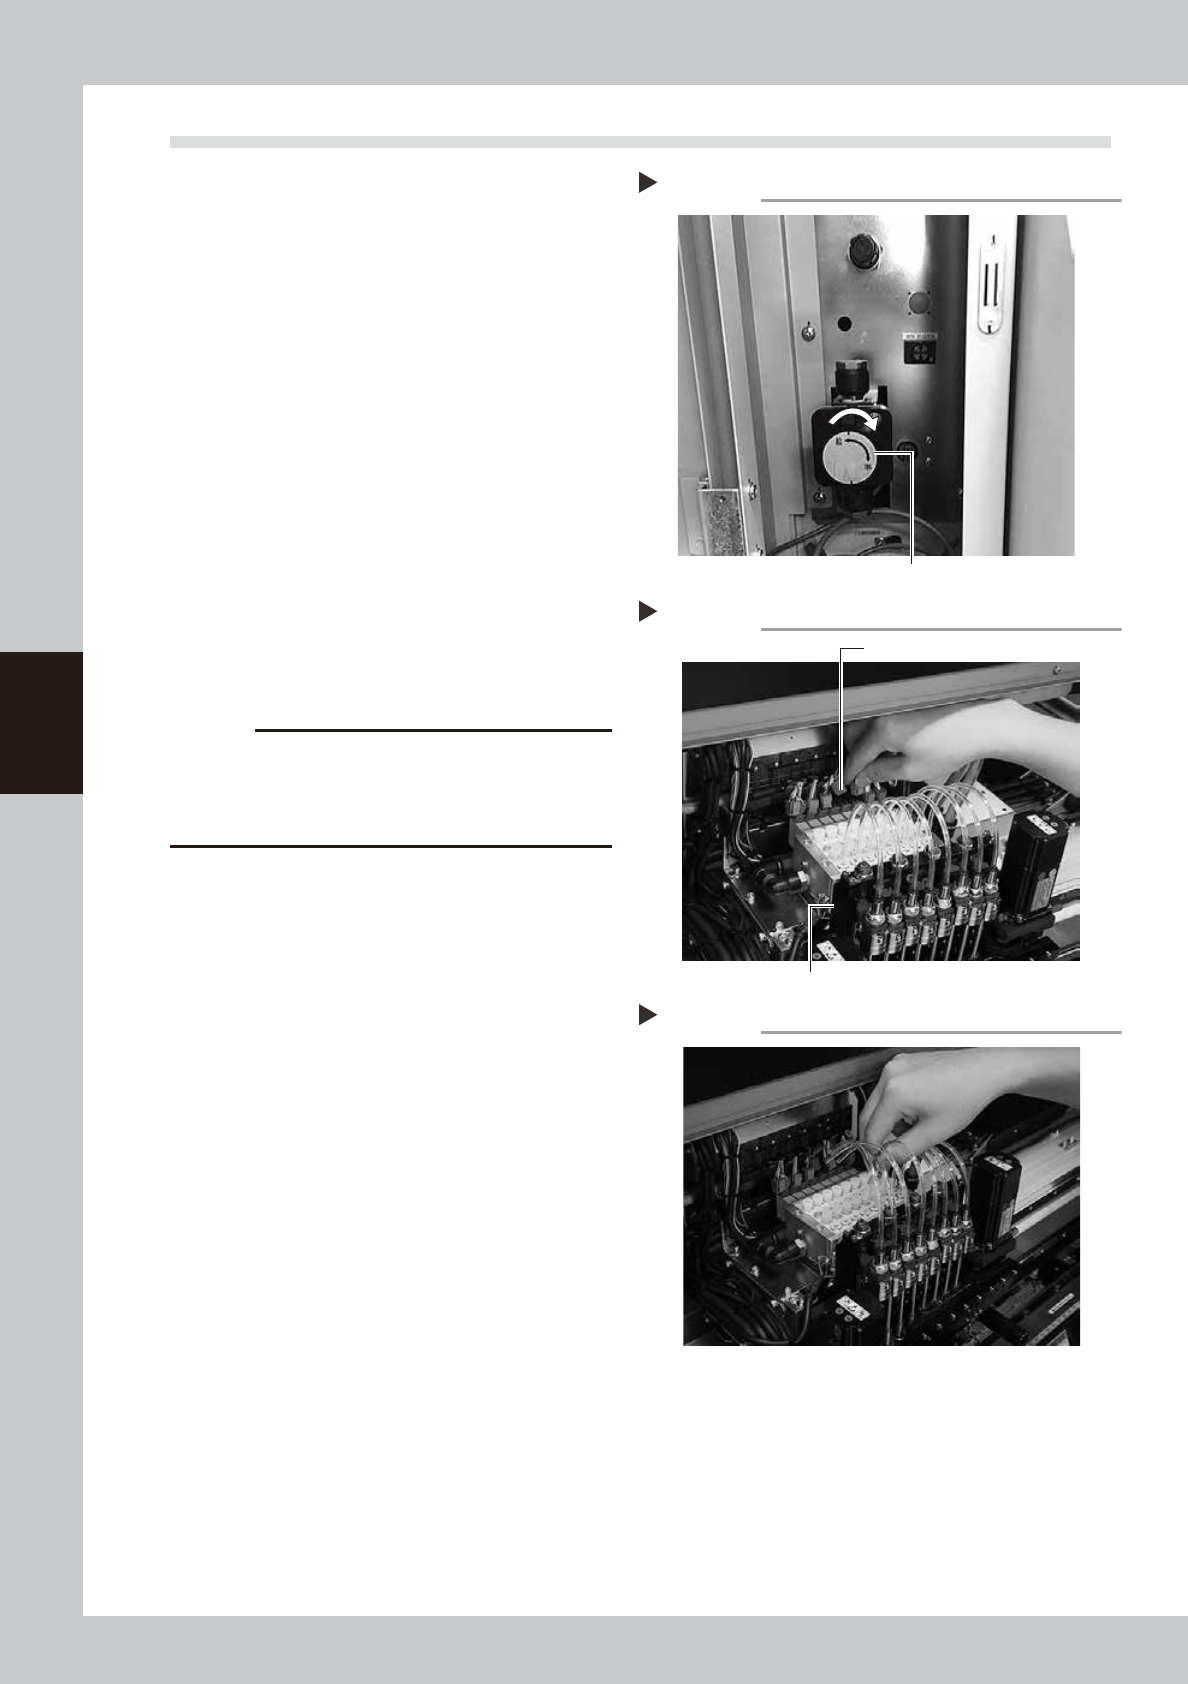
1
Turn OFF the air supply and power
OFF the machine.
1. Quit the software and power OFF the
machine.
2. Turn the "air supply/exhaust" switch inside
the panel at lower left of the machine
clockwise to turn the air supply OFF.
53417-L1-10
2
Move the head unit forward.
Open the safety cover of the machine, and
move the head unit toward you.
3
Remove the connectors on the head
valve unit.
1. Remove all connectors attached to the
head valve unit.
2. Remove the connector attached to the
vacuum sensor board.
53405-L1-00
c
CAUTION
A harness of thin wires is attached to the connector
housing. Use extreme caution not to break the wires. Do
not pull the harness to unplug the connector. Always
grip the connector body when unplugging.
4
Disconnect the air hoses.
Disconnect the air hose inserted in each
ejector unit.
53406-L1-00
Removing the connector
Step 3
Connector
Vacuum sensor board connector
Disconnecting the air hose
Step 4
Shutting off the air supply
Step 1
“Air supply/exhaust” switch
4-7
4
How to replace consumable parts
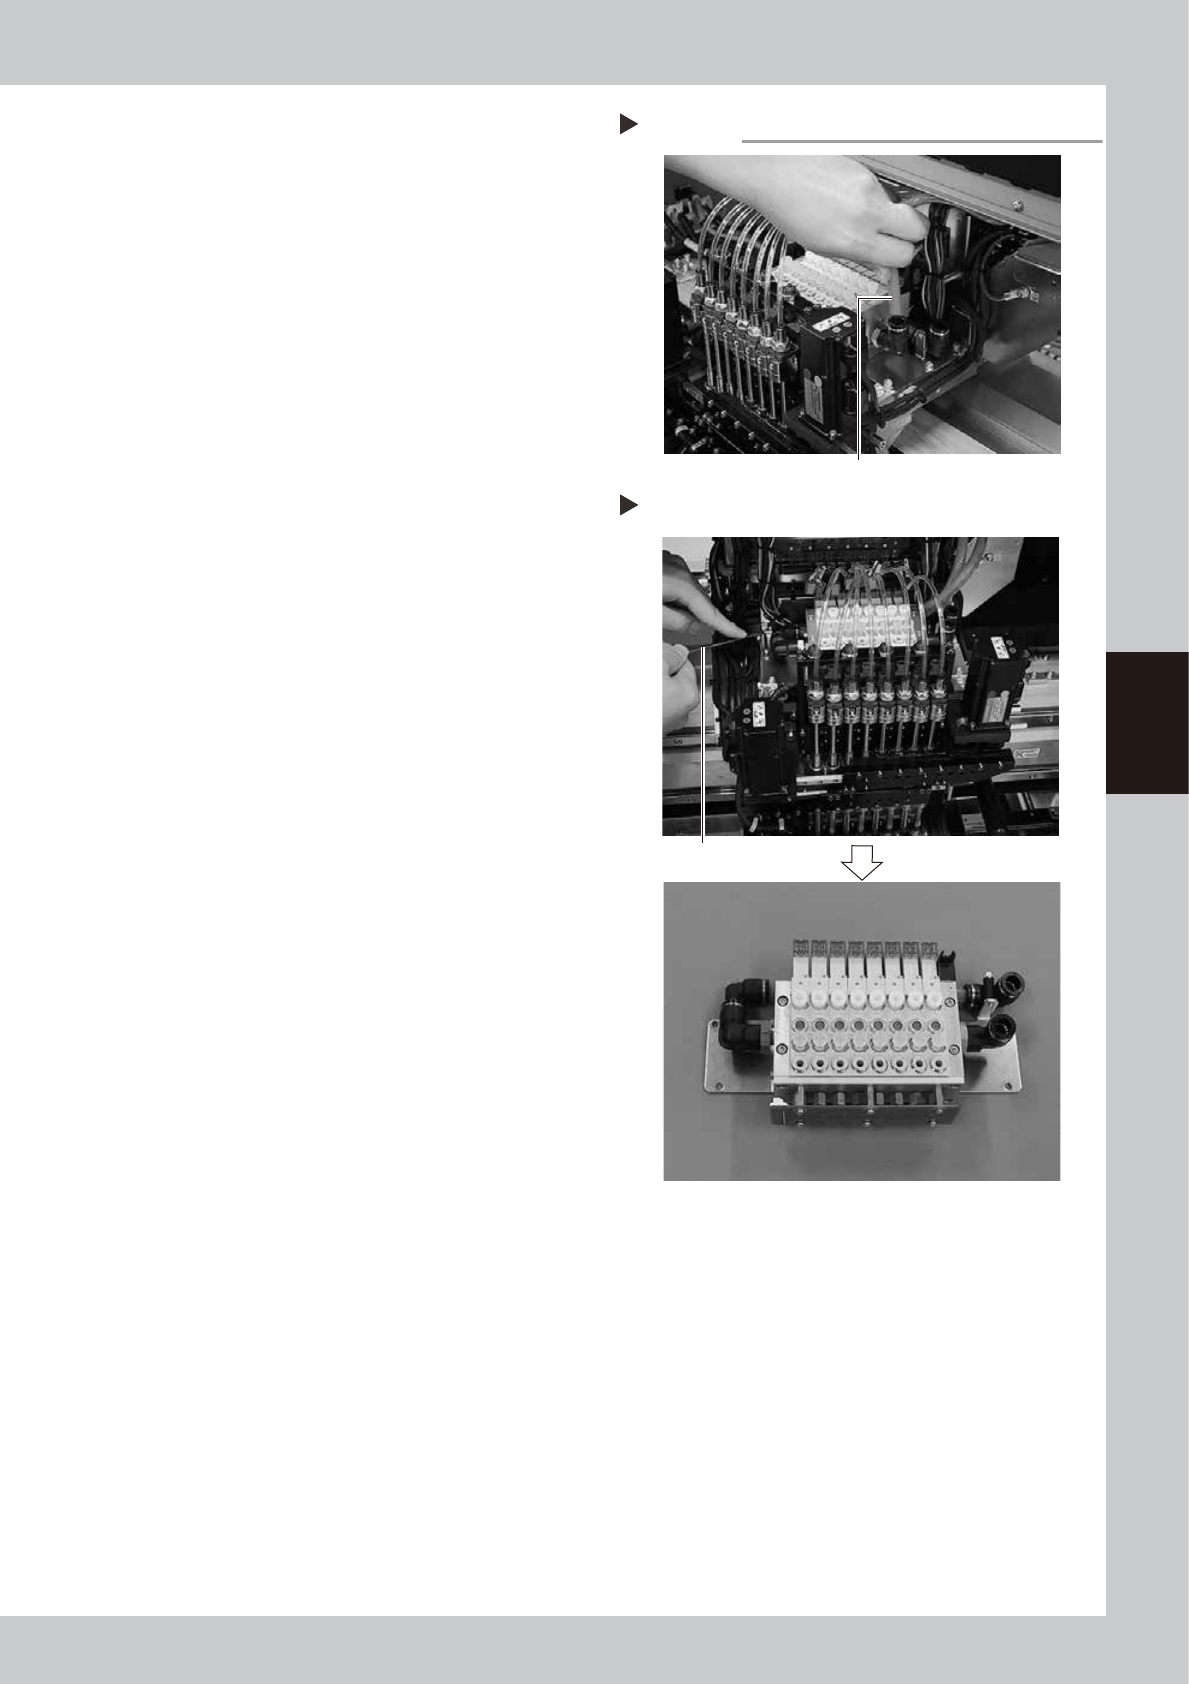
5
Disconnect the air hoses on the
right side of the valve unit.
Disconnect the two air hoses located on the
right side of the valve unit.
53407-L1-00
6
Remove the valve unit from the
head assembly.
1. Use the M5 hex wrench to remove the
four bolts securing the valve unit (two
bolts each on the right and left of the
base).
2. Remove the valve unit from the head
assemble while slightly lifting it up.
53408-L1-00
Disconnecting the air hose
Step 5
Air hose
Removing the valve unit
Step 6
Remove the bolt with
the hex wrench.
Valve unit removed from head assembly