YS100_Mainte_E.pdf - 第123页
4-7 4 How to replace consumable parts 5 Disconnect the air hoses on the right side of the valv e unit. Disconnect the two air hoses located on the right side of the valve unit. 53407-L1-00 6 Remo ve the valve unit from t…
4-6
4
How to replace consumable parts
3.2 Replacing a valve (solenoid valve)
1
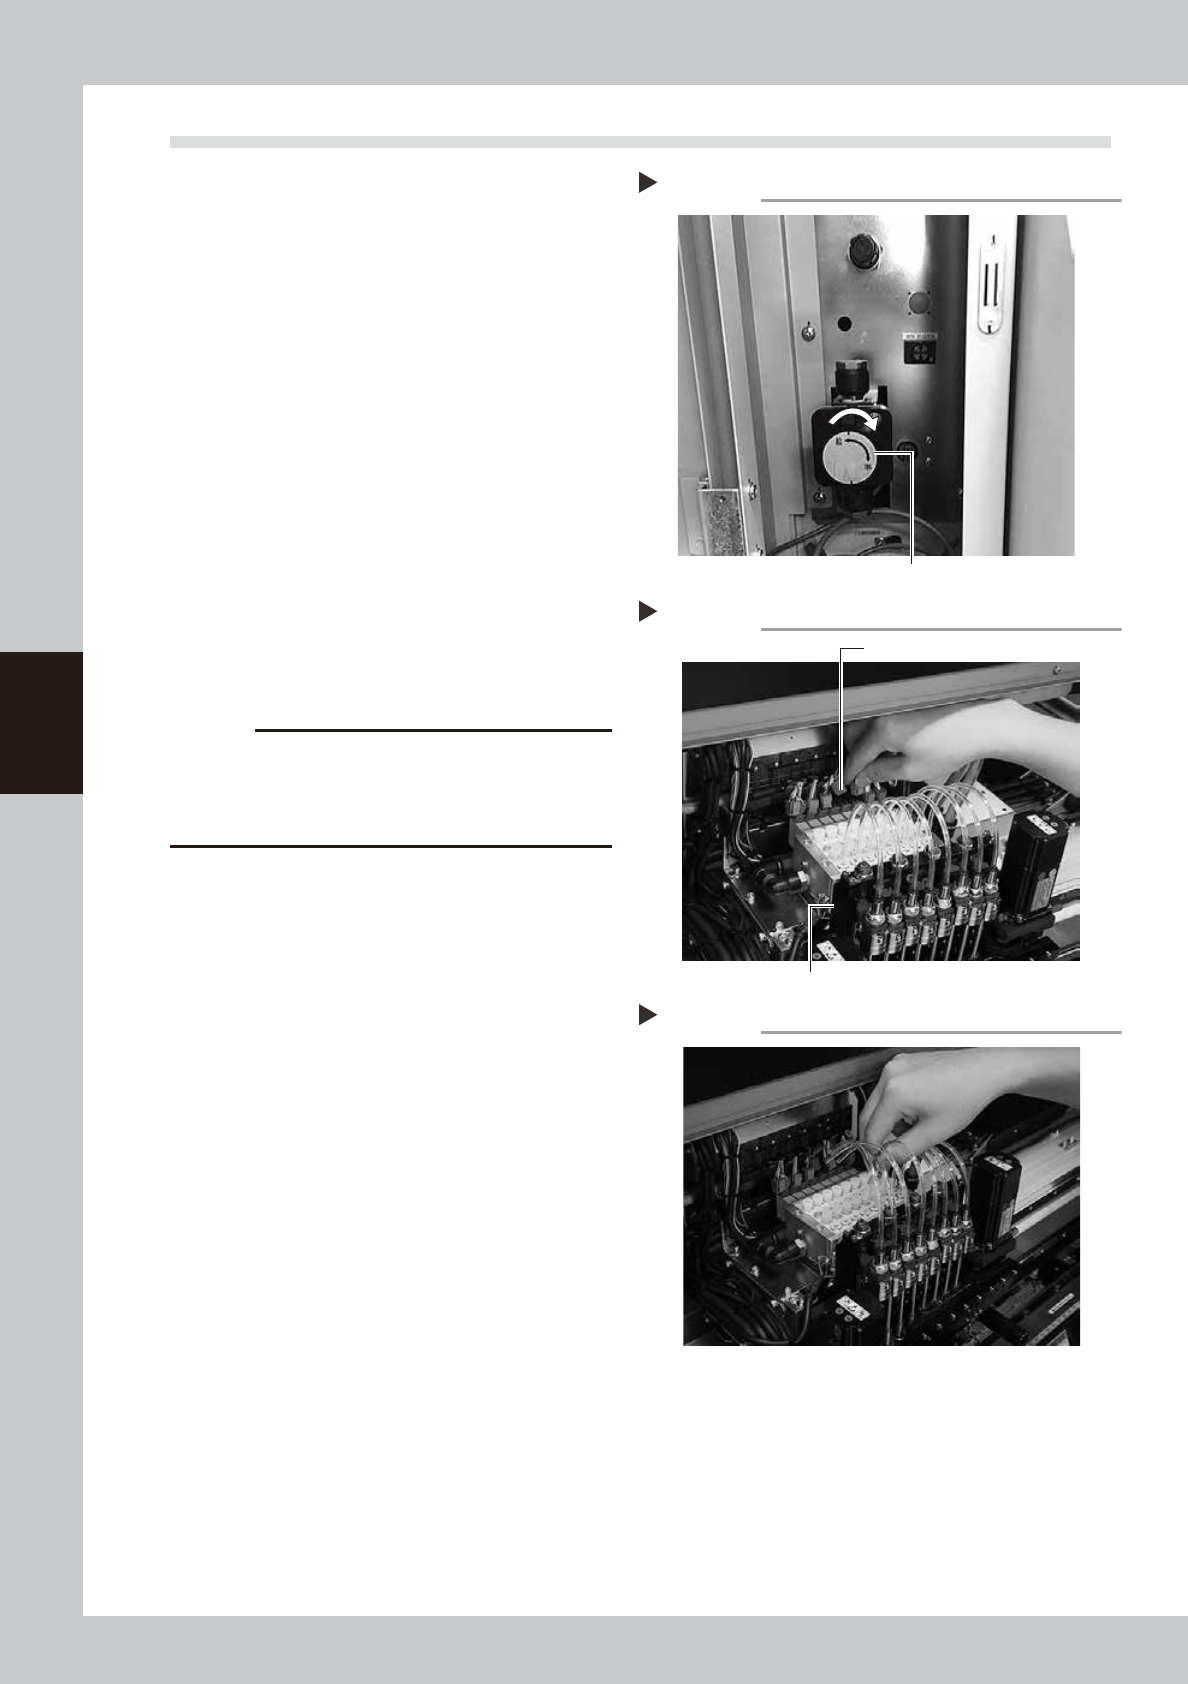
Turn OFF the air supply and power
OFF the machine.
1. Quit the software and power OFF the
machine.
2. Turn the "air supply/exhaust" switch inside
the panel at lower left of the machine
clockwise to turn the air supply OFF.
53417-L1-10
2
Move the head unit forward.
Open the safety cover of the machine, and
move the head unit toward you.
3
Remove the connectors on the head
valve unit.
1. Remove all connectors attached to the
head valve unit.
2. Remove the connector attached to the
vacuum sensor board.
53405-L1-00
c
CAUTION
A harness of thin wires is attached to the connector
housing. Use extreme caution not to break the wires. Do
not pull the harness to unplug the connector. Always
grip the connector body when unplugging.
4
Disconnect the air hoses.
Disconnect the air hose inserted in each
ejector unit.
53406-L1-00
Removing the connector
Step 3
Connector
Vacuum sensor board connector
Disconnecting the air hose
Step 4
Shutting off the air supply
Step 1
“Air supply/exhaust” switch
4-7
4
How to replace consumable parts
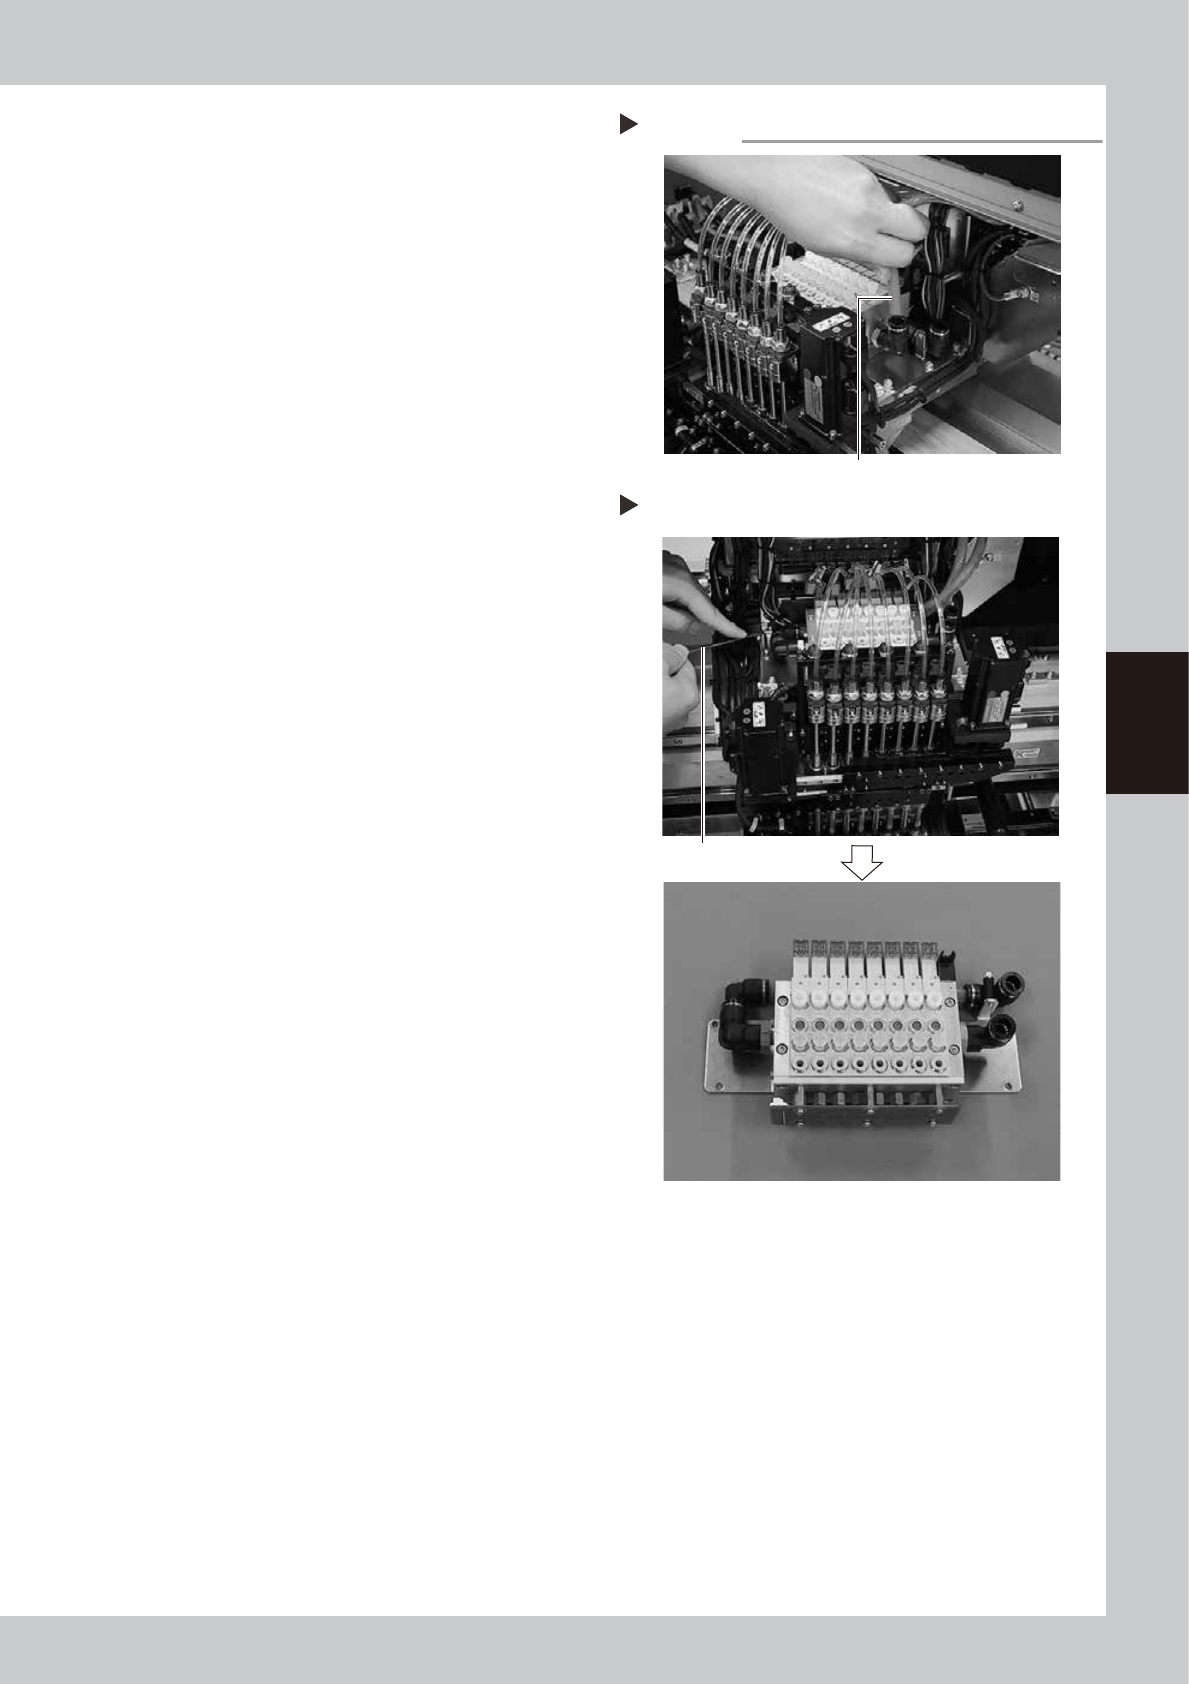
5
Disconnect the air hoses on the
right side of the valve unit.
Disconnect the two air hoses located on the
right side of the valve unit.
53407-L1-00
6
Remove the valve unit from the
head assembly.
1. Use the M5 hex wrench to remove the
four bolts securing the valve unit (two
bolts each on the right and left of the
base).
2. Remove the valve unit from the head
assemble while slightly lifting it up.
53408-L1-00
Disconnecting the air hose
Step 5
Air hose
Removing the valve unit
Step 6
Remove the bolt with
the hex wrench.
Valve unit removed from head assembly
4-8
4
How to replace consumable parts
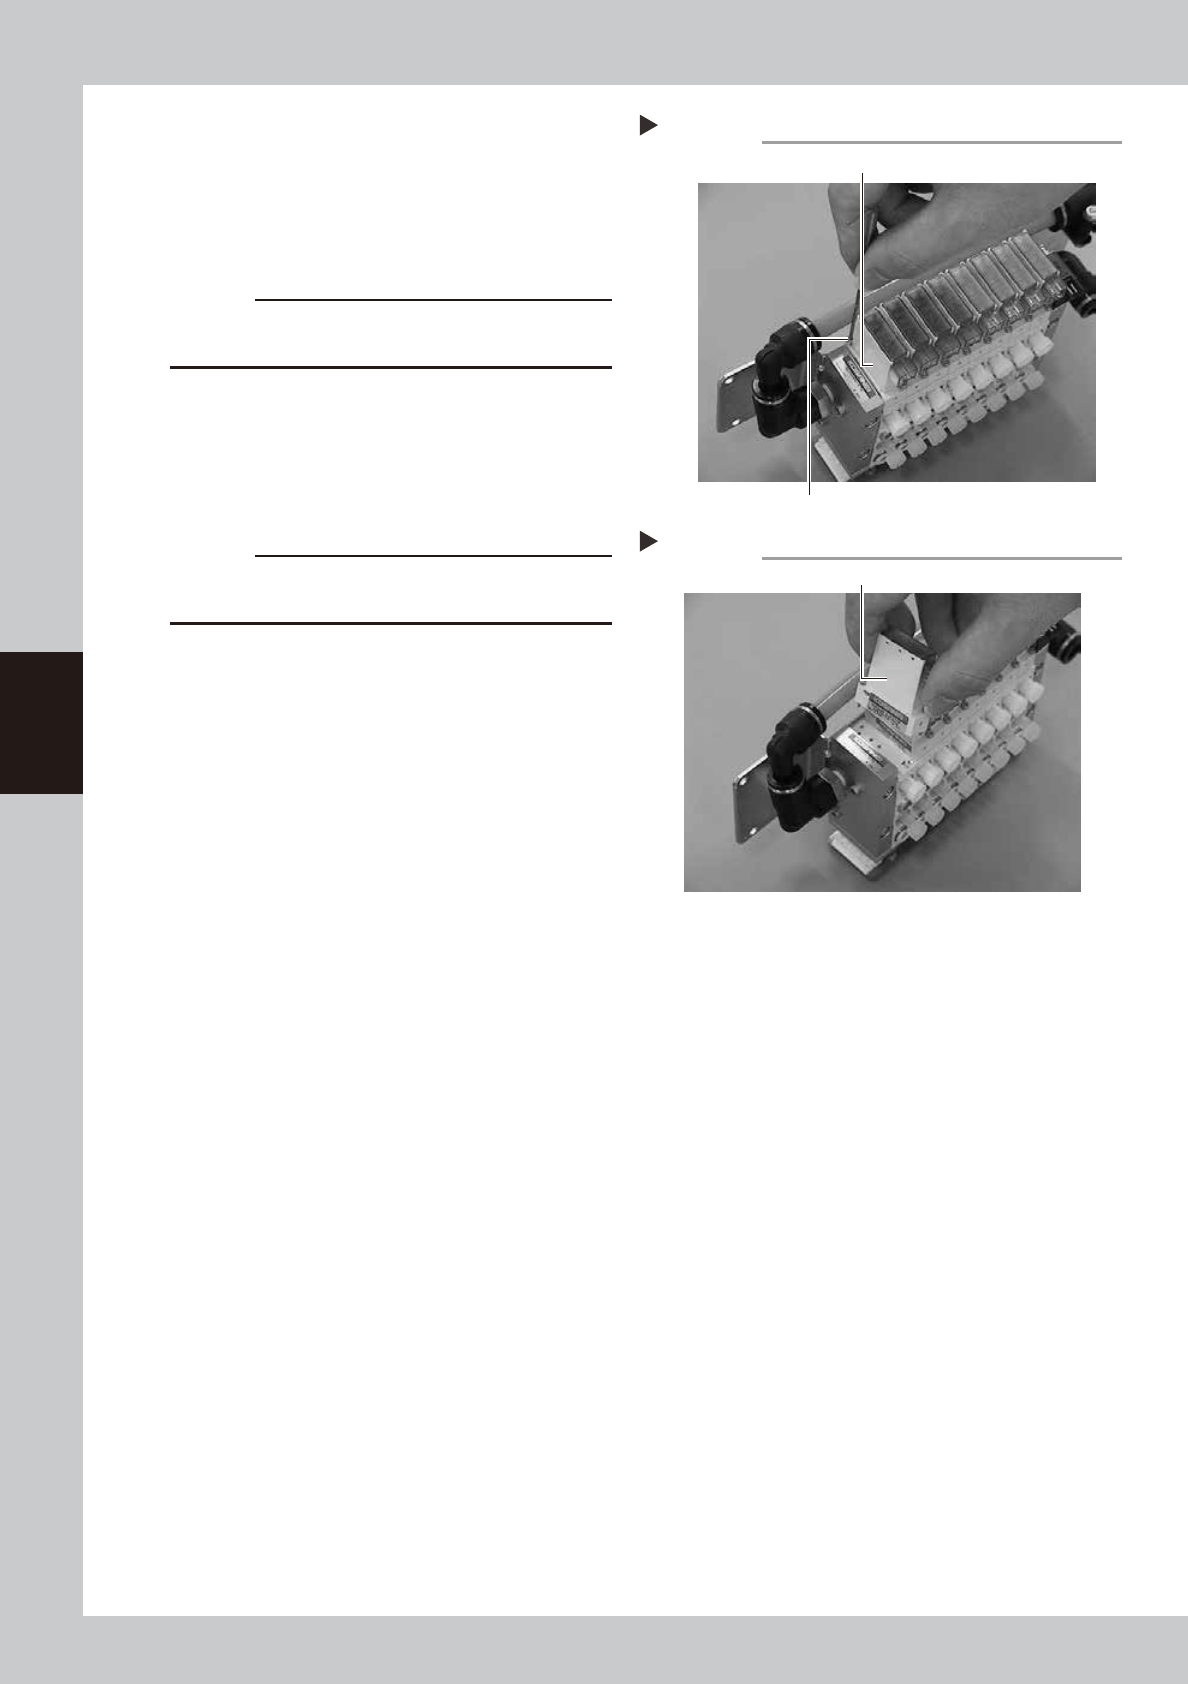
7
Remove the valve (solenoid valve).
Use a precision Phillips screwdriver to loosen
the two screws securing the valve (solenoid
valve) to be replaced, and then remove the
valve (solenoid valve) .
53410-L1-00
c
CAUTION
Be careful not to drop the gasket which is fitted to the
back of the solenoid valve.
8
Attach a new valve (solenoid valve).
Use a precision Phillips screwdriver to tighten
the two screws to secure the new valve
(solenoid valve).
53411-L1-00
c
CAUTION
Be careful not to lose the gasket, or not to fit it inside out
or pinch it.
9
Reinstall the valve unit in the
reverse of the above procedure.
Also reconnect the air hoses and connectors
back to their original positions.
0
Supply air to the machine and
power on the machine.
Start the machine and perform return-
toorigin.
q
Check the operation.
On the [Unit]-[Head] screen, press the
[Vacuum] and [Blow] buttons to check that
no abnormal values appear.
Removing the valve (solenoid valve)
Step 7
Solenoid valve mounting screw
Valve (solenoid valve)
Attaching a valve (solenoid valve)
Step 8
New valve (solenoid valve)