YS100_Mainte_E.pdf - 第62页
2-6 2 Daily maintenance items 2. Cleaning the feeder plate Chips or foreign objects falling on the feeder plate might bite into the surface during feeder setting and cause the pickup position to deviate. Periodic inspect…
2-5
2
Daily maintenance items
1.2 Checking the nozzles visually
To visually check nozzles, remove each nozzle from the head or from the nozzle station.
n
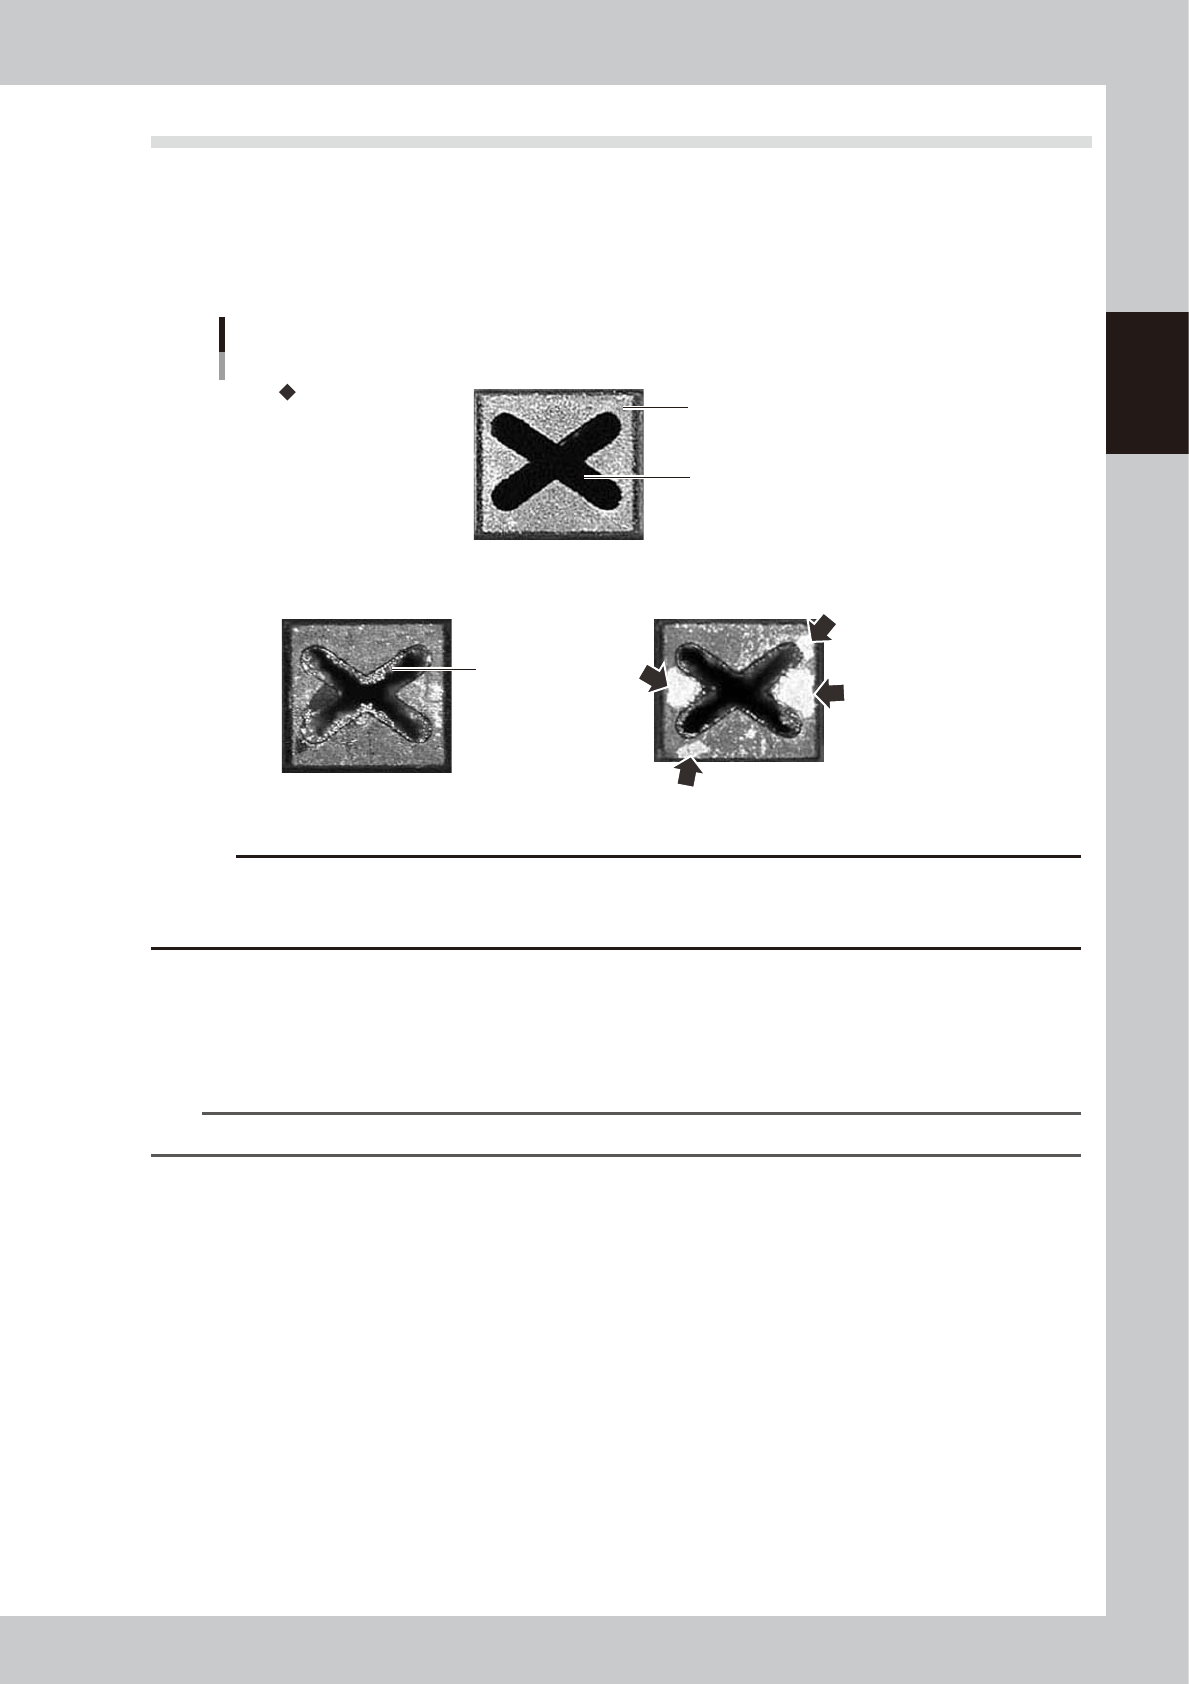
Points to check the removed nozzles
Check the removed nozzles with a magnifying glass or similar tool.
If any solder or contaminant sticks to the nozzle tip or nozzle hole, clean the nozzle.
Nozzle tip
Solder is adhering to
nozzle hole.
Solder is adhering to
nozzle tip (flat surface).
Nozzle hole
Checking the nozzle condition
No good: Nozzle is clogged. No good: Shiny material on tip
Normal condition
53200-L1-10
c
CAUTION
If the above check reveals a clogged or dirty nozzle, clean the nozzle hole or nozzle tip seeing chapter 3, "1.1
Inspecting and cleaning the nozzles"and "2.1 Cleaning the nozzle air path". In case of the FNC nozzle, refer to "2.2
Cleaning FNC nozzles" in Chapter 3.
n
Checking nozzles by removing them from the head
1. Move the head unit to a position where the nozzles can be easily removed. Then remove each nozzle manually.
2. After checking and cleaning the nozzle, reattach the nozzle to the head while making sure the head position and the
nozzle's orientation are correct.
n
NOTE
As for a simple method, check the nozzle attached to the head with a mirror or similar tool.
n
Checking nozzles by removing them from the nozzle station
1. Return all nozzles in the nozzle station.
2. On the [Unit] - [Head] screen, press the [Nozzle Stn Shutter] button to allow the nozzles to be removed from the
nozzle station. Then remove each nozzle manually.
3. After checking and cleaning the nozzle, return the nozzle back in the nozzle station and press the [Nozzle Stn Shutter]
button.
2-6
2
Daily maintenance items
2. Cleaning the feeder plate
Chips or foreign objects falling on the feeder plate might bite into the surface during feeder setting and
cause the pickup position to deviate. Periodic inspection and cleaning are recommended to prevent this
problem.
n
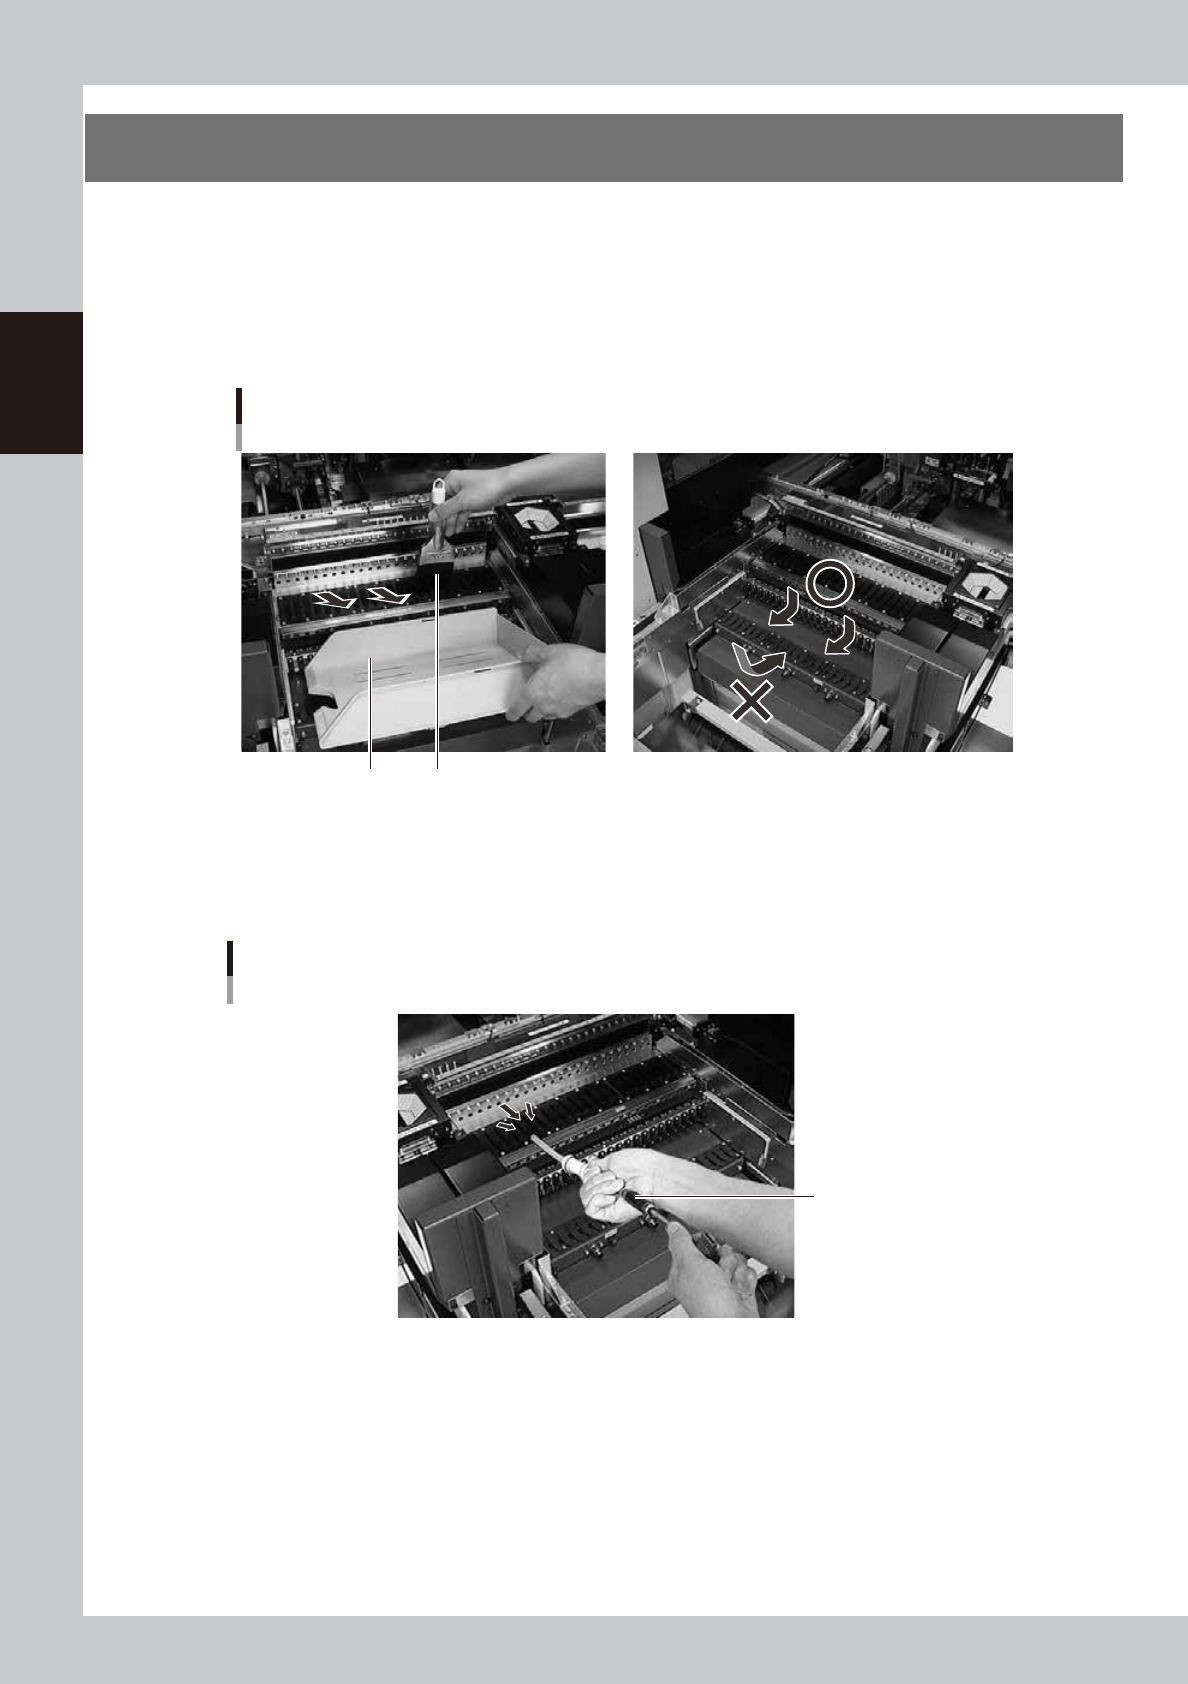
Cleaning with the accessory brush
Clean the feeder plate with the accessory brush as shown below.
Cleaning brush
Cleaning the feeder plate (bank)
Dustpan
53202-L1-00
n
Cleaning with the vacuum cleaner or vacuum ASSY (option)
Use a vacuum cleaner or optional vacuum ASSY (KHY-M88V0-A0X) connecting to the air connector on the front of the
machine to suck in fine dust particles to clean the feeder plate.
Vacuum ASSY
Cleaning the feeder plate
Use the vacuum ASSY
53205-L1-00
2-7
2
Daily maintenance items
3. Cleaning Multi-view camera protective glass (option)
Adhered dust, etc., on the multi-camera lighting's protective glass can cause component recognition errors.
To prevent this, it is recommended to inspect and clean the cover in a periodic manner.
e
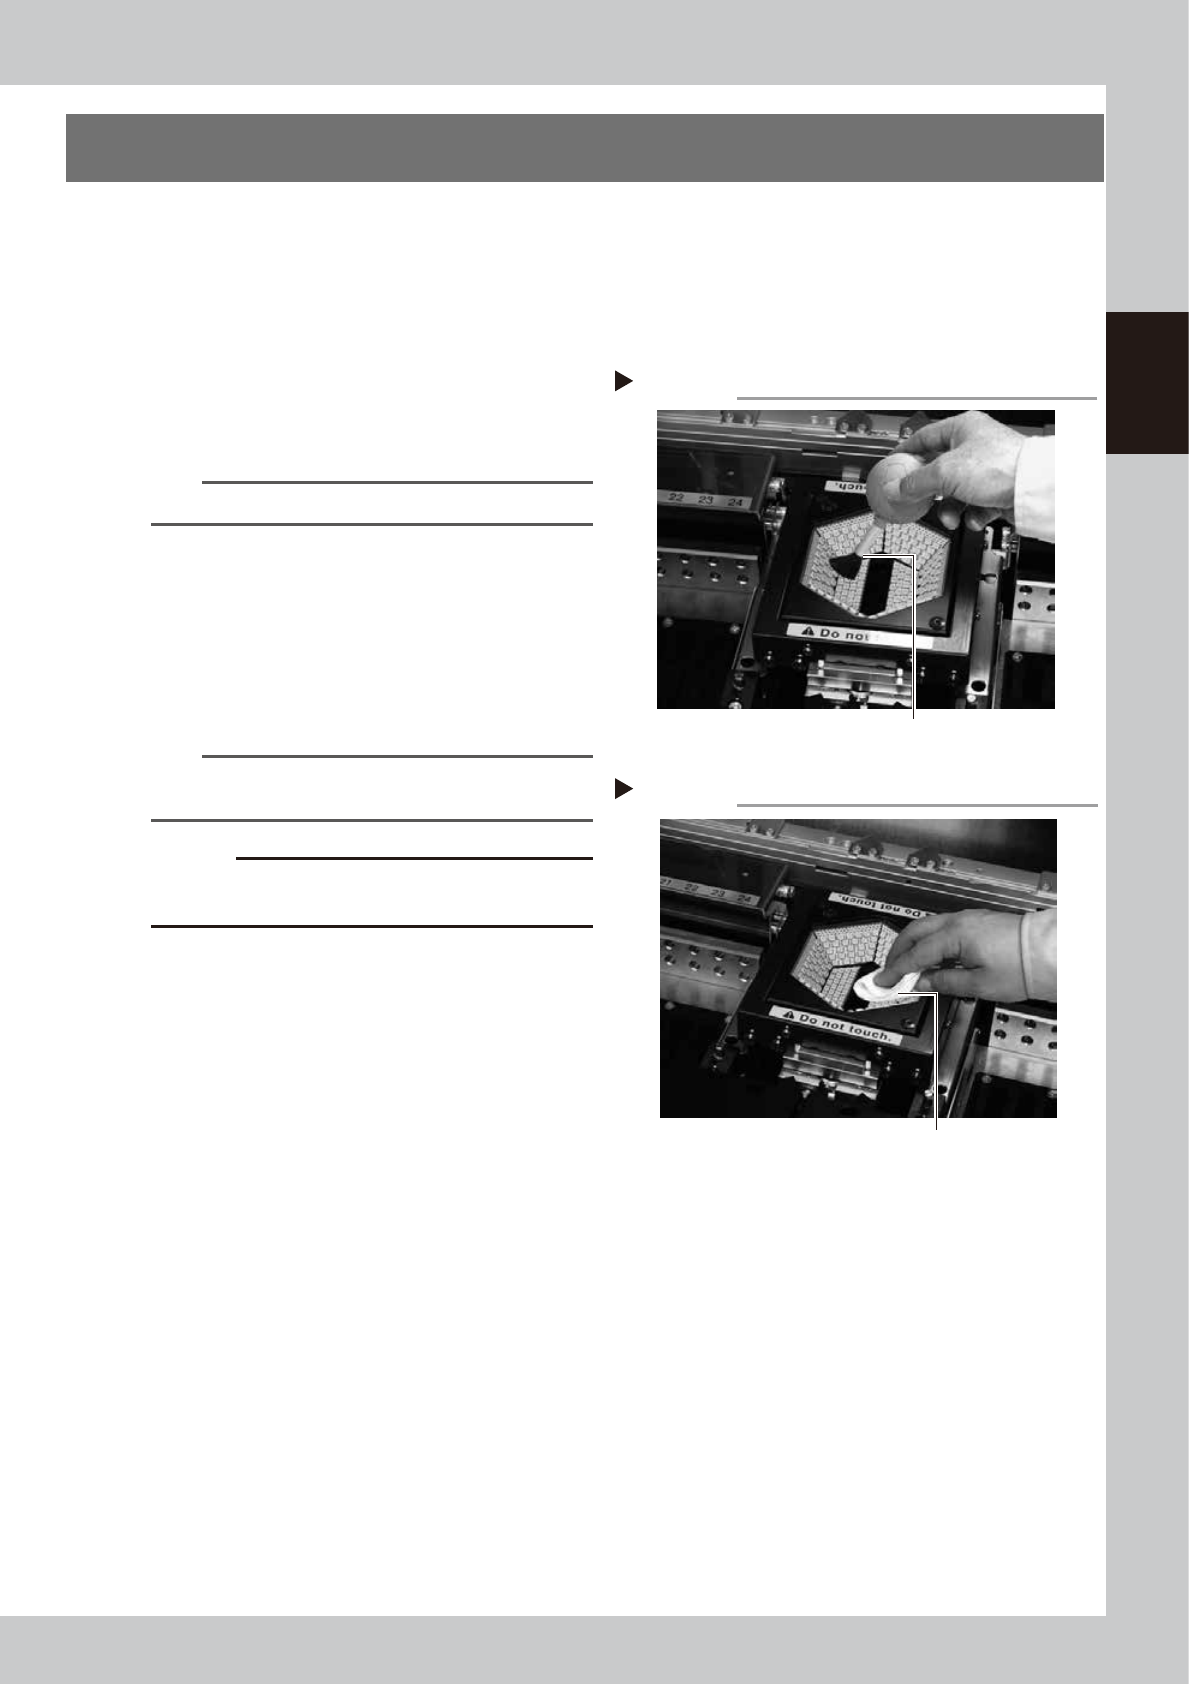
1
Blow off dust on the lighting's
protective glass.
1. Press the emergency stop button to open
the machine safety cover.
2. Remove the dust on the lighting's
protective glass with a blower brush.
53203-L1-10
TIP
A lens blower brush is an optional purchase part.
2
Wipe the protective glass with a
cloth or cleaning paper.
Apply a few drops of lens cleaner to a
lint-free cleaning cloth or cleaning paper
that does not raise dust, and wipe the
protective glass.
53204-L1-00
n
NOTE
A lens cleaner and cleaning paper are optional
purchase parts.
c
CAUTION
Do not use other than the lens cleaner optionally
supplied, such as IPA or acetone.
Wiping the protective glass
Step 2
Lent-free cleaning cloth
Blowing off dust with blower brush
Step 1
Lens blower brush