SIPLACE-SX4-DX4-用户手册.pdf - 第228页
Settings Settings on the Basic Machine 5.1.1 Setting the Machine Covers 228 Service Manual SIPLACE SX4/DX4 5.1.1.1 5 . 1 . 1 . 1 S e t t in g t h e C o v e r G u id a n c e Setting the Cover Guidance Cover guidance ( exa…
Settings
5.1.1 Setting the Machine Covers Settings on the Basic Machine
Service Manual SIPLACE SX4/DX4 227
5
5 Settings
Settings
5.1
5.1 Settings on the Basic Machine
Settings on the Basic Machine
5.1.1
5.1.1 Setting the Machine Covers
Setting the Machine Covers
Overview
NOTICE
Example
The following settings are shown using the example of an SX2 machine. The procedure is the
same for other machines. Any differences will be explicitly indicated.
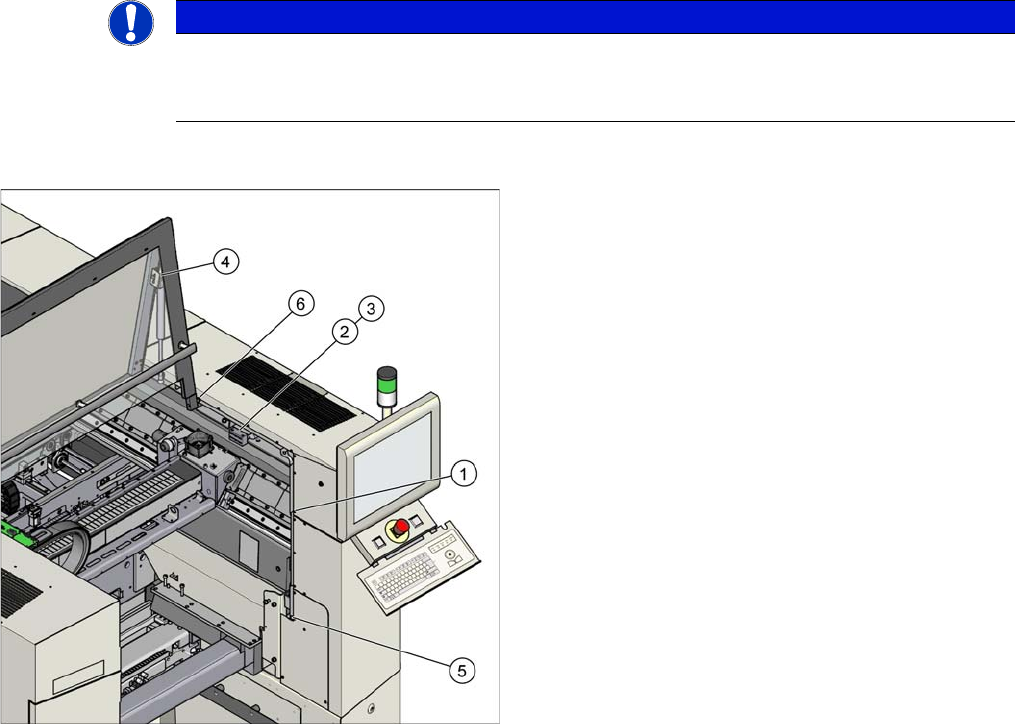
Settings (example of SX2 shown)
1. Setting the cover guidance
See "5.1.1.1 Setting the Cover Guidance" [ ➙ 228]
2. Setting the cover switch
See "5.1.1.2 Setting the Cover Switch" [ ➙ 229]
3. Setting the cover switch centering
See "5.1.1.3 Setting the Cover Switch Centering De-
vice" [ ➙ 230]
4. Setting the actuator
See "5.1.1.4 Setting the Actuator" [ ➙ 230]
5. Setting the bottom stop
See "5.1.1.5 Setting the Bottom Stop" [ ➙ 231]
6. Setting the rollers
See "5.1.1.6 Setting the Cover Rollers" [ ➙ 232]
Settings
Settings on the Basic Machine 5.1.1 Setting the Machine Covers
228 Service Manual SIPLACE SX4/DX4
5.1.1.1
5.1.1.1 Setting the Cover Guidance
Setting the Cover Guidance
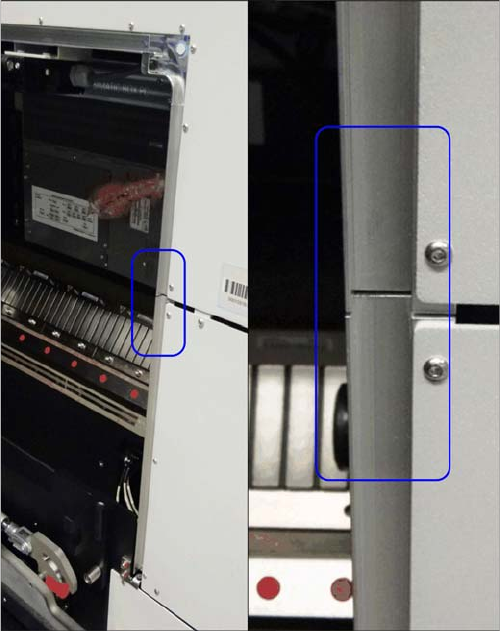
Cover guidance (example of SX2 shown)
The cover guidance transitions must be set when the
gantry changer doors are closed, so that the guidances
are flush with one another. Make sure that there is no pro-
truding edge, against which the cover guide roller could
be knocked.
Settings
5.1.1 Setting the Machine Covers Settings on the Basic Machine
Service Manual SIPLACE SX4/DX4 229
5.1.1.2
5.1.1.2 Setting the Cover Switch
Setting the Cover Switch
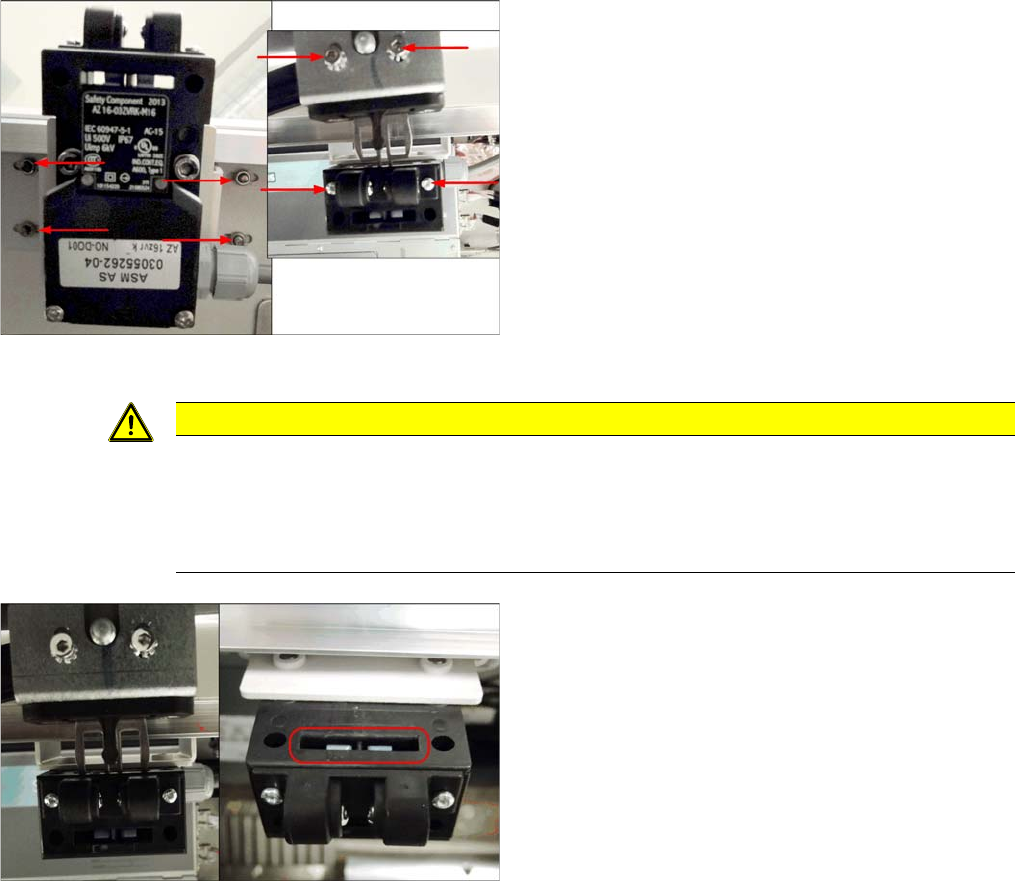
Cover switch (using example of SX2)
Cover switch [03055262-xx]
► Loosen the screws fastening the cover switch, the
centering device and the actuator, so that the assem-
blies can be easily moved.
CAUTION
Screws on actuator
With enforcement of the Machinery Directive DIN EN 1088 (2009), the following has been ex-
ecuted to avoid misuse (e.g. putting the safety features out of action): the actuator and machine
protective switch screws have been replaced by Torx screws with pins. The relevant set of tools
may only be used for performing repair work.
Cover switch (using example of SX2)
► Close the cover far enough for the actuator to be just
over the switch. Align them so that the metal bracket
is parallel to the opening in the switch. The metal
bracket may not scrape against the cover switch.
► Tighten the cover switch screws in this position.