CX200-4(Maint).pdf - 第60页
(1-2) Mov e the head (having the nozzle to be detached) to the place- ment station with the [Manual Alignment] button in the “Mnl Opn Menu” tab sheet. (Operation Sequence: “UNIT ADJ.” Window (Submenu) Æ “Nozzle Adj.” T a…
1.4.4 Detachment and Attachment of Vacuum Nozzle
The vacuum nozzles must be detached or attached
with the operation power being turned “ON”
It is dangerous. Be sure to detach or attach a vacuum
nozzle alone (without any other attended personnel).
Before detaching or attaching a vacuum nozzle, be
sure to spread a rag under the working area.
Otherwise, a fallen vacuum nozzle will easily be lost if
any.
To facilitate the detachment or the attachment of the vacuum nozzle,
move the X/Y table in the X (plus) direction to leave a space under the
placement station.
Use the [Table X] button in the “Others” tab sheet to move the
X/Y table. (Operation Sequence: “MNL OPN.” Window
(Submenu) Æ “Manual Axis Opn” Tab Æ “Others” Tab Æ
[Table X] Button).
(1) Detachment of Vacuum Nozzle
(1-1) Set the [OPERATION] switch to the “SETUP” side.
Confirm that the “LOCK” lamp on the front operation panel is
“ON”
0110-003 1-48
AFO01ETRP
1.4 Maintenance Method
CAUTION
CAUTION
Note
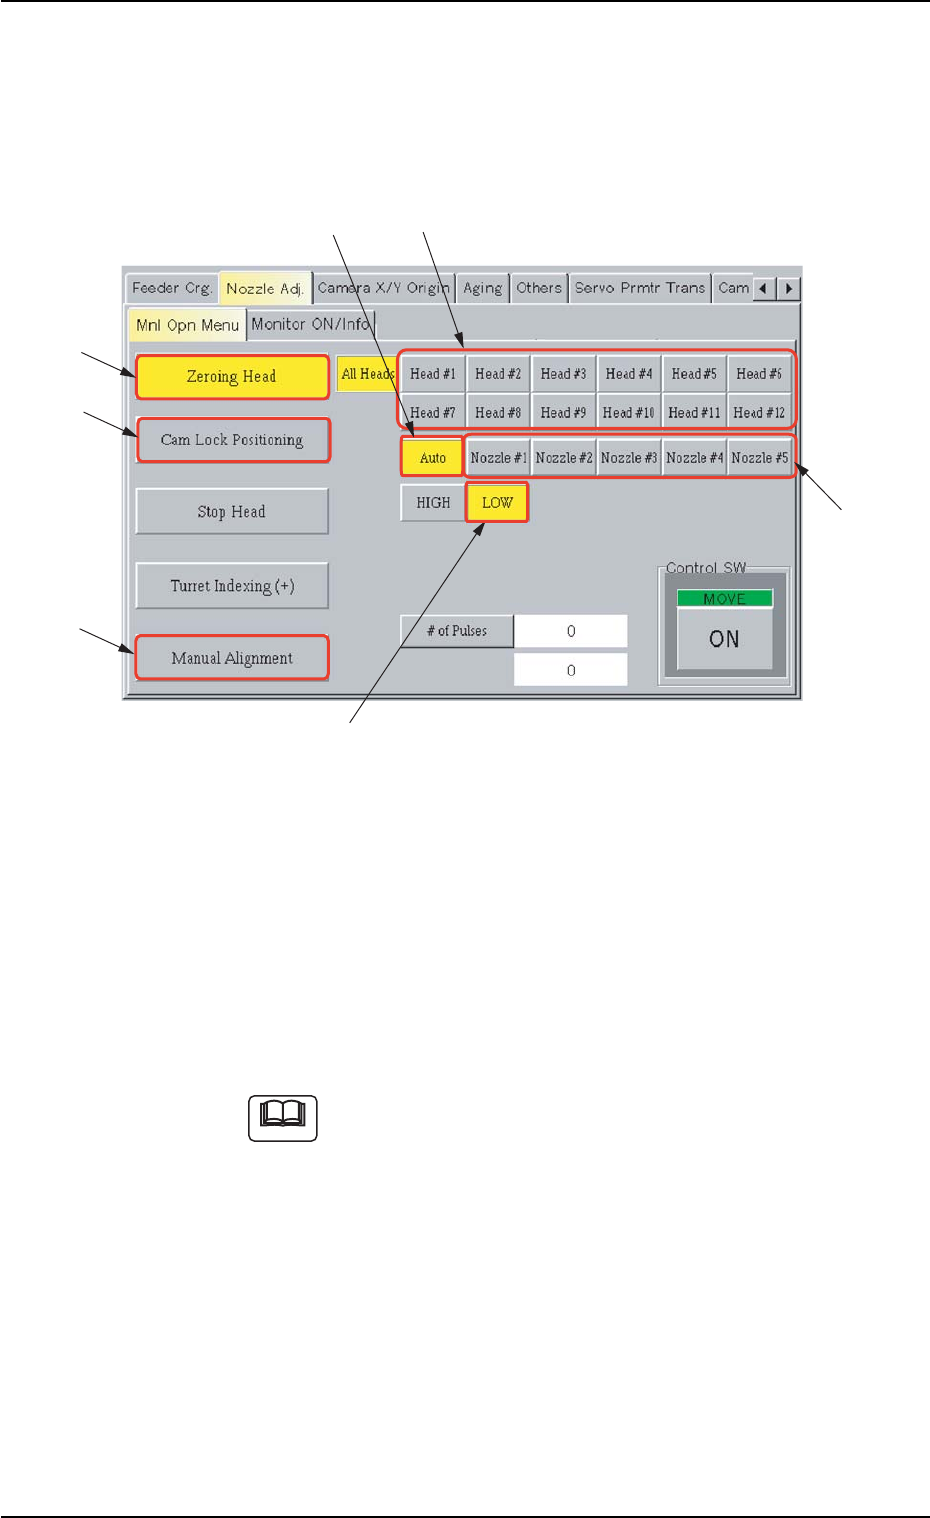
(1-2) Move the head (having the nozzle to be detached) to the place-
ment station with the [Manual Alignment] button in the “Mnl Opn
Menu” tab sheet. (Operation Sequence: “UNIT ADJ.” Window
(Submenu) Æ “Nozzle Adj.” Tab Æ “Mnl Opn Menu” Tab Æ
[Manual Alignment] Button)
Fig. 4A64 “Mnl Opn Menu” Tab Sheet
(1-3) Select one of the buttons (Head Nos.) in “*2”, the [Auto] button
(*3), the [LOW] button (*4), and the [Cam Lock Positioning]
(*5).
Press the [ENABLE] button on the operation panel in two sec-
onds after the [ON] button (entitled “MOVE”).
The “LOW” nozzle on the specified head turns toward the front
side of the machine.
If the head does not turn, use the [Zeroing Head] button (*6) to
zero the specified head and perform the above operation
again.
1.4 Maintenance Method
0110-003 1-49 AFO01ETRP
Note
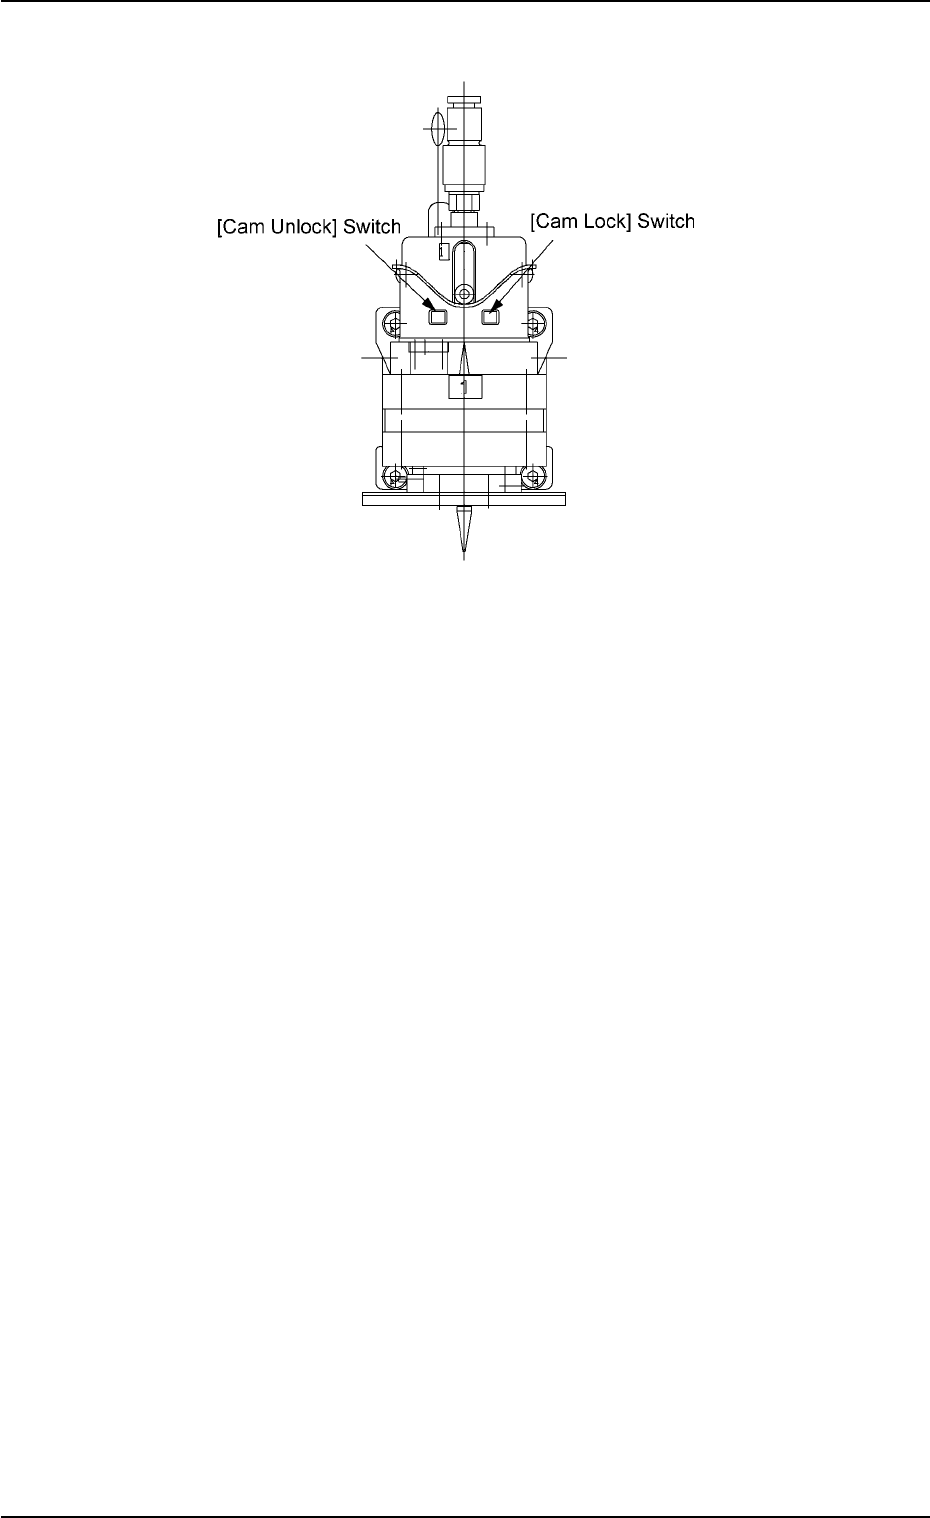
(1-4) Press the [Cam Lock] switch on the head.
Fig. 4A64-1
(1-5) Select one (Nozzle # of the nozzle to be detached) of the but-
tons in “*7” and press the [ON] button (entitled “MOVE”). In two
seconds, press the [ENABLE] button on the operation panel.
The selected vacuum nozzle will face toward the front side of
the machine. Press the [Cam Unlock] switch.
1.4 Maintenance Method
0110-003 1-50 AFO01ETRP