YS24X_Ope_E.pdf - 第133页
3-1 3 Starting and ending pr oduction 1. Star ting production This section describes how to select the board data which is already registered and perfor m component mounting. 1 Select the board data. 1. When the board da…

Chapter 3 Starting and ending production
Contents
1. Starting production 3-1
1.1 Resuming operation from the stopped point 3-6
1.1.1 Loading the saved data 3-7
1.1.2 Editing mount flags 3-7
1.2 Using the "block skip function" 3-8
1.2.1 Selecting the blocks 3-9
1.2.2 Starting operation 3-10
2.
Ending production and turning power off
3-11
3
3.1 Production 3-13
5
7
9
3.5 Alignment 3-21
3.6 Retry 3-22
3
4
5
3.10 Pick Rate Warning 3-27
3-1
3
Starting and ending production
1. Starting production
This section describes how to select the board data which is already registered and perform component
mounting.
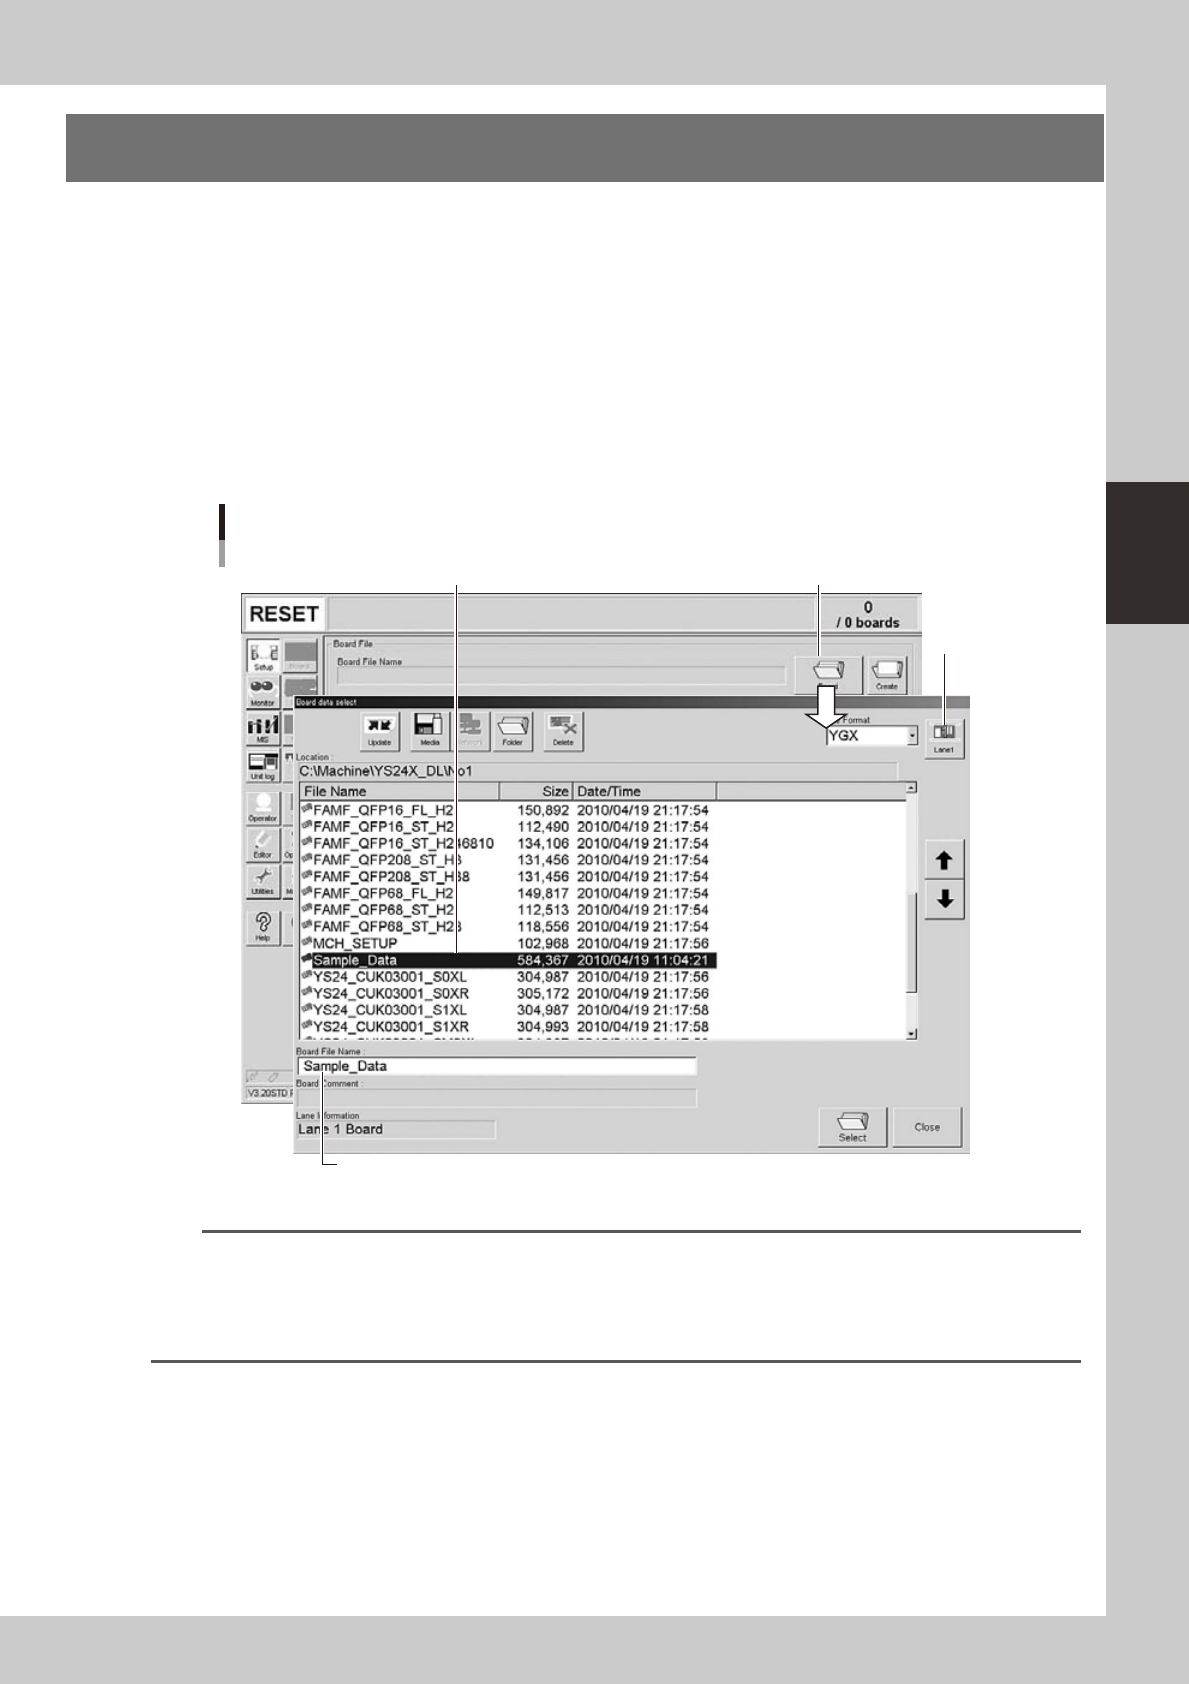
1
Select the board data.
1. When the board data is not yet selected, press the [Board] button on the Setup screen.
A list of registered board data appears.
In dual-lane machines, the lane select button is displayed on the "Board data select" screen, so press
that button to display the lane to be used for production. (When producing boards using both lanes,
select "Lane combination".)
2. Line up the cursor with the board data to use for production and press the [Select] button.
The machine loads the seleted board data.
Selecting the board data
Select board data from list.
Press [Board] button.
Lane select
button.
Selected board name is displayed.
24300-L4-10
TIP
• Combined board data will be displayed when "Lane combination" is selected with the lane select button.
Combined board data includes two board data which are stored in one board file. Combined board data is
displayed along with an orange icon.
• When combined board data is selected, the board le name and board data name used for production on the
selected lane are displayed on the Setup screen.
3-2
3
Starting and ending production
n
NOTE
When producing boards using both lanes of dual-lane machines, use the [ Lane select ] button to select the lane to
be operated and then adjust or check the conveyor unit setup.
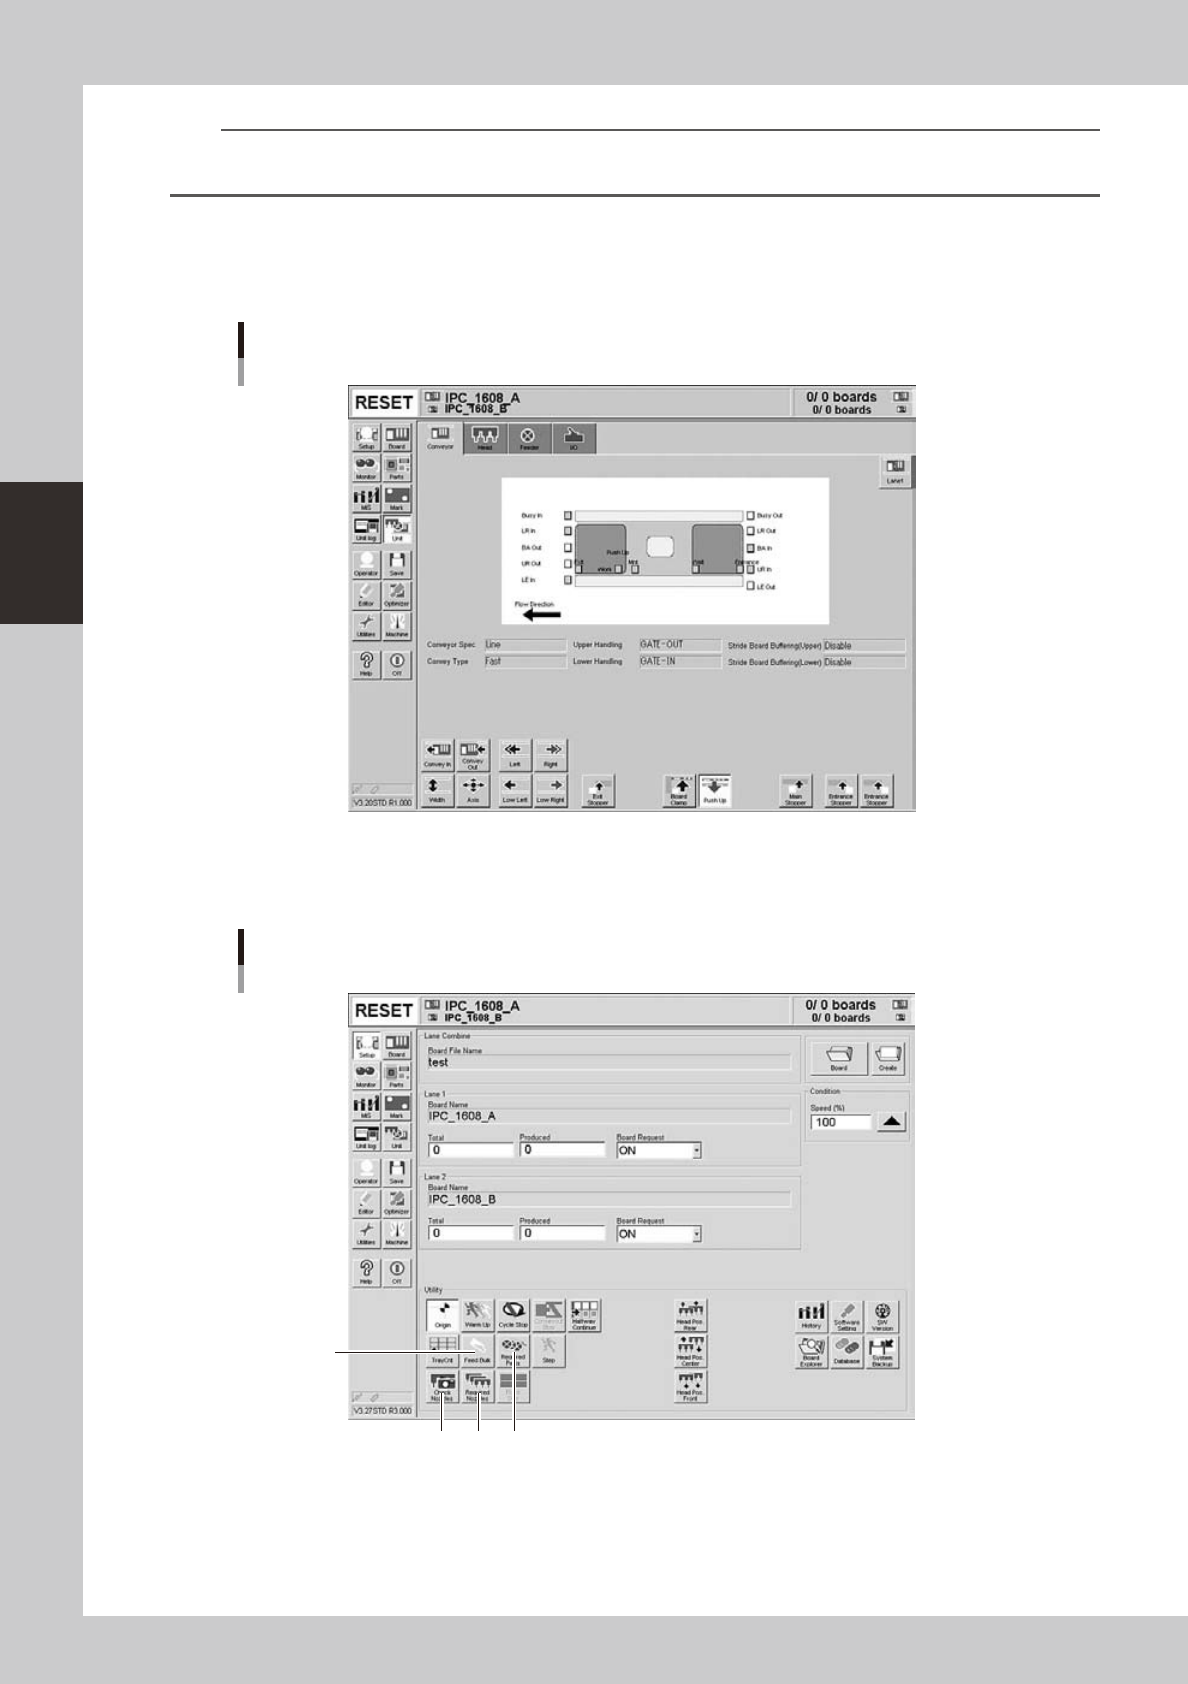
2
Set up the conveyor unit.
Open the [Unit] - [Conveyor] tab screen, and adjust the conveyor width and push-up pins according to
the board. For further details, refer to "3.4 Adjusting the convey unit setup" in Chapter 2.
[Unit] − [Conveyor] screen
Example of Dual-lane
24301-L4-10
3
Check the other setup items.
Return to the [Setup] screen, and press the following buttons to check or change the setting data.
3
124
Setup screen
Example of Dual-lane
24302-L4-20
1. [Required Parts] button
Displays the designated feeder set positions and components to be mounted. Check whether the necessary feeders are
installed in the correct feeder set positions on the feeder plate.