YS24X_Ope_E.pdf - 第138页
3-6 3 Starting and ending pr oduction 1.1 Resuming operation from the stopped point Pressing the [Halfwa y Continue] button on the "Setup" screen opens the "Halfwa y Continue" dialog box as shown belo…

3-5
3
Starting and ending production
2
Cut off the used top tape.
Cut the top tape with the edge cutter inside the tail cover.
Cutting the used top tape
Top tape to be cut
Edge cutter
23305-L4-00
3
Close the tail cover.
The tail cover has a magnet to hold it closed, so it can be easily returned to the original position.
Closing the tail cover
Tail cover
23306-L4-00
3-6
3
Starting and ending production
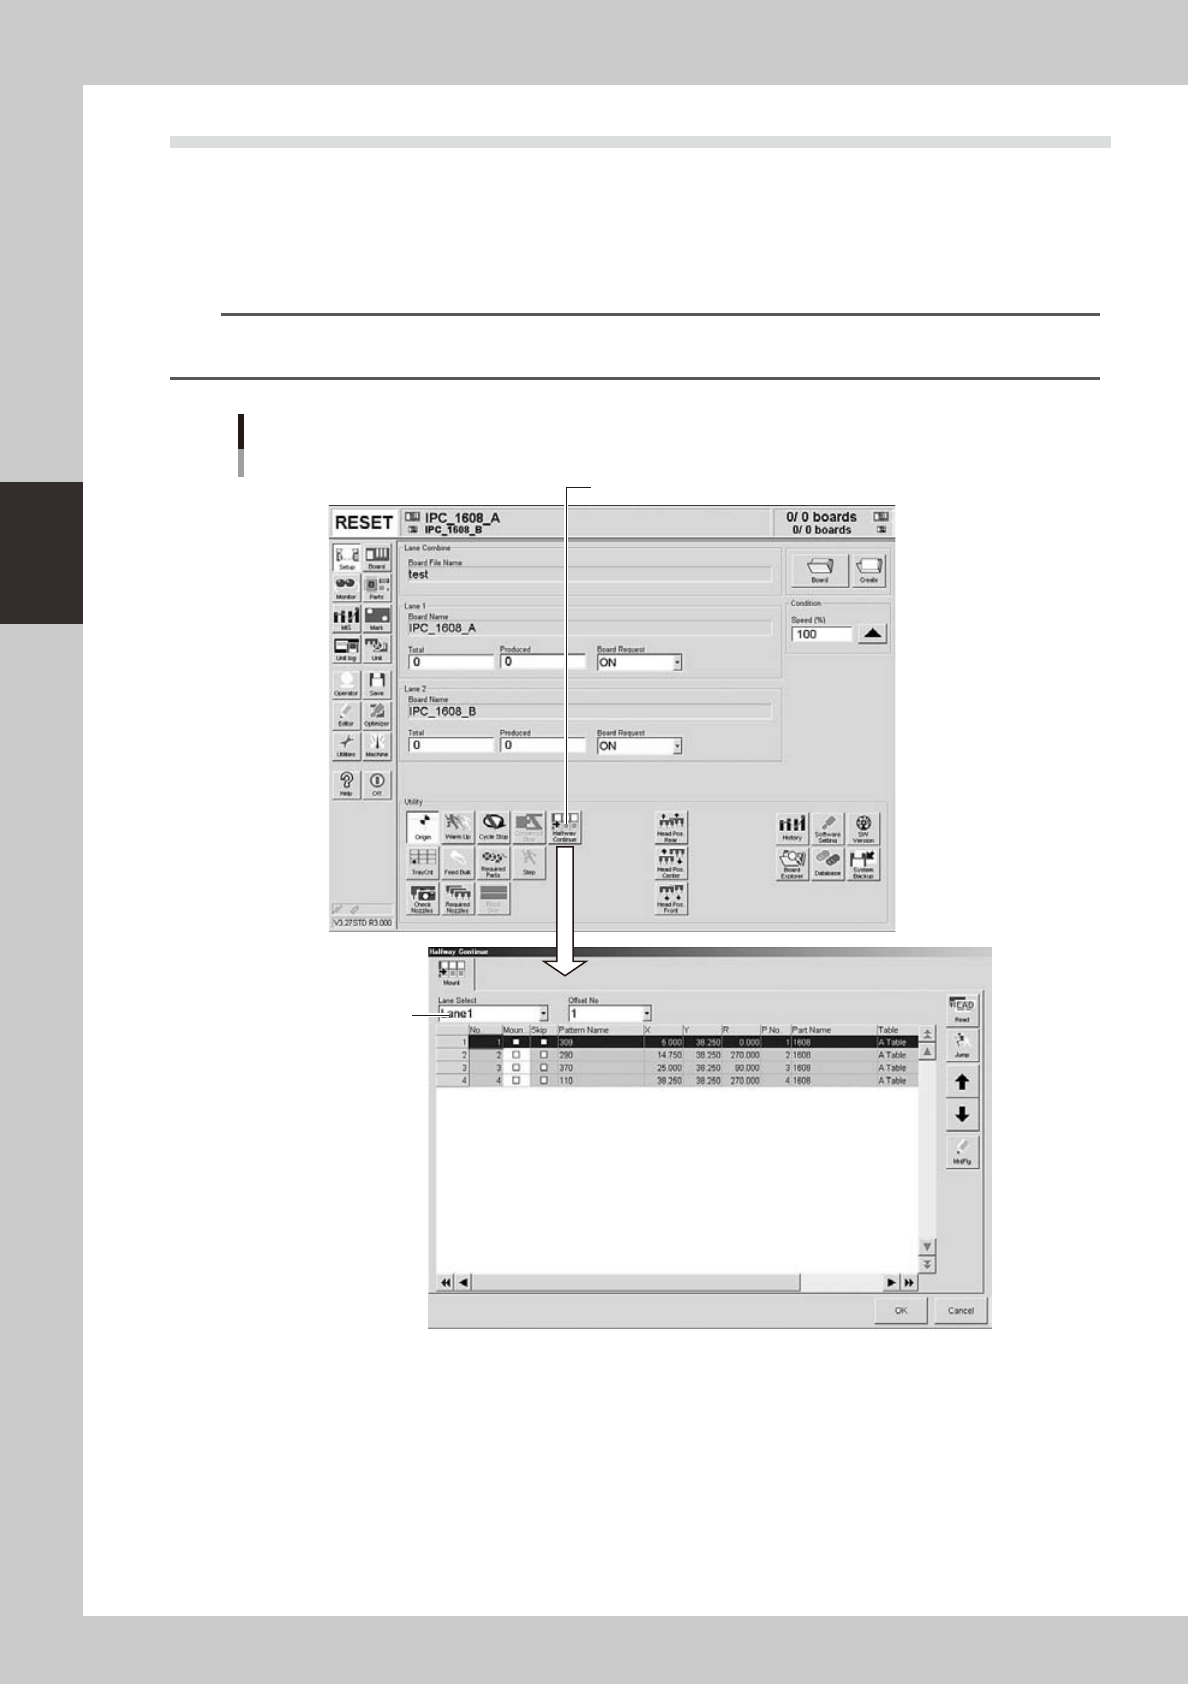
1.1 Resuming operation from the stopped point
Pressing the [Halfway Continue] button on the "Setup" screen opens the "Halfway Continue" dialog box as
shown below. Even after you have reset operation data while component mounting on a board was in progress,
this dialog box allows you to reload that operation data to continue the component mounting or to mount
components at a specific block or mounting points. Note that this function can be used just for the first board
after the operation is resumed, with routine mounting operation beginning from the next board.
n
NOTE
When boards are being produced using both lanes of dual-lane machines, select the lane from the "Lane Select"
drop-down list in the "Halfway Continue" dialog box, and then resume operation.
[Halfway Continue] button
"Halfway Continue" dialog box
Example of Dual-lane
“ Lane Select ” box
24304-L4-20
3-7
3
Starting and ending production
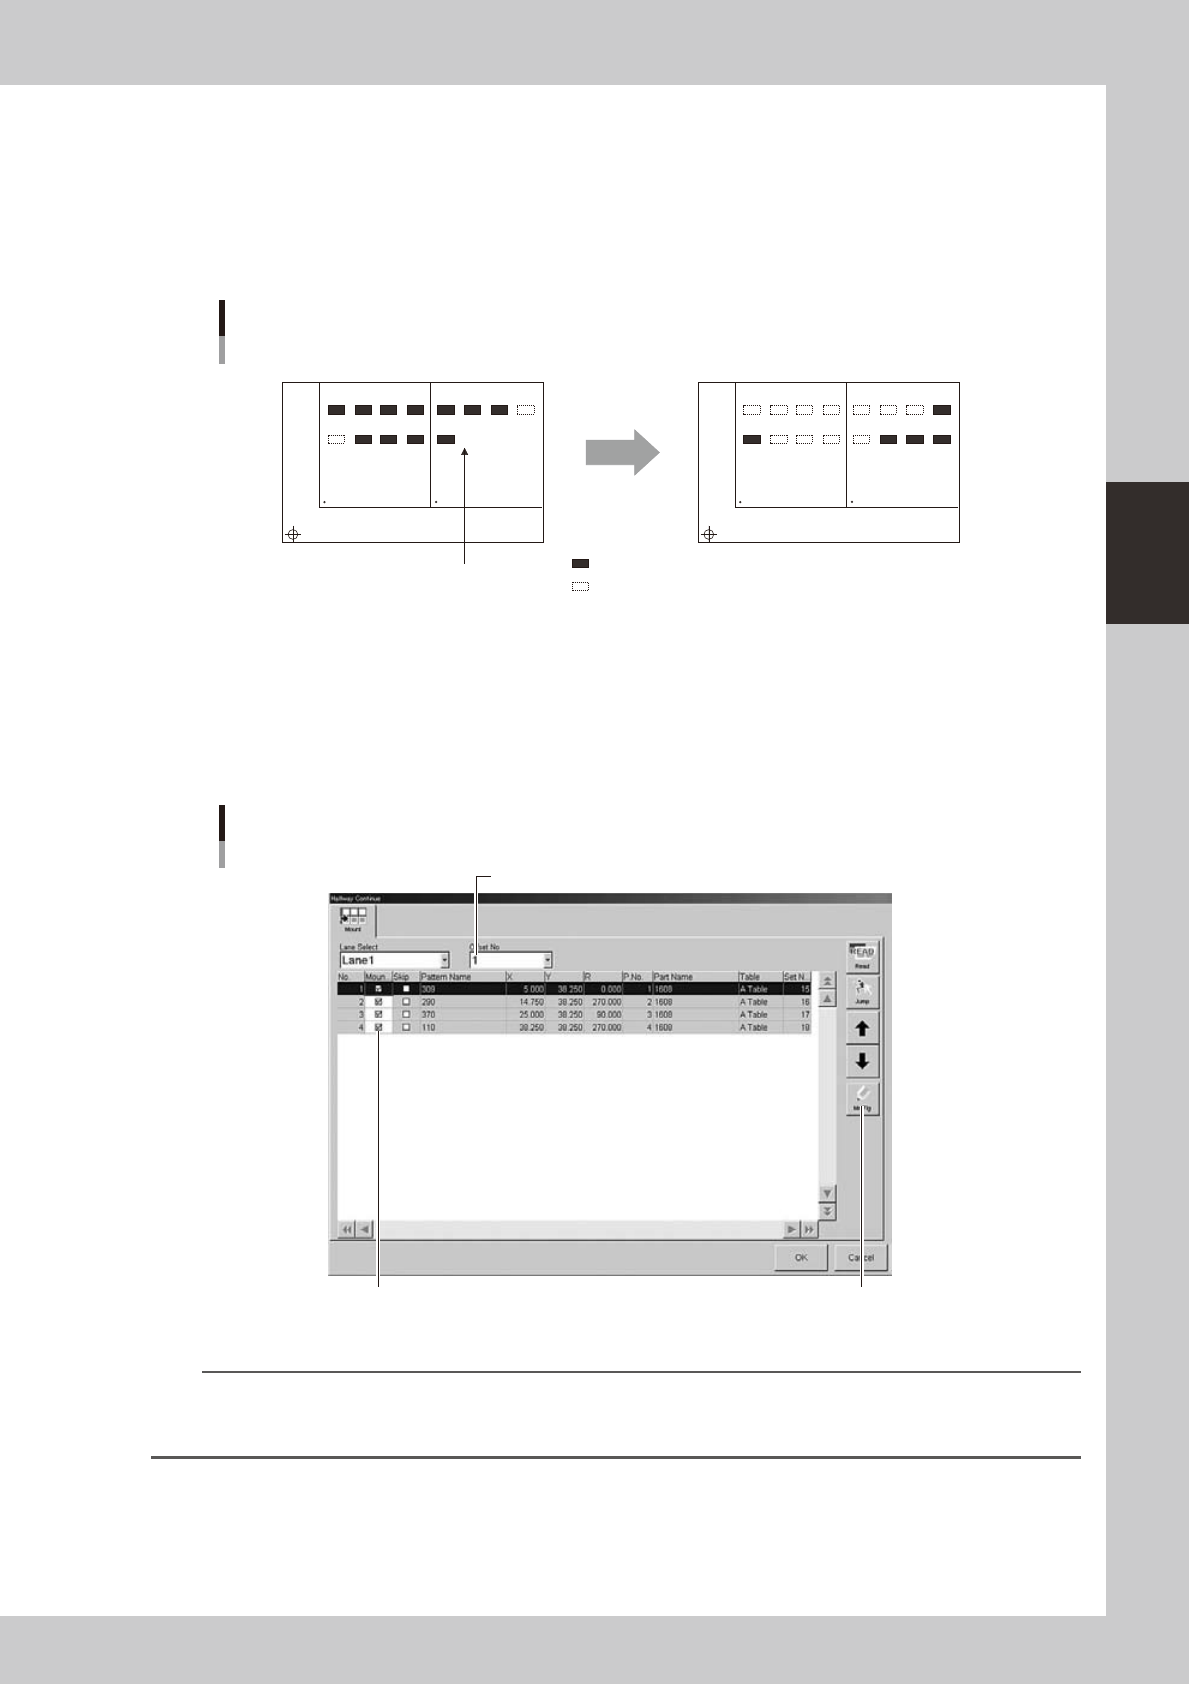
1.1.1 Loading the saved data
When you have reset automatic operation while component mounting on a board was in progress, the machine
automatically saves the operation data at the time the operation was reset. That operation data can be reloaded
by pressing the [Read] button on the "Halfway Continue" dialog box. Then you can resume automatic operation
to mount components from the stopped point. Since the saved operation data includes error information,
components will be mounted at the points where for some reason the machine failed to mount components.
Automatic operation restarts
after loading saved data.
1
5
BLOCK NO.1
Resuming component mounting
BLOCK NO.2
2
6
3
7
4
8
1
5
2
6
3
7
4
8
1
5
BLOCK NO.1 BLOCK NO.2
2
6
3
7
4
8
1
5
2
6
3
7
4
8
: mounted
: not mounted
Reset
23301-L4-00
1.1.2 Editing mount flags
The "Halfway Continue" dialog box also allows you to mount components at specific mounting points by
specifying the mount data numbers. When you have paused and reset operation data while component
mounting was in progress, you can reload that operation data by pressing the [Read] button and then edit each
mounting point as necessary by using the [MntFlg] button.
Editing mount flags
Example of Dual-lane
Offset No. selection box
Mounted flag (checkmark) [MntFlg] button
24305-L4-00
n
NOTE
When the offset function for multi-board panels is used, component mount data for each block can be edited by
selecting the offset No. Note that this function can be used just for the first board after the operation is resumed, with
routine mounting operation beginning from the next board.