YS24X_Ope_E.pdf - 第93页
2-18 2 asic operation n Manual I/O operation [Unit] – [I/O] screen 1 2 3 24212-L4-00 Button name Function 1 Select output display group Select the output group for display in the "Output" status list. The fol…
2-17
2
asic operation
n
Manual feeder operation
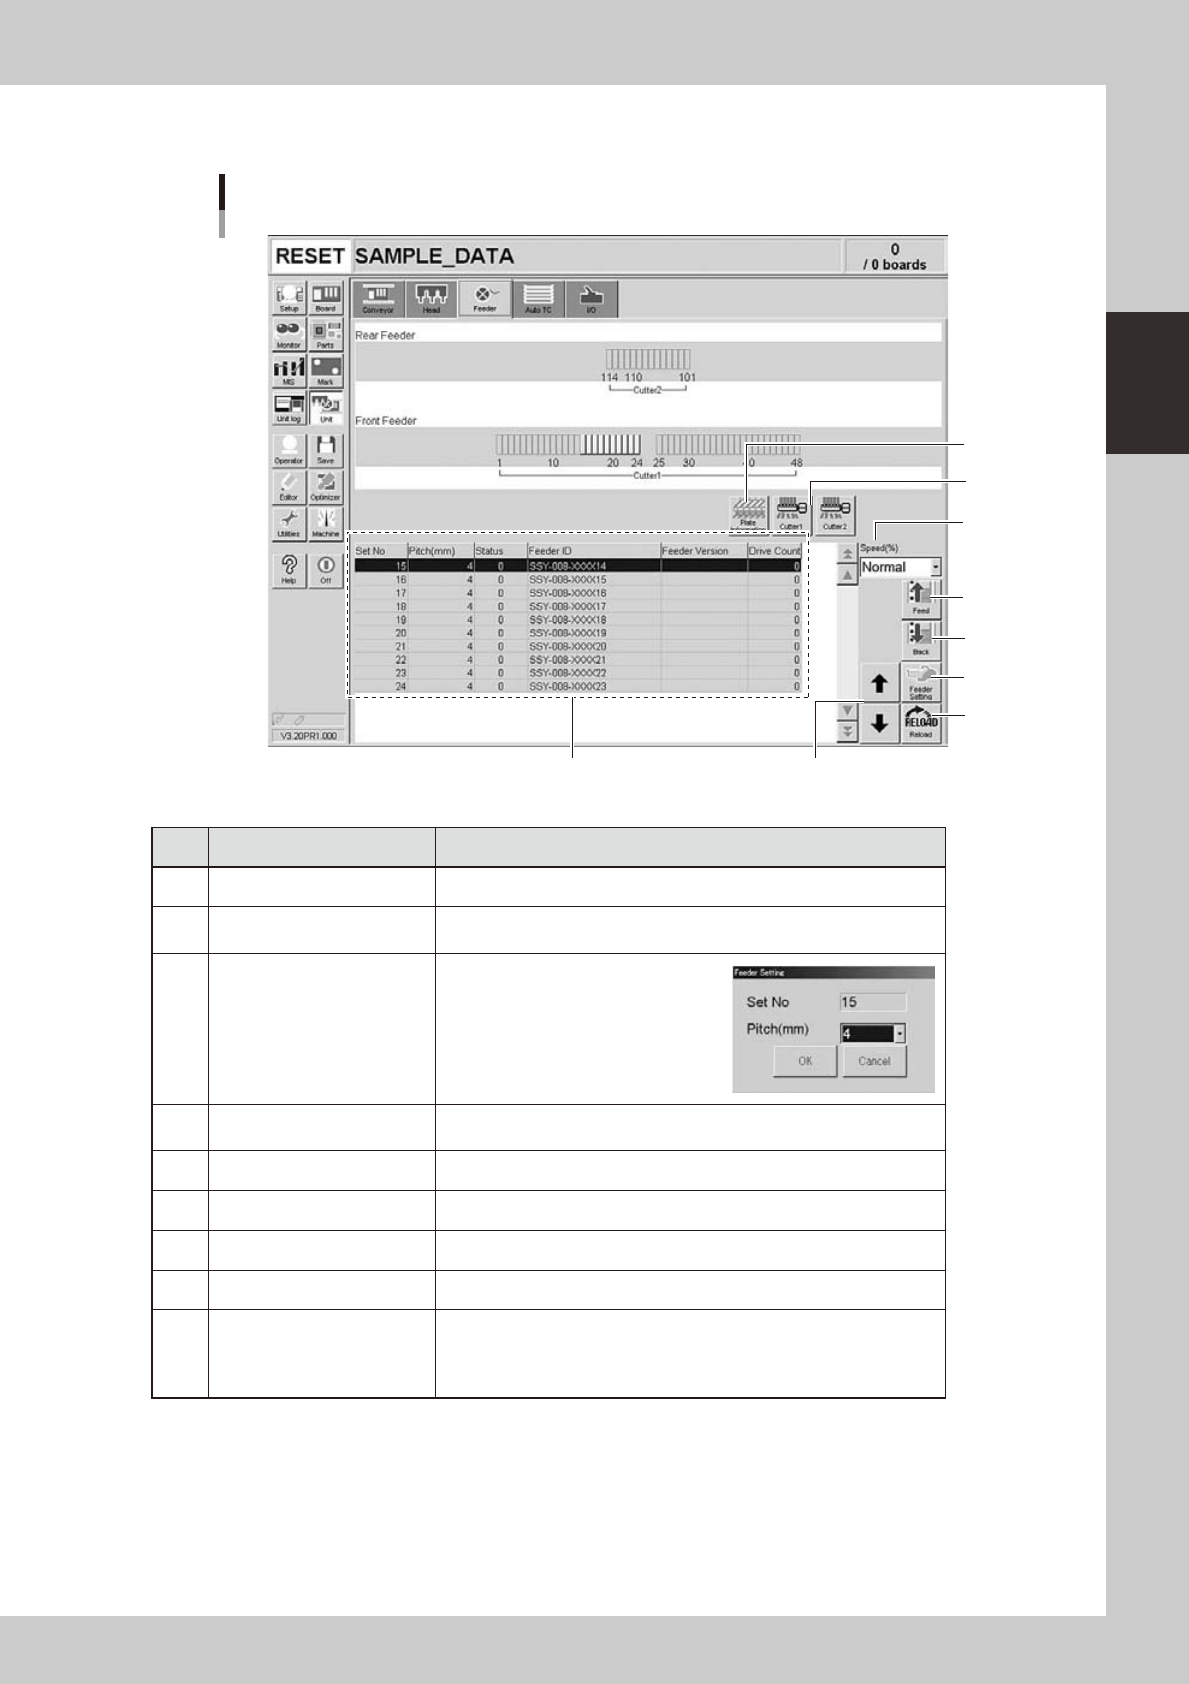
[Unit] – [Feeder] screen
1
4
7
8
2
69
5
3
24210-L4-10
Button name Function
1 Feed Each time pressing this button advances the tape at the specified pitch.
2 Back
Each time pressing this button moves the tape backward at the specified
pitch.
3 Feeder Setting
Pressing this button opens the
feeder setting dialog box that
allows selecting a feed pitch from
2 to 56mm.
Set the feed pitch and press the
[OK] button. The set feeder pitch
is stored in memory.
4 Speed
Select the feed speed from the drop-down list. The selectable speeds
are "Normal", 90, 80, … 10%.
5 Reload Clears the feeder condition (memory) and reloads the setting.
6 Up/down arrows Moves the selected row up or down.
7 Cutter Opens or closes the tape cutter (option).
8 Plate Information Allows you to check the version of the plate board in the feeder plate.
9 Feeder Information
Displays the information of the feeders set on the feeder plate.
The error code number is displayed in the "Status" column.
The details and countermeasure of each error code number are
described in the "SS feeder user's manual".

2-18
2
asic operation
n
Manual I/O operation
[Unit] – [I/O] screen
1 2
3
24212-L4-00
Button name Function
1 Select output display group
Select the output group for display in the "Output" status list. The
following groups can be selected:
• ALL
• NSTA (nozzle station)
• DUMP STATION
• CONV (conveyor)
• HEAD
• BSTA (blow station)
• OTHERS
2 Select input display group
Select the input group for display in the "Input" status list. The
following groups can be selected:
• INTLCK (interlock)
• SRV (servo origin limit)
• FDR (feeder)
• NSTA (nozzle station)
• CONV (conveyor)
• SPARE
• DUMP STATION
• BSTA (blow station)
• OTHERS
3 ON/OFF Turns the selected valve on or off.
2-19
2
asic operation
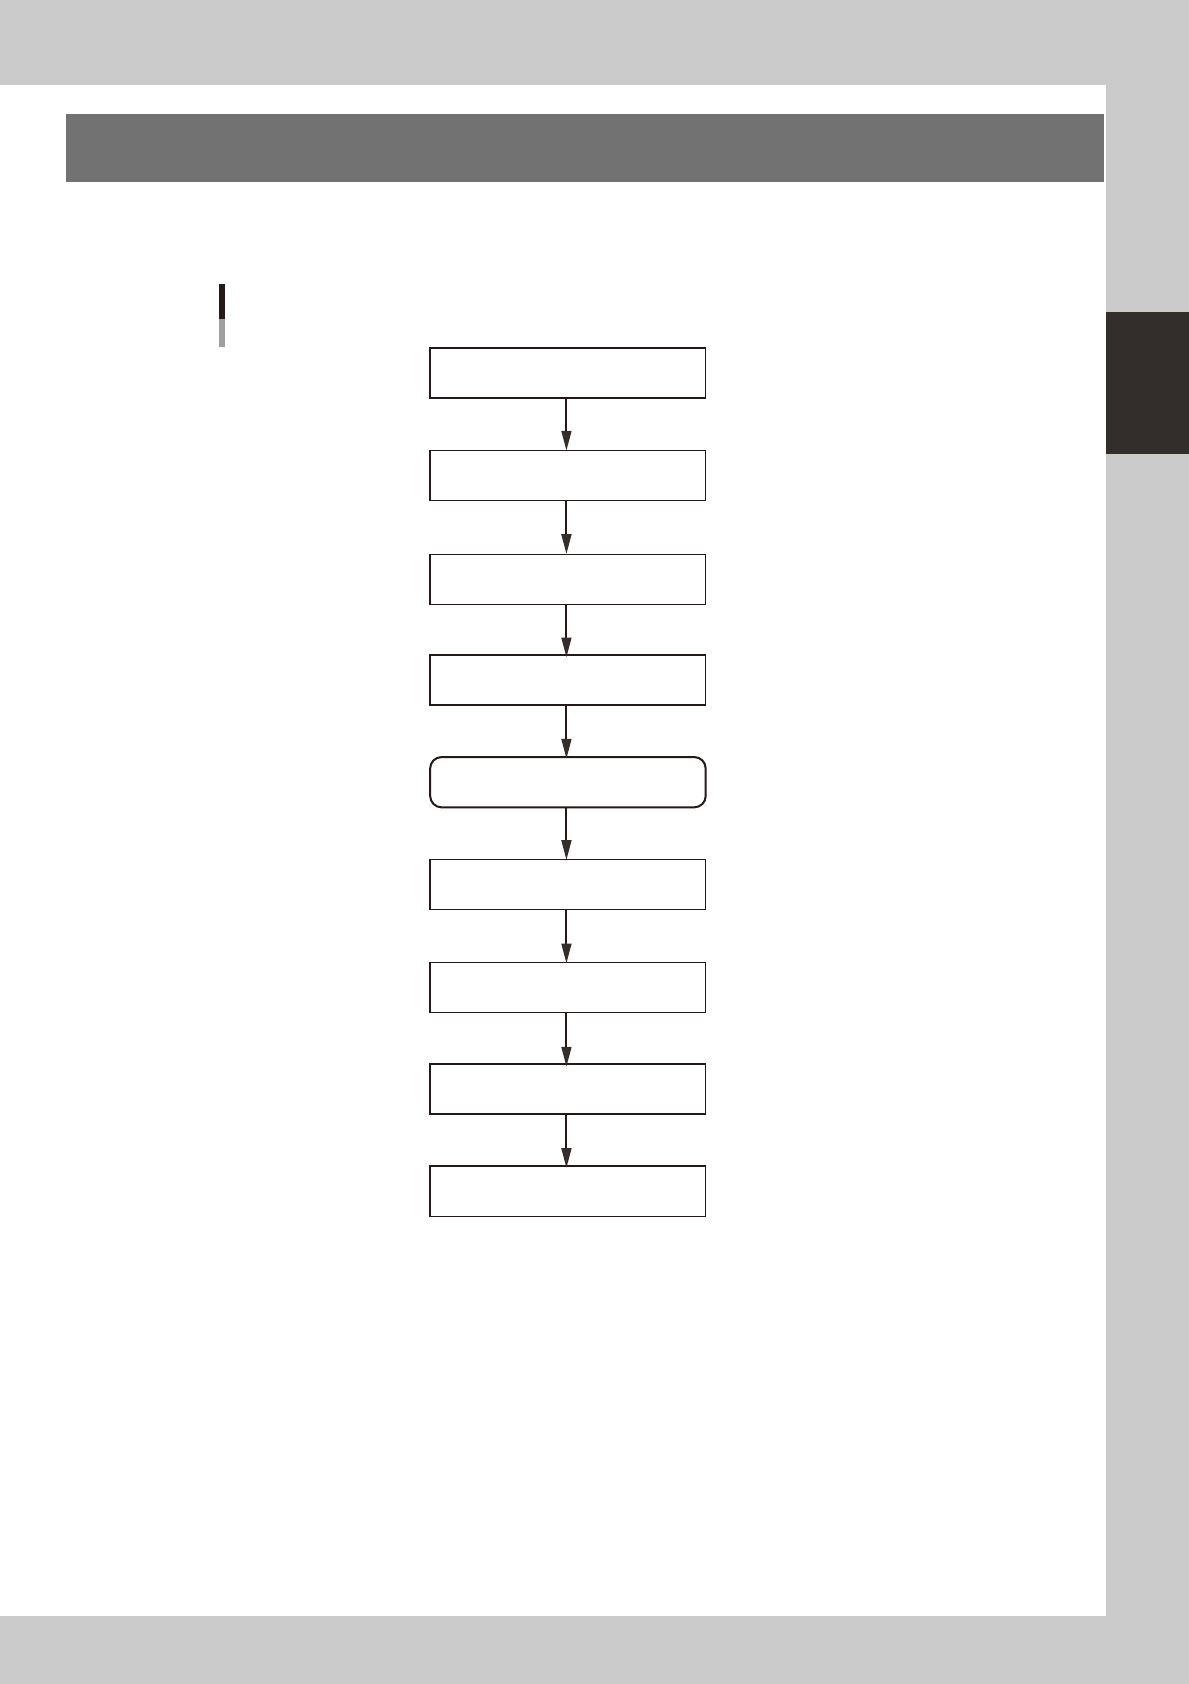
3. Starting and stopping the machine
This section explains routine procedures for starting and turning off the machine according to the flow charts
beow.
Starting and turning off machine
Production (Running)
Press emergency stop button
Return axes to origins
Turn off power switch
Check before operation
Preform return-to-origin
Specify operator
Press [Off] button on screen
Program is loaded.
Return-to-origin dialog box appears.
Move-to-origin dialog box appears.
Shut down dialog box appears.
Finish board production.
Setup screen appears.
Turn on power switch
23201-L4-00