YS24X_Ope_E.pdf - 第97页
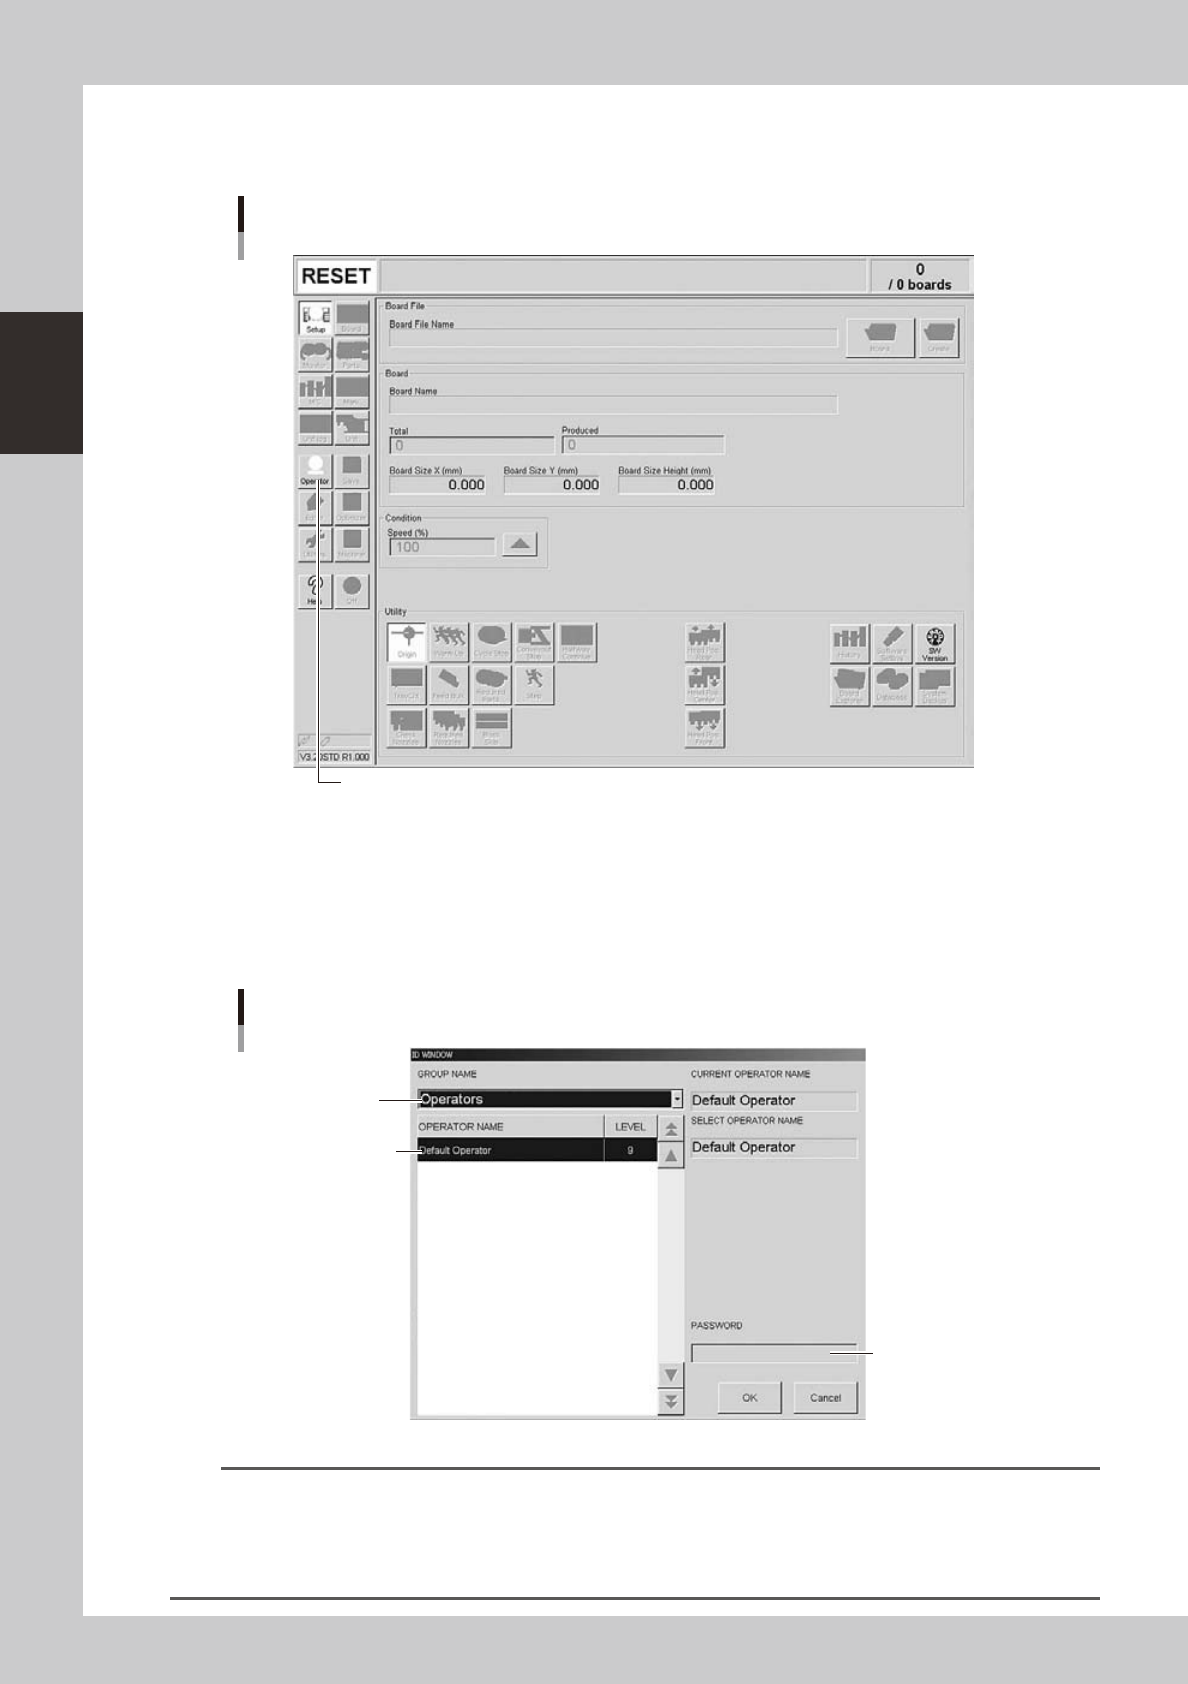
2-22 2 asic operation 3 Pr ess the [Operator] button. The ID WINDOW dialog box appears for specifying t he operator . Press the [Operator] button to open the ID WINDOW . [Operator] button 24214-L4-10 4 Specify the oper…

2-21
2
asic operation
3.2 Starting the machine
Proceed as follows to start the machine.
1
Turn the main power ON.
Turn on the main power switch at the front lower right of the machine, by turning it to the right. After the
system has started, the Initialization screen appears and the program necessary for machine operation
is loaded.
ON
OFF
Main Switch
23202-L4-00
Initialization screen
24213-L4-00
2
Perform return-to-origin.
The return-to-origin dialog box appears. Press the [READY] button and follow the instructions on the
screen.
2-22
2
asic operation
3
Press the [Operator] button.
The ID WINDOW dialog box appears for specifying the operator.
Press the [Operator] button to open the ID WINDOW.
[Operator] button
24214-L4-10
4
Specify the operator and enter the password.
As needed, the operator "Administrator" or "Operator" can be selected from the GROUP NAME list.
Select the group name and operator name, enter the password, and press the [OK] button. (Just press
the [OK] button if no password is set.) When the password is matched, the initial screen (Setup screen
before selecting a board) appears.
Select group name.
Enter password.
Select operator name.
Specifying the operator
24215-L4-00
TIP
Active menu buttons differ depending on the operation level setup. For example, when the machine is turned on with
the factory setup, the program starts up at an operation level called "Default Operator". This "Default Operator" level is
set to "Level 0" at the time of shipment to allow only basic operation items. This operation level can be changed as
needed. Operators and operation items can also be added and specified by setting the password and operation
level.
2-23
2
asic operation
3.3 Warming up the machine
After starting up the machine, we recommend warming it up for about 10 minutes in most cases. If less than
two hours has elapsed after the machine was last used, no warm-up is necessary.
1
Make pre-operation checks and then start up the machine.
For pre-operation checks and starting up the machine, see "3.1 Pre-operation check" in this chapter.
2
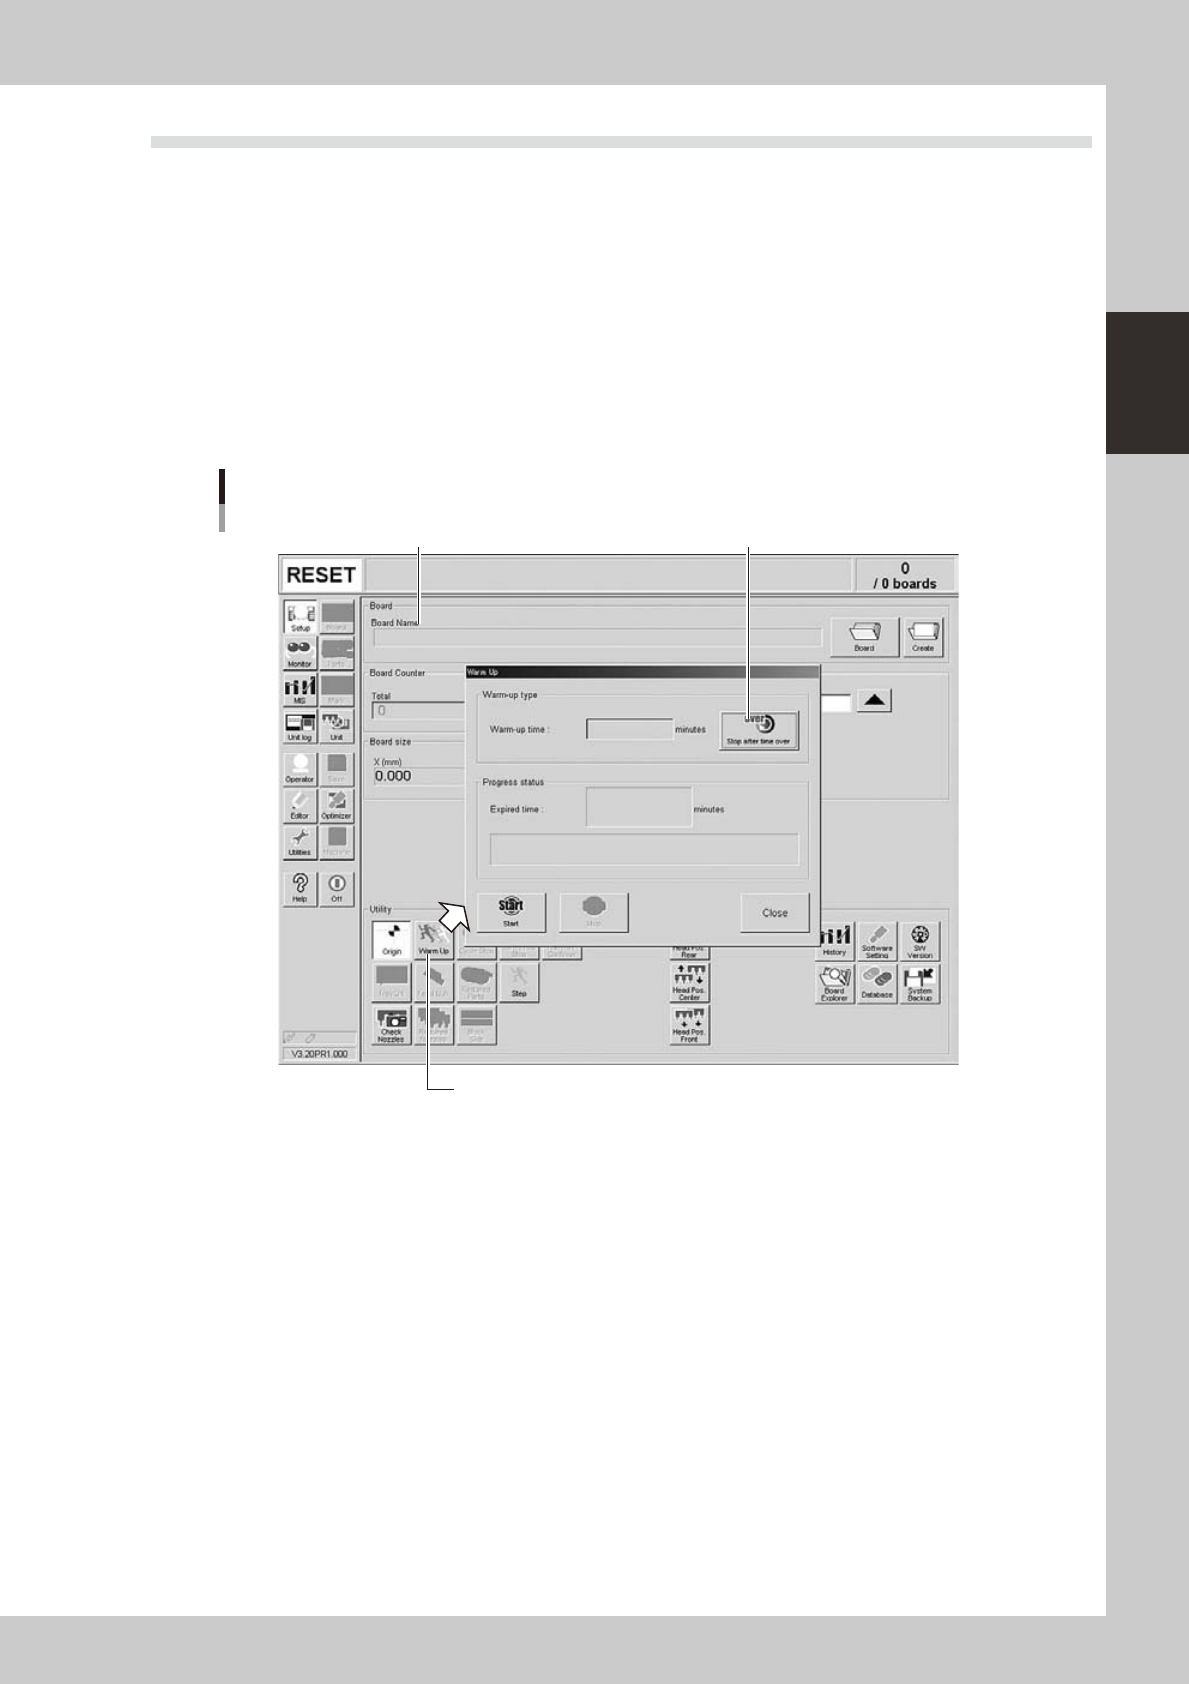
Press the [Warm Up] button on the Setup screen.
The Warm-up screen then appears.
3
Enter a warm-up time.
Press the [Stop after time over] button and enter the warm-up time. Warm-up will automatically stop
when the warm-up time you set has elapsed. Normally, about a 10-minute warm-up is sufficient.
Press [Warm Up] button to open "Warm Up" screen.
Setup screen
Warm-up time setting
Press this button to set warmup time.
24216-L4-00