Printer 600 Machine Programming.pdf - 第36页
0$&+,1( 352*5$00 ,1* 67$*(& '(',& $7('722/ ,1* 1.36 User Manual Software Ve rsion 07SP04 display ed. 16. Select Open Cover (F2). 17. Either: a. Open the front prin thead cover . or b. Ra…
0$&+,1(352*5$00,1*
67$*(&'(',&$7('722/,1*
Software Version 07SP04 User Manual 1.35
cleaner are moved to the rear.
The Change Tooling Parameters window is displayed:
NOTE
If the remote board stop is fitted the Board Stop X and Board Stop Y
parameters are replaced by Remote Board Stop X.
9. Setting up the board stop position is automatically done using the board
dimensions previously set in the product file. If they need adjustment to re-
position the board stop for any reason, ie any routing on the board edge or
a badly positioned image on the stencil, this can be done now. If adjustment
is necessary continue with Step 9. If adjustment is not necessary go to Step
14.
10.Select Adjust (F1).
11.Use the Next and Previous keys (F4 - F5) to highlight each parameter.
12.Use the Incr. and Decr. keys (F6 - F7), or the forward slash key (/) on the
keyboard, to change the parameter value.
13.Select Save (F2). The message ‘Saving fiducial data - Please wait Board
data file saved’ is displayed.
14.Select Exit (F8).
15.Select Full Width (F5). The message ‘Checking for a board on the belts’
is displayed. Whilst the rear rail is moving the message ‘Rail Moving...’ is
Mode
Load
Data
Edit
Data
Setup
Squeegee
Change
Screen
Change
Tooling
Change
Language
Exit
Change Tooling Parameters
BOARD WIDTH
BOARD STOP X
BOARD STOP Y
UNDER CLEARANCE
216.0
125.0
142.6
19.0
mm
mm
mm
mm
Adjust
Open
Cover
Home
Cleaner
Board
Stop
Full
Width
Load
Width
Generic
Tool ing
Exit
Save Next Previous Incr. Decr. Exit
Save Next Previous Incr. Decr. Exit
Save Next Previous Incr. Decr. Exit
Save Next Previous Incr. Decr. Exit
0$&+,1(352*5$00,1*
67$*(&'(',&$7('722/,1*
1.36 User Manual Software Version 07SP04
displayed.
16.Select Open Cover (F2).
17.Either:
a. Open the front printhead cover.
or
b. Raise the printhead shutter and lower the drop down panel.
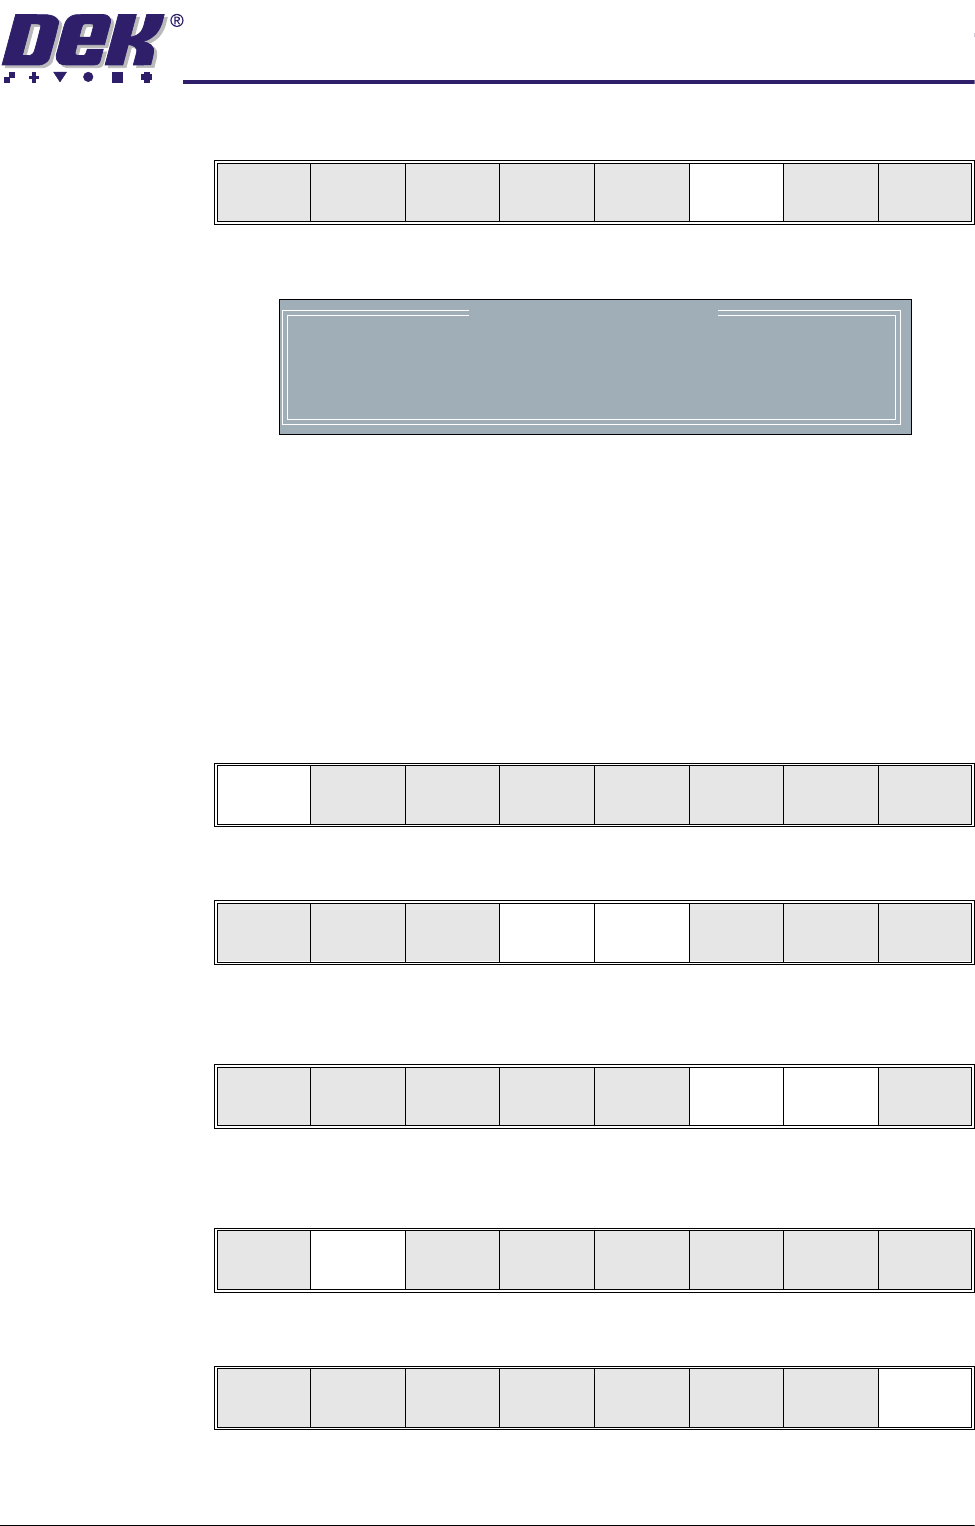
18.Fit the tooling tower to the manual tooling plate. Ensure the dowels on the
front edge of the tooling tower base are correctly seated in the holes in the
front edge of the manual tooling plate.
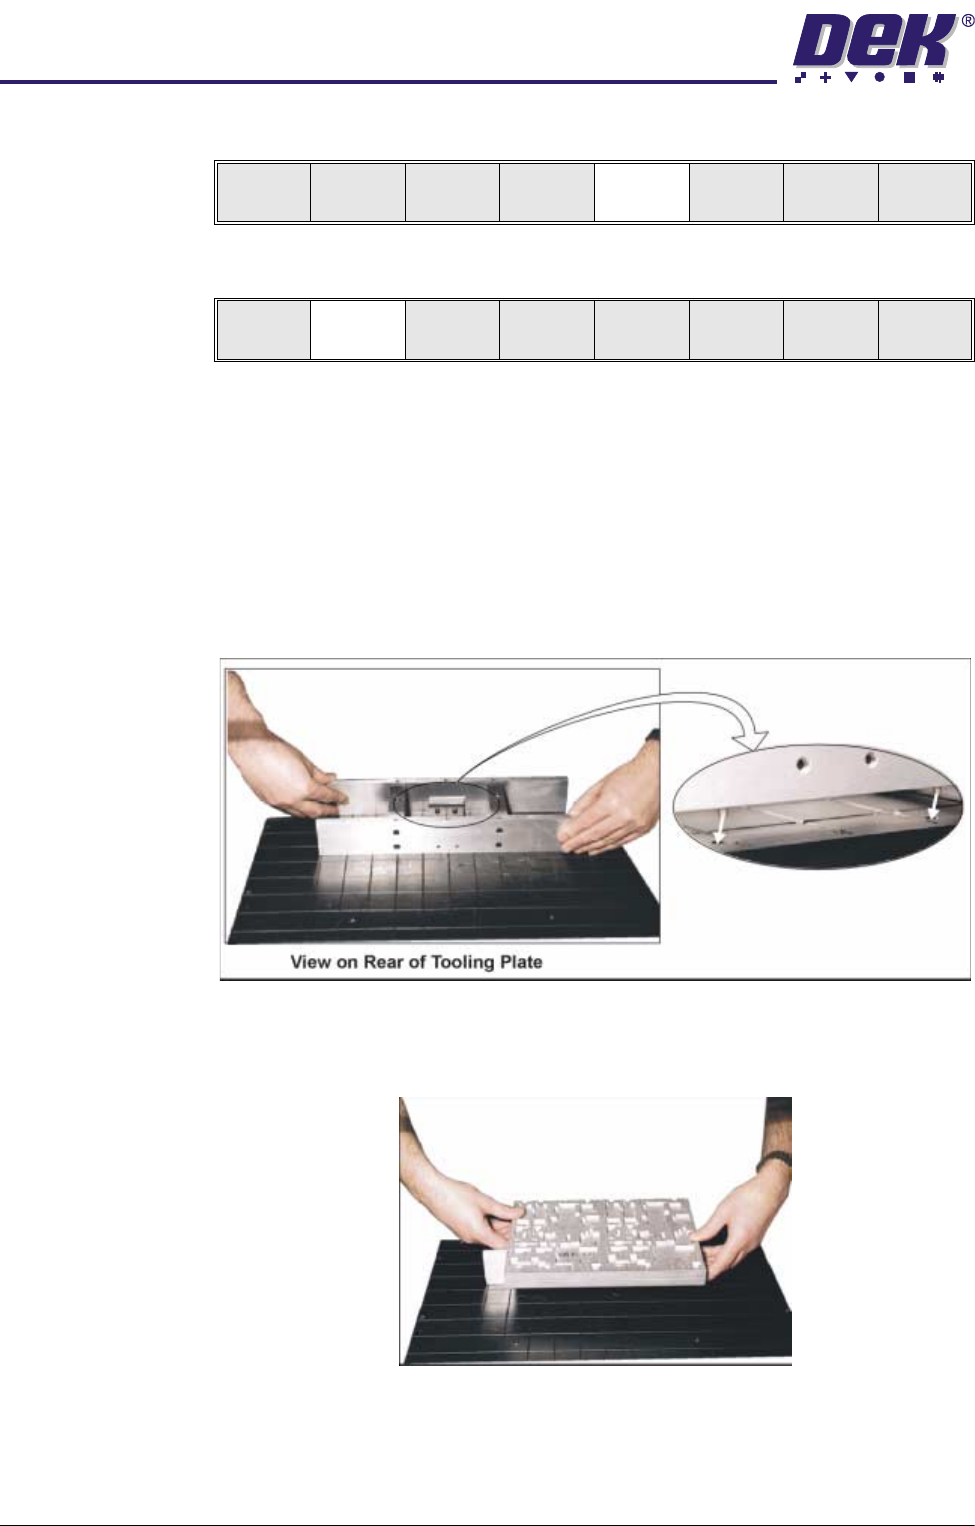
19.Verify the plate assembly orientation and fit the assembly to the tooling
tower. Ensure the dowels of the plate assembly are correctly seated in the
holes in the tooling tower.
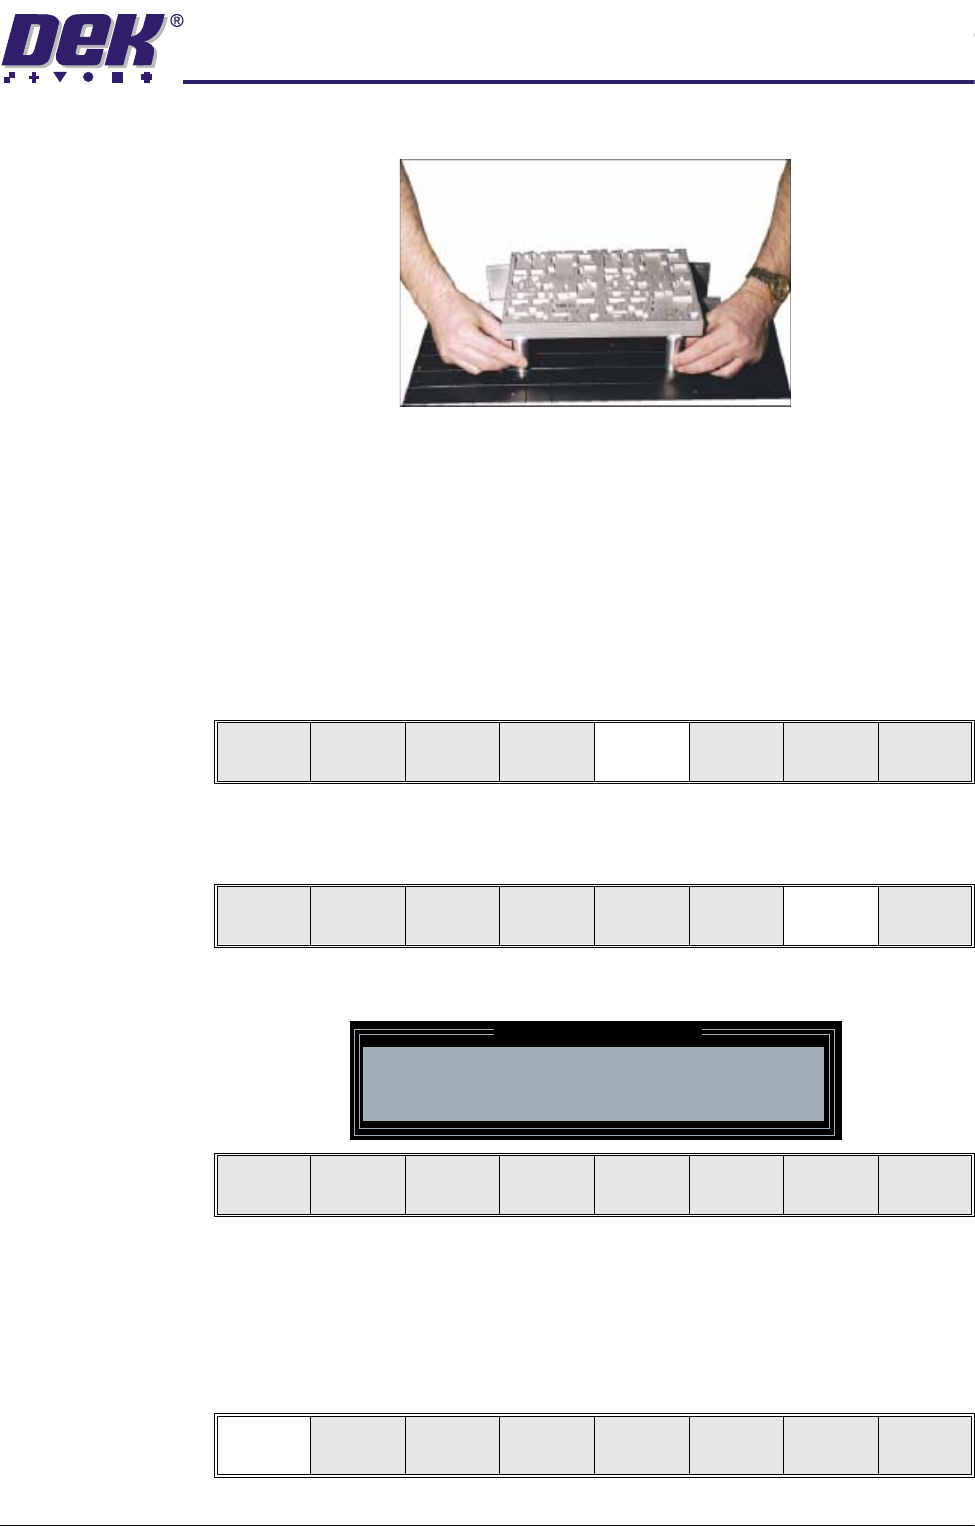
20.If required, slide additional magnetic pins beneath the plate assembly to fully
Adjust
Open
Cover
Home
Cleaner
Board
Stop
Full
Width
Load
Width
Generic
Tool ing
Exit
Adjust
Open
Cover
Home
Cleaner
Board
Stop
Board
Width
Load
Width
Generic
Tool ing
Exit
0$&+,1(352*5$00,1*
67$*(&'(',&$7('722/,1*
Software Version 07SP04 User Manual 1.37
support it when printing wide boards.
21.Either:
a. Close the front printhead cover.
or
b. Raise the drop down panel and lower the printhead shutter.
22.Press the System button.
23.Select Board Width (F5). The message ‘Checking for a board on the
belts’ is displayed. Whilst the rear rail is moving the message ‘Rail
Moving...’ is displayed.
24.Select Generic Tooling (F7). The print carriage moves to the front of the
machine.
The following window and menu bar is displayed:
NOTE
If contaminated squeegees are fitted, these should be replaced at this point.
25.Select Continue (F1). Cleaner moves to the Home position and the print
carriage moves to the rear of the machine. The message ‘Table at Home
Height’ is displayed.
Adjust
Open
Cover
Hpme
Cleaner
Board
Stop
Board
Width
Load
Width
Generic
Tool ing
Exit
Adjust
Open
Cover
Home
Cleaner
Board
Stop
Full
Width
Load
Width
Generic
Tooling
Exit
Generic Tooling Warning
WARNING Paste may drip into the machine
Remove Squeegees NOW
Continue
Open
Cover
Exit
Continue
Open
Cover
Exit