Printer 600 Machine Programming.pdf - 第76页
0$&+,1( 352*5$00 ,1* 67$*( 9,6,216 <67(06 (783 1.76 User Manual Software Ve rsion 07SP04 successful the camera can be return ed to its ori gin. Re-check the fiduci al coordinat es set in the product f ile.…
0$&+,1(352*5$00,1*
67$*(9,6,216<67(06(783
Software Version 07SP04 User Manual 1.75
4. Select Run (F1).
5. Select Auto Board (F1).
6. Select Step (F1).
7. Select Step (F1).
The board fiducial/select mark should now be visible on the vision data
window.
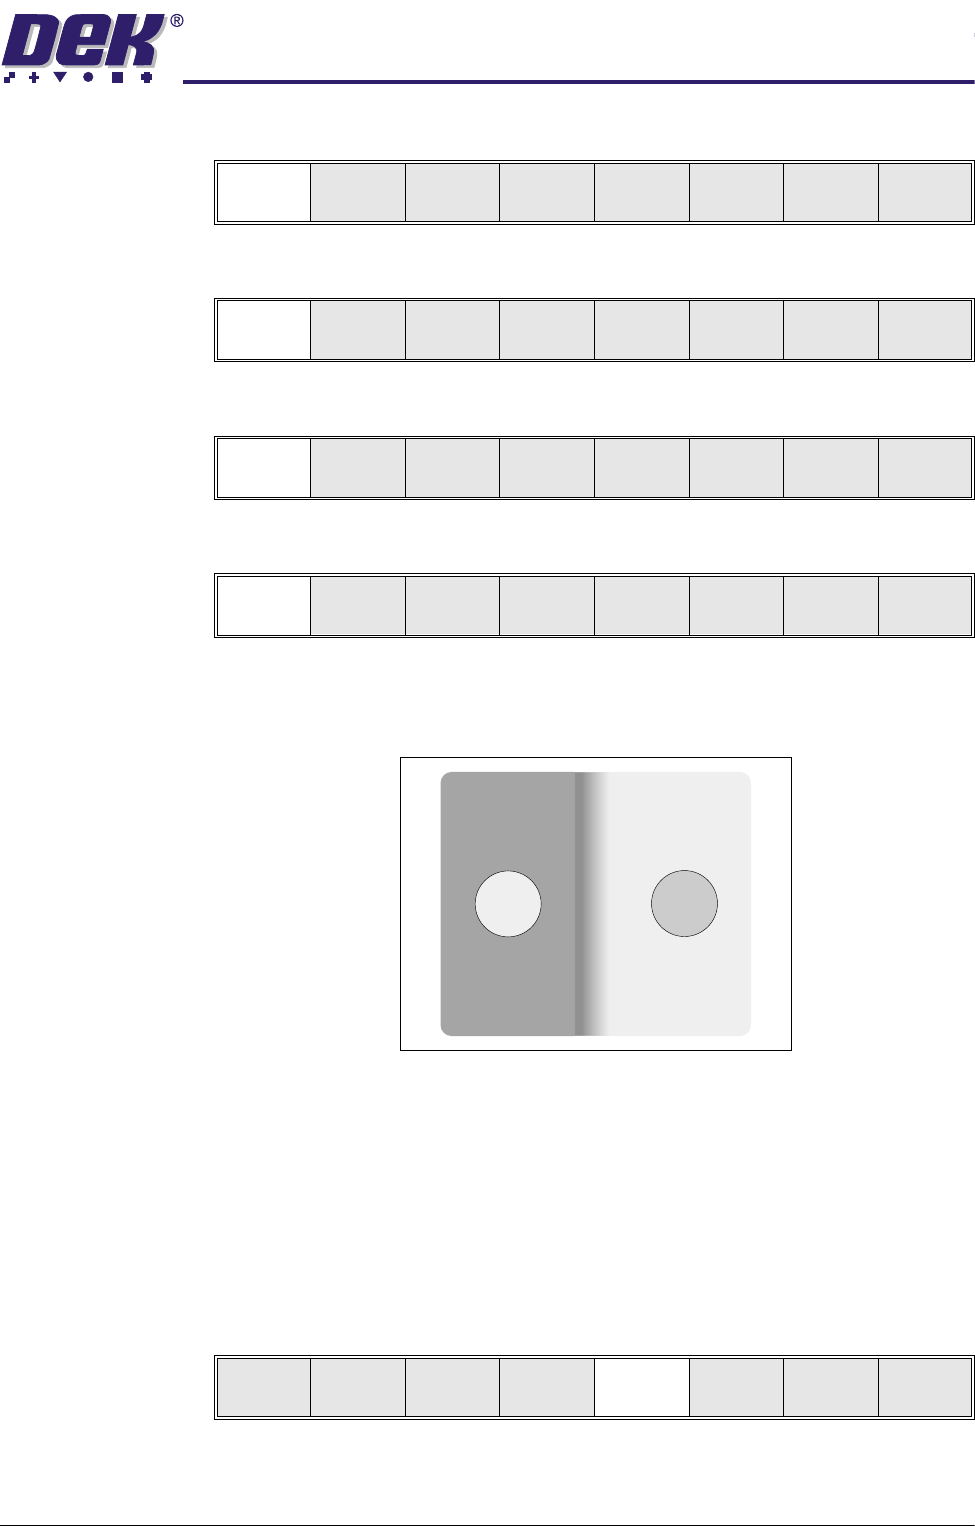
If selective print/pass through is enabled, the image on the left hand side of
the monitor is the board select mark. The right hand side of the monitor
shows the corresponding position on the stencil, which is a mirror image of
the board without the select mark. While the select mark is being setup and
the menu bar is as Step 8, the message ‘The form of this fiducial will
select Print / Pass through’. is displayed.
If the fiducial is in the field of view go to Step 10. If the fiducial is not in the
field of view, continue with Step 8.
8. Select Search Step (F5).
For each press of Search Step the camera conducts an increasing spiral
search to enable the operator to locate the fiducial. If this search is not
Run
Open
Cover
Paste
Load
Clean
Screen
Adjust Setup Monitor Maint.
Auto
Board
Manual
Board
Knead
Paste
Exit
Step
Open
Cover
Inspect
Setup
Single Exit
Step
Open
Cover
Inspect
Setup
Single Exit
Step
Open
Cover
Fiducial
Setup
Adjust
Search
Step
Search
Reset
Single Exit
0$&+,1(352*5$00,1*
67$*(9,6,216<67(06(783
1.76 User Manual Software Version 07SP04
successful the camera can be returned to its origin. Re-check the fiducial
coordinates set in the product file.
9. Select Search Reset (F6). When the fiducial is located move it to the centre
of the stencil.
10.If auto fiducial setup is enabled go to Step 27, otherwise continue with Step
11.
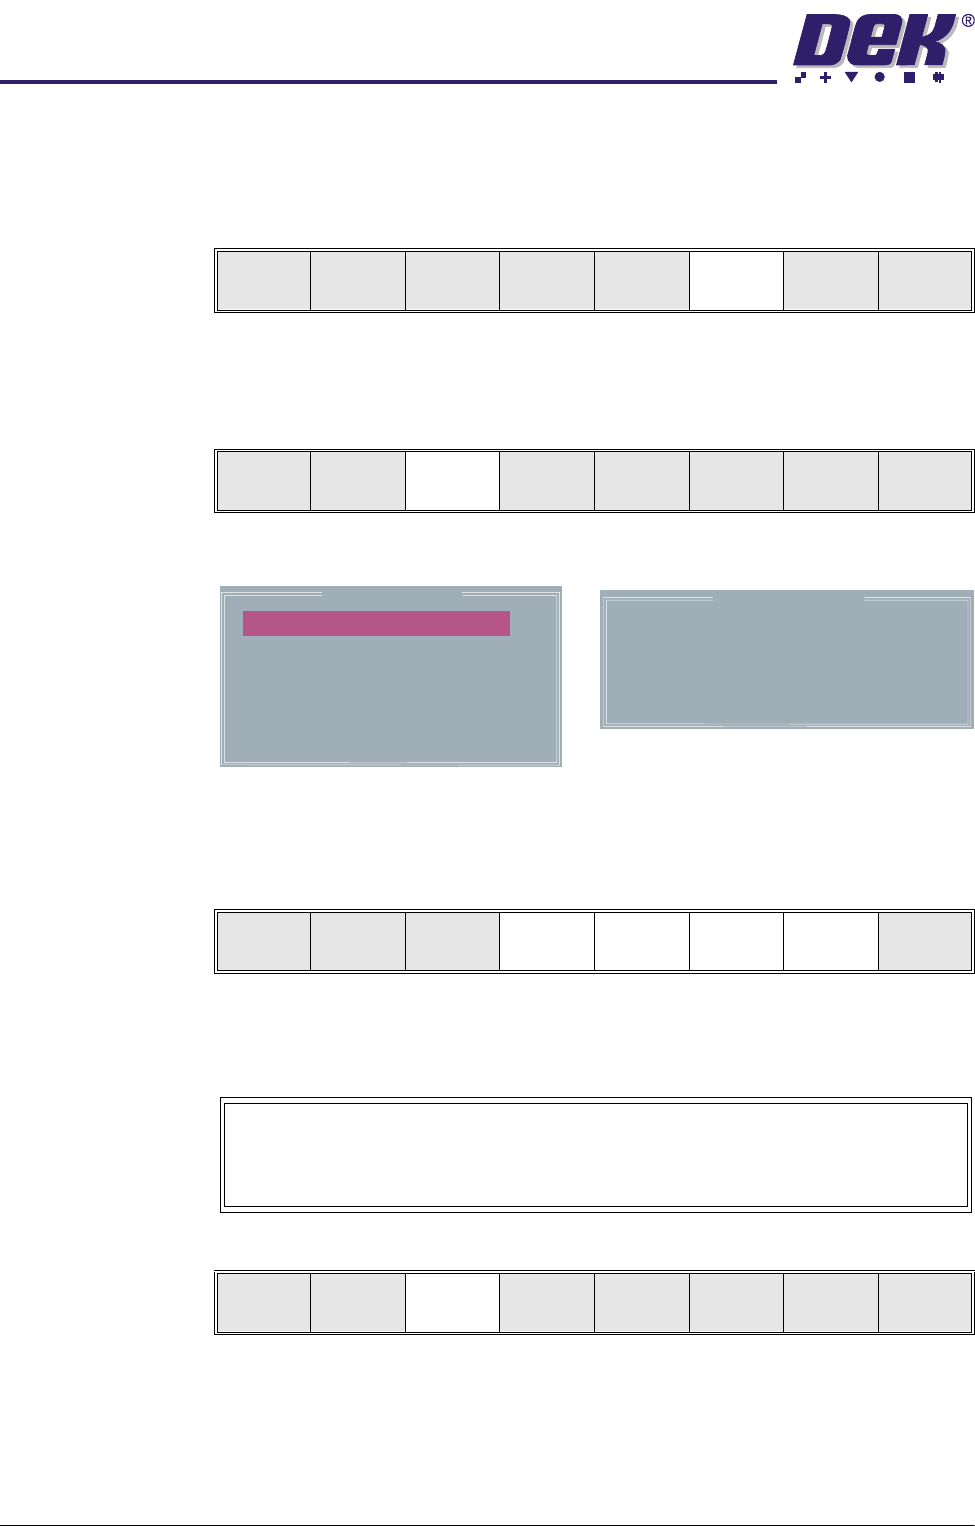
11. Select Fiducial Setup (F3).
The monitor displays the following:
12.Use the Next, Previous, Incr. and Decr. keys (F4 - F7), to highlight and
adjust each of the parameters in the left hand box, to set the fiducial type,
background, accept score and to position the fiducial in the approximate
centre of the monitor.
NOTE
Ensure no part of the fiducial is outside the box.
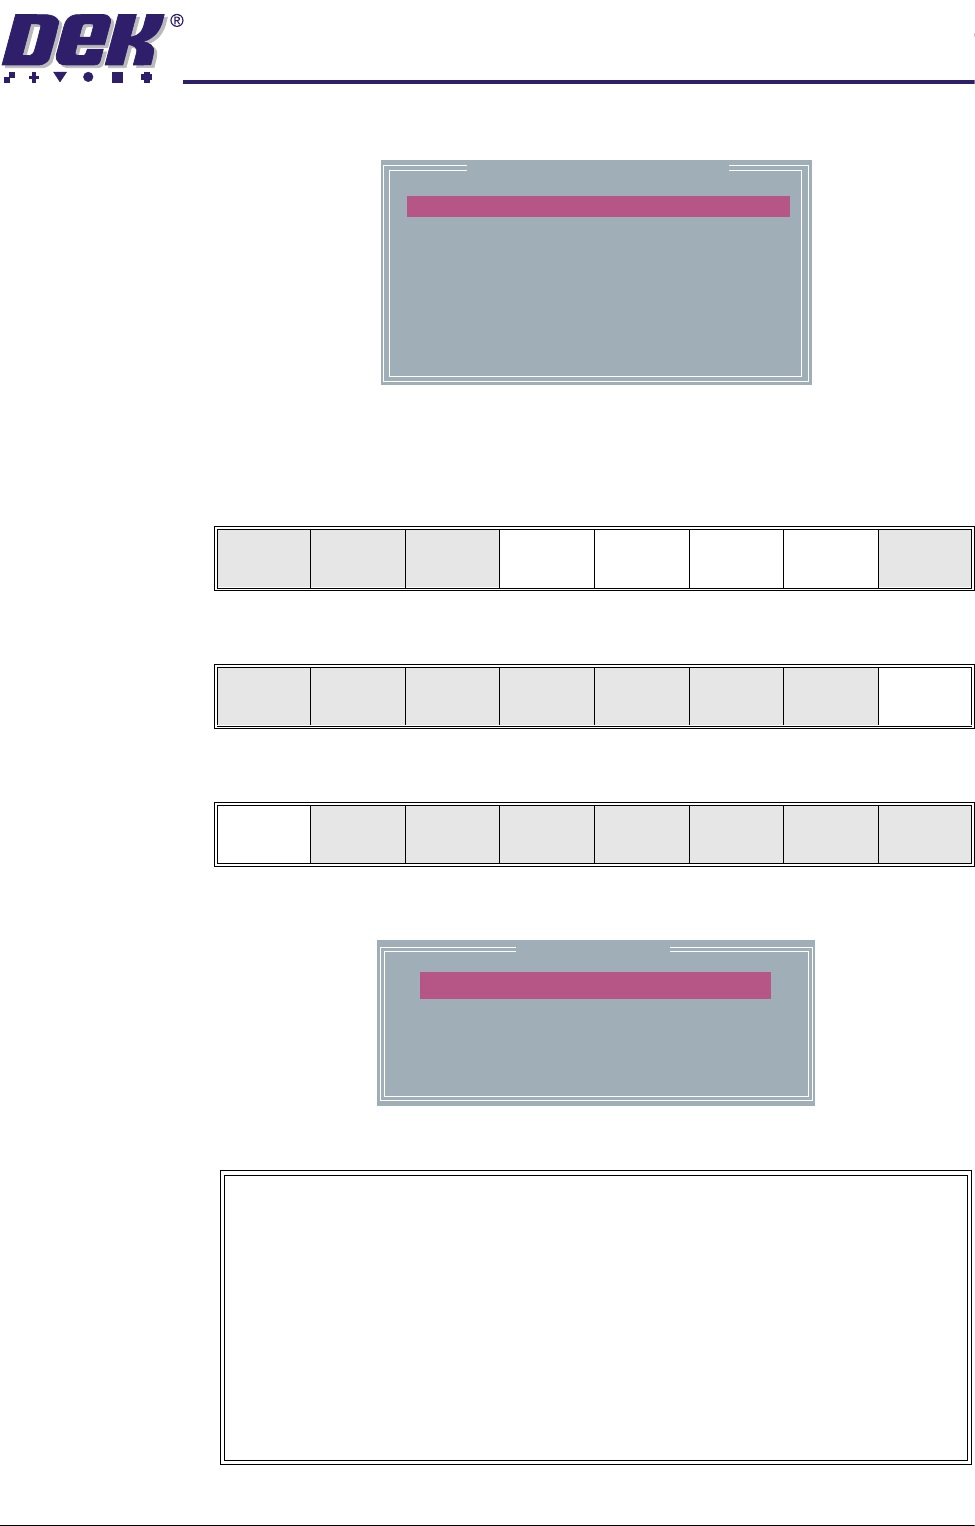
13.Select Set Light (F3).
A histogram is displayed on the monitor and the Fiducial Lighting Parame-
Step
Open
Cover
Fiducial
Setup
Adjust
Search
Step
Search
Reset
Single Exit
Step
Open
Cover
Fiducial
Setup
Adjust
Search
Step
Search
Reset
Single Exit
Background
Dark
Accept Score
Fiducial X
Fiducial Y
800
184.4
77.9
Circle Parameters
Board Fiducial 1
mm
mm
mm
Diameter
Inner Contour
Outer Contour
1.80
0.40
0.40
Fiducial Type
Circle
Learn
Fiducial
Locate
Fiducial
Set
Light
Next Previous Incr. Decr. Exit
Video Model
To setup a video model, choose Video Model from the Fiducial Type
Parameter.
Learn
Fiducial
Locate
Fiducial
Set
Light
Next Previous Incr. Decr. Exit
0$&+,1(352*5$00,1*
67$*(9,6,216<67(06(783
Software Version 07SP04 User Manual 1.77
ters window is displayed on the status page.
14.Use the Next, Previous, Incr. and Decr. keys (F4 - F7), to highlight and
adjust the lighting parameters to a level whereby the fiducials just ‘white out’,
without blooming. Default level 8 is usually adequate for the majority of
setups.
15.Select Exit (F8).
16.Select Learn Fiducial (F1).
Setup the fiducials appearing in the right hand box on the monitor.
Fiducial Lighting Parameters
SCREEN VERTICAL
SCREEN OBLIQUE
BOARD VERTICAL
BOARD OBLIQUE
WINDOW LEFT
WINDOW TOP
WINDOW WIDTH
WINDOW HEIGHT
8
8
8
8
-1.0
-1.5
2.0
2.0
Next Previous Incr. Decr. Exit
Next Previous Incr. Decr. Exit
Learn
Fiducial
Locate
Fiducial
Set
Light
Next Previous Incr. Decr. Exit
Circle Parameters
mm
mm
mm
mm
mm
xxx
xxx
xxx
xxx
xxx
Position X
Position Y
Diameter
Inner Contour
Outer Contour
Video Model
When using video model the Video Model Parameters are as follows:
Position X, Position Y, Height, Width and Video Model Type.
Video Model Type has three options as follows:
Uses a video model type best suited to the type of fiducial being learnt.
Auto
Type 1
Type 2
Uses a DEK standard video model making a synthetic model of the
feature to be learnt. Best suited to features that are not replicated in
the camera field of view. A unique pattern is ideal for this model.
Normalised Correlation, makes a note of all features and board
background in the bounding rectangle. This is ideally suited to regular
arrays such as a corner of a BGA device or a QFP pad.