00193687-06_Installation SIPLACE Explorer2.1_DE.pdf - 第28页
3 Installation des SIPLACE Explorer Installati ons- und Konfigurationsanleitung SIPLACE Explor er 3.1 Erstinstallation von SIPLACE Explorer 2.1 Ausgabe 11/2006 DE 28 3.1.1 Inst allationsvorgang Java J2SE Runtime Environm…

Installations- und Konfigurationsanleitung SIPLACE Explorer 3 Installation des SIPLACE Explorer
Ausgabe 11/2006 DE 3.1 Erstinstallation von SIPLACE Explorer 2.1
27
– MSDE 2000 (siehe Seite 53)
Installieren Sie diese Komponente, wenn Sie nicht mit MS SQL Server 2000 arbeiten
möchten. Installieren Sie MSDE 2000 auf dem Computer, auf welchem die System-
Datenbanken installiert werden sollen. 3
– Adobe Reader 6.0
Diese Komponente benötigen Sie, um die Dokumentation zu SIPLACE Explorer V.2.1 lesen
zu können. 3
– Optionen zu SIPLACE Explorer V.2.1
Die beiden Optionen Backflush V1.0 und SIPLACE Traceability Option 1.0 müssen Sie
extra bestellen und installieren. Diese sind nicht im Leistungsumfang des SIPLACE
Explorer V2.1 enthalten. 3
3 Installation des SIPLACE Explorer Installations- und Konfigurationsanleitung SIPLACE Explorer
3.1 Erstinstallation von SIPLACE Explorer 2.1 Ausgabe 11/2006 DE
28
3.1.1 Installationsvorgang Java J2SE Runtime Environment 5.0
HINWEIS
Sie müssen über Windows Administrator-Rechte verfügen, um die Installation ausführen zu
können. 3
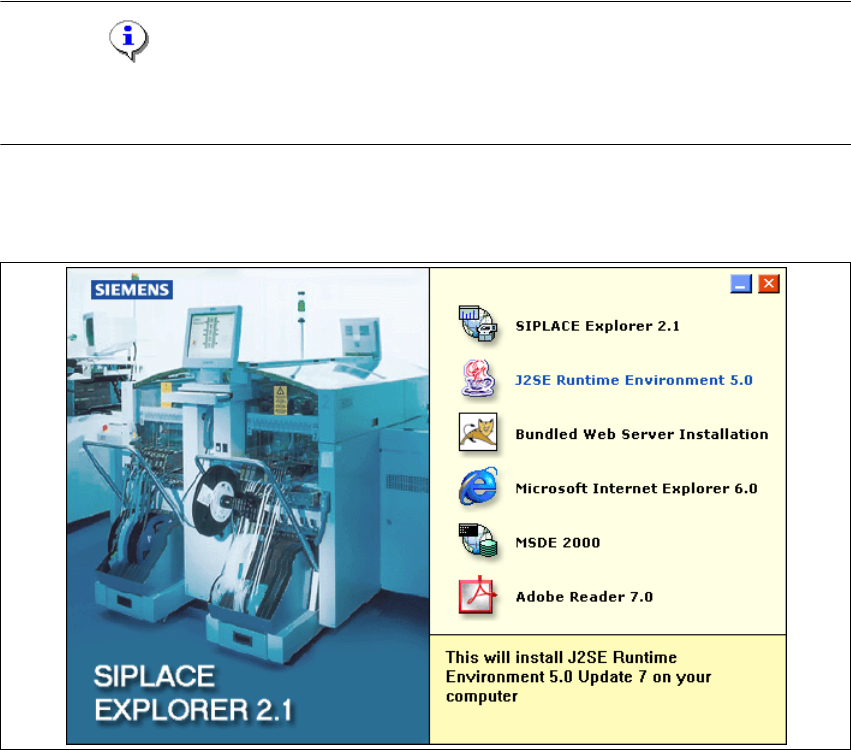
→ Legen Sie die SIPLACE Explorer CD in Ihr CD-Rom-Laufwerk ein.
→ Es erscheint der Start Screen.
3
Abb. 3 - 1 SIPLACE Explorer setup - Start Screen
→ Wählen Sie J2SE Runtime Environment 5.0 aus. Die benutzergeführte Installation von Java
J2SE wird gestartet.
Installations- und Konfigurationsanleitung SIPLACE Explorer 3 Installation des SIPLACE Explorer
Ausgabe 11/2006 DE 3.1 Erstinstallation von SIPLACE Explorer 2.1
29
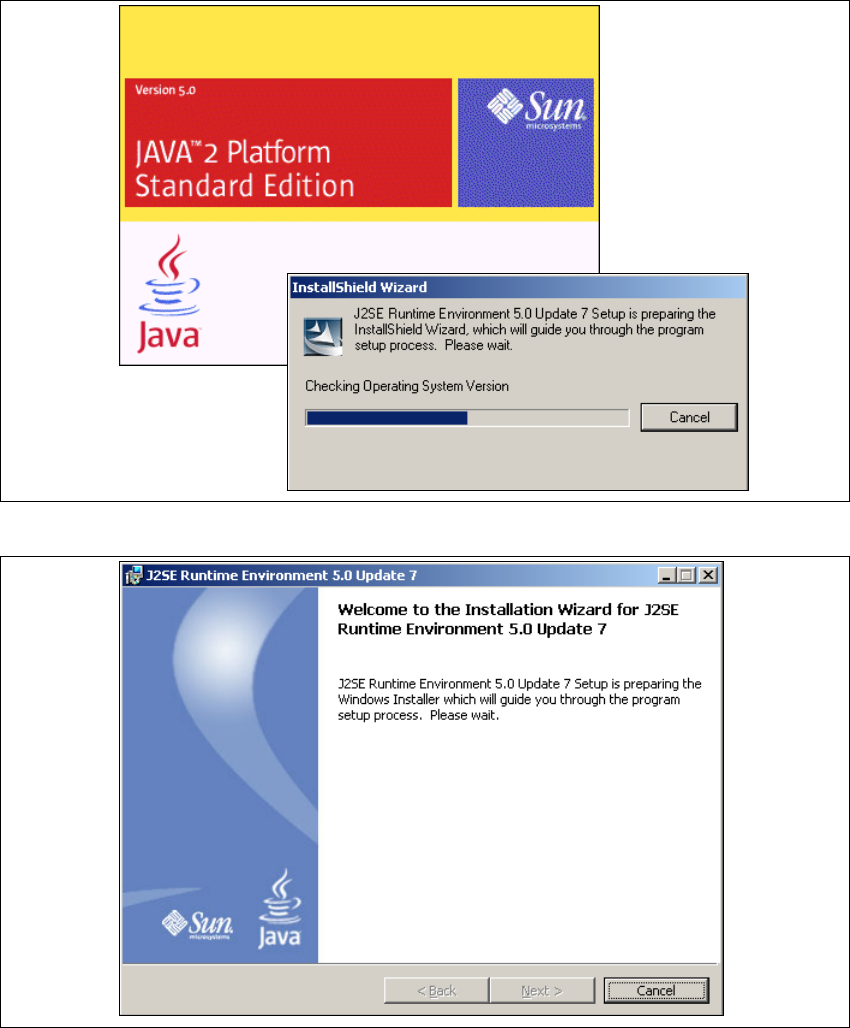
3
Abb. 3 - 2 Installshield Wizard - Vorbereitung der Installation
3
Abb. 3 - 3 Java 2SE Setup - Willkommen im SIPLACE Explorer
→ Beenden Sie alle anderen Programme und klicken Sie dann auf Next (Weiter). Das
Dialogfenster License Agreement wird geöffnet.
→ Wählen Sie die Option Custom Setup aus.