00198505-01_SM_SIPLACE_SmartFeeder_EN.pdf - 第227页
10 Repairs to SmartFeeder 24 - 104 mm X 10.1 Front sliding guide/sliding foil Service Manual SIPLACE SmartFeeder 4 - 104 mm X 11/2017 227 10 Repairs to SmartFeeder 24 - 104 mm X Feeder module Item no. Description SmartFe…
9 Repairs to SmartFeeder 12 mm X / 16 mm X
9.14 Control board
226 Service Manual SIPLACE SmartFeeder 4 - 104 mm X 11/2017
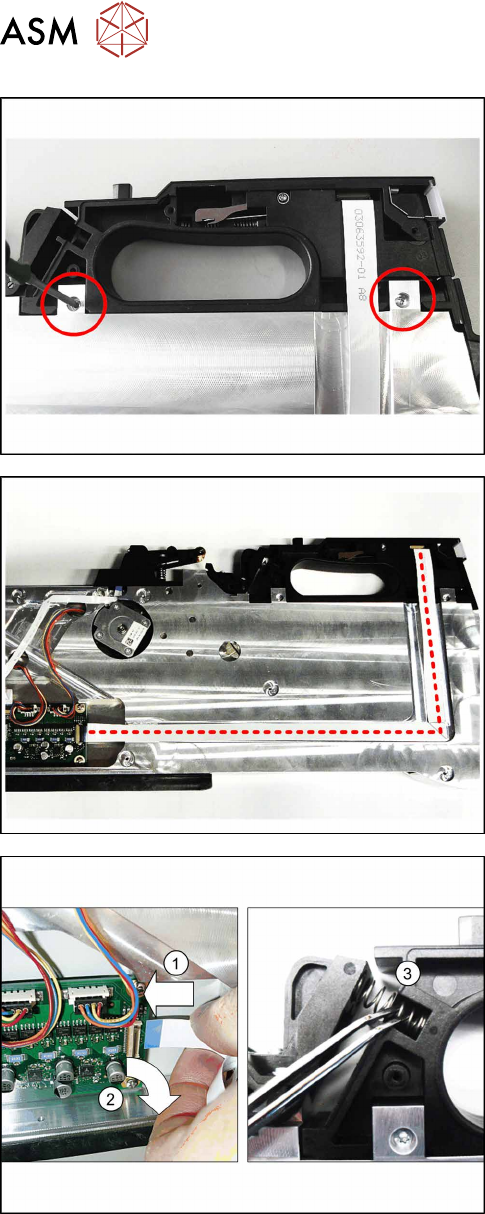
► Place the feeder module carefully down on its
right side.
► Fasten the handle using the two marked screws
with 0.6Nm.
► Fold the flat ribbon cable in exactly the same way
as the old cable.
► Run the cable as shown and press the cable into
the cable duct and onto the double-sided adhes-
ive tape. Replace the adhesive tape if necessary.
When running the cable, make sure that the blue
side points upwards at the end of the cable.
► Insert the end of the flat ribbon cable (with the
blue side pointing upwards) up to the stop in the
flat ribbon connection shown on the control
board.(1)
► Close the connection and make sure that the
cable it firmly fitted.(2)
► Fit the two compression springs into the
rocker.(3)
► Fasten the left and the right side covers (see
9.3.2 "Fitting the Left Side Cover" [}184], 9.3.4
"Fitting the Right Side Cover" [}185]).
9.14 Control board
The control board for the SmartFeeder 2x8mmX is not available as a spare part, because the cali-
bration data for the pickup position are saved in the EEPROM of this board.
A new calibration of the pickup position is therefore only possible at the final inspection point of the
feeder module production at ASM.
10 Repairs to SmartFeeder 24 - 104 mm X
10.1 Front sliding guide/sliding foil
Service Manual SIPLACE SmartFeeder 4 - 104 mm X 11/2017 227
10 Repairs to SmartFeeder 24 - 104 mm X
Feeder module Item no. Description
SmartFeeder 24mm X 00141373- xx
00141393-xx
SIPLACE SmartFeeder 24mm X
SIPLACE SmartFeeder 24mm X with splice sensor
SmartFeeder 32mm X 00141374- xx
00141394-xx
SIPLACE SmartFeeder 32mm X
SIPLACE SmartFeeder 32mm X with splice sensor
SmartFeeder 44mm X 00141375- xx
00141395-xx
SIPLACE SmartFeeder 44mm X
SIPLACE SmartFeeder 44mm X with splice sensor
SmartFeeder 56mm X 00141376- xx
00141396-xx
SIPLACE SmartFeeder 56mm X
SIPLACE SmartFeeder 56mm X with splice sensor
SmartFeeder 72mm X 00141397-xx SIPLACE SmartFeeder 72mm X with splice sensor
SmartFeeder 88mm X 00141398-xx SIPLACE SmartFeeder 88mm X with splice sensor
SmartFeeder 104mm X 00141399-xx SIPLACE SmartFeeder 104mm X with splice sensor
10.1 Front sliding guide/sliding foil
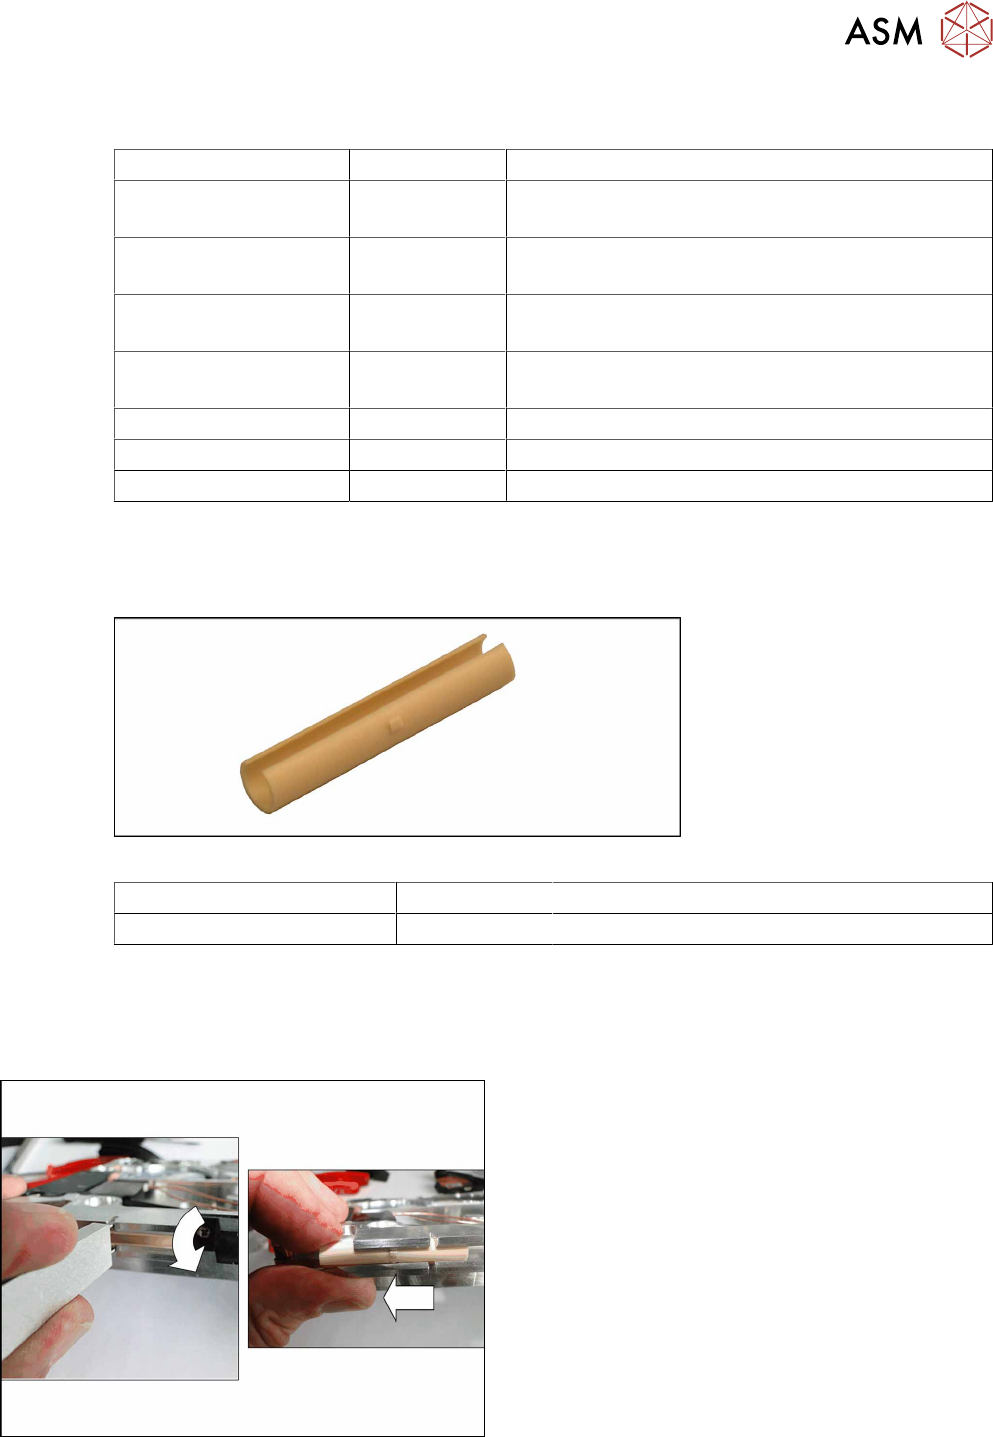
Required spare part
Fig.83: Sliding foil
Feeder module Item no. Designation
SmartFeeder 24 – 104mmX 03019604Sxx Sliding foil, X-feeder JUM-S-06LY
Required tools
●
Sliding foil remover
10.1.1 Removing the sliding foil
► Place the feeder module carefully down on its
side, onto a stable, level and clean surface.
► Place the sliding foil remover into the sliding
guide, as shown in the diagram.
► Lever the sliding foil out of the engaged position.
► Pull the sliding foil out of the sliding guide, to-
wards the front.
10 Repairs to SmartFeeder 24 - 104 mm X
10.2 Rear sliding guide
228 Service Manual SIPLACE SmartFeeder 4 - 104 mm X 11/2017
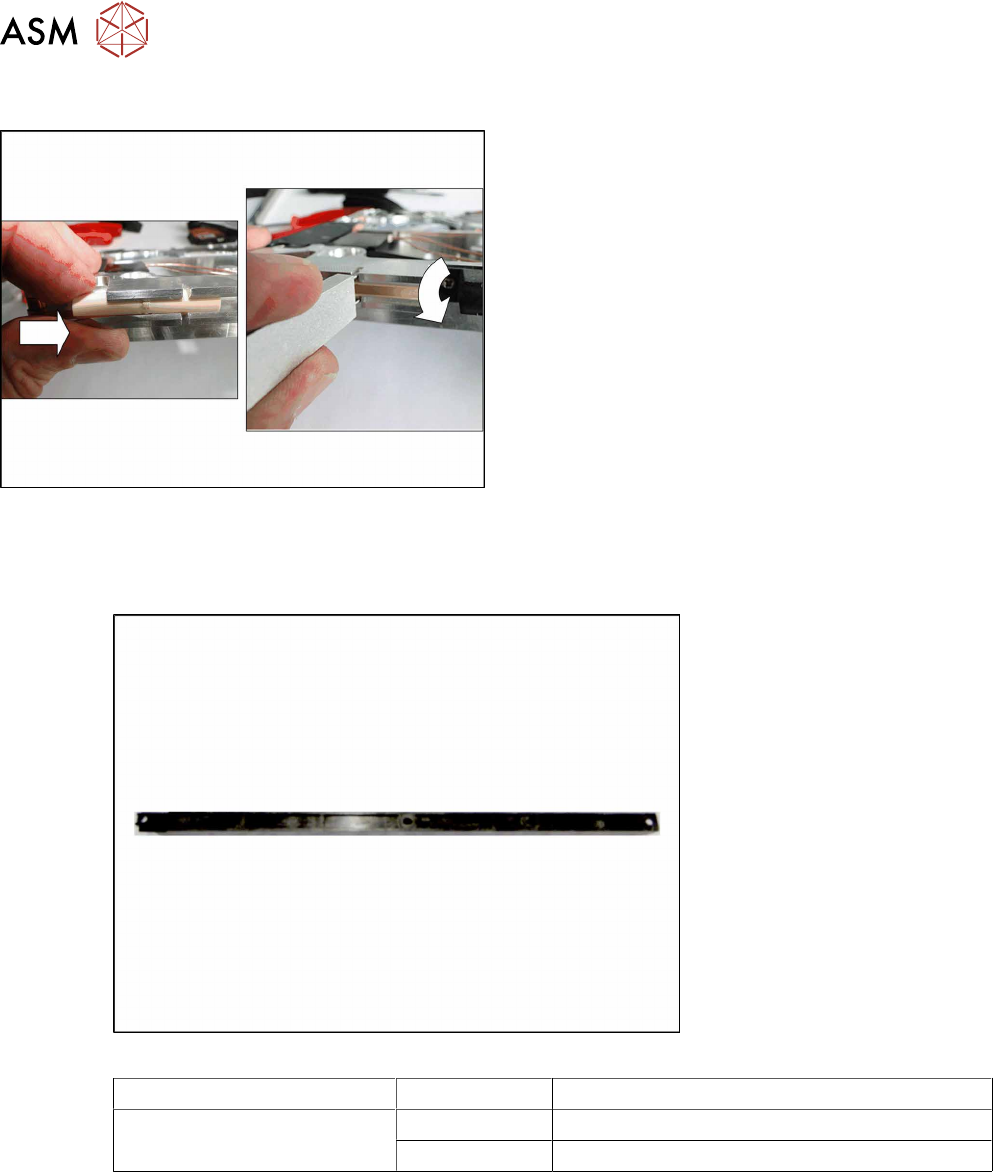
10.1.2 Fitting the sliding foil
► Press the sliding foil slightly together.
► Push the sliding foil into the sliding guide, from
the front, as far as the end stop.
► Turn the sliding foil, until the slit can be fully seen
and the sliding foil engages audibly.
10.2 Rear sliding guide
Required spare part
Fig.84: Sliding guide, back
Feeder module Item no. Designation
SmartFeeder 24 – 104mmX 03003994- xx Sliding guide / back L200
03010211-xx ISO 7045 - M2.5 x 10-A2-50-H (4x)
Required tools
●
Phillips screwdriver 0.6Nm