00198505-01_SM_SIPLACE_SmartFeeder_EN.pdf - 第133页
8 Repairs to SmartFeeder 2x8 mm X 8.1 Front sliding guide/sliding foil Service Manual SIPLACE SmartFeeder 4 - 104 mm X 11/2017 133 8 Repairs to SmartFeeder 2x8 mm X Feeder module Item no. Description SmartFeeder 2x8mmX…
7 Repairs to SmartFeeder 8 mm X
7.15 Control board
132 Service Manual SIPLACE SmartFeeder 4 - 104 mm X 11/2017
7.15.3 Performing a reference run
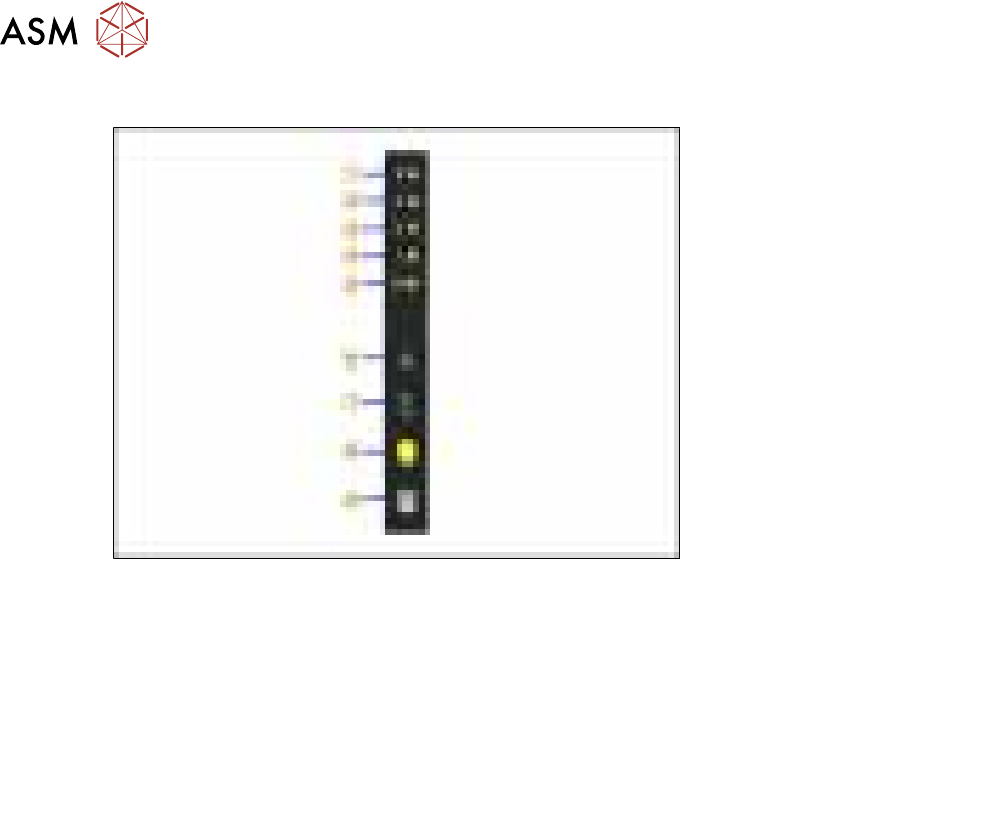
Fig.41: Control panel
1. LED 8 – 8mm pitch
(active only on SmartFeeder 8mmX)
6. FORWARDS button
2. LED 4 – 4mm pitch 7. BACKWARDS button
3. LED 2 – 2mm pitch 8. FOIL button
4. LED 1 – 1mm pitch 9. SET button
5. LED M – menu
Shines when an operator menu is active
► Place the feeder module on a single slot EDIF or on a changeover table for X feeders which is
connected to a placement machine.
► Press and hold the gray SET button(9) until the reference run is enabled.
► Press the yellow foil button three times briefly(8).
After the first press of the FOIL button, the LEDM will switch on.
After the second press, LED1 will also be switched on.
After the third press, LED2 will also be switched on.
The menu for enabling the reference run has now been selected.
► In addition to the SET button, also press the FORWARDS button(7).
LED8(1) should now flash rapidly. If LED8 and LED4(2) flash, this indicates that there is a
feeder module error present (e.g. foil is tensioned or tape drive has an error) and the refer-
ence run can not be performed.
► Release the FORWARDS button.
The reference run will start.
► Release the SET button.
The reference run will be automatically finished. The control panel will then switch over to the
pitch display.
8 Repairs to SmartFeeder 2x8 mm X
8.1 Front sliding guide/sliding foil
Service Manual SIPLACE SmartFeeder 4 - 104 mm X 11/2017 133
8 Repairs to SmartFeeder 2x8 mm X
Feeder module Item no. Description
SmartFeeder 2x8mmX 00141269-xx SIPLACE SmartFeeder 2x8 mm X
00141289-xx SIPLACE SmartFeeder 2x8mm X splice sensor
8.1 Front sliding guide/sliding foil
Required spare part
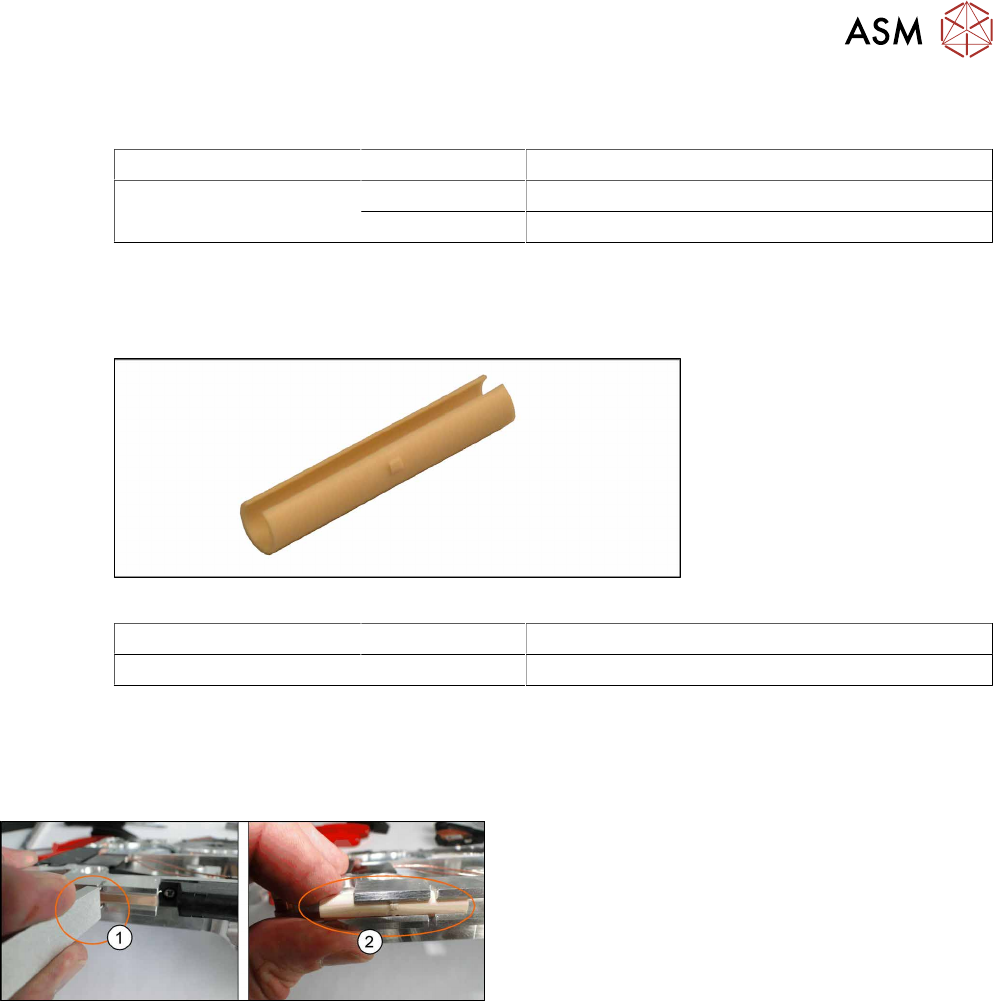
Fig.42: Sliding foil X-Feeder
Feeder module Item no. Designation
SmartFeeder 2x8mmX 03019604Sxx Front sliding guide
Required tools
●
Sliding foil remover
8.1.1 Removing the Sliding Foil
► Place the feeder on a stable, level and clean sur-
face.
► Insert the sliding foil remover into the sliding
guide.(1)
► Lever the sliding foil out of the engaged position.
► Lever the sliding foil until it has been turned by
approximately90°.
► Push the sliding foil towards the front and out of
the sliding guide.(2)
8.1.2 Fitting the Sliding Foil
► Press the sliding foil slightly together.
► Push the sliding foil from the front into the sliding guide, until it engages.
8 Repairs to SmartFeeder 2x8 mm X
8.2 Rear Sliding Guide
134 Service Manual SIPLACE SmartFeeder 4 - 104 mm X 11/2017
8.2 Rear Sliding Guide
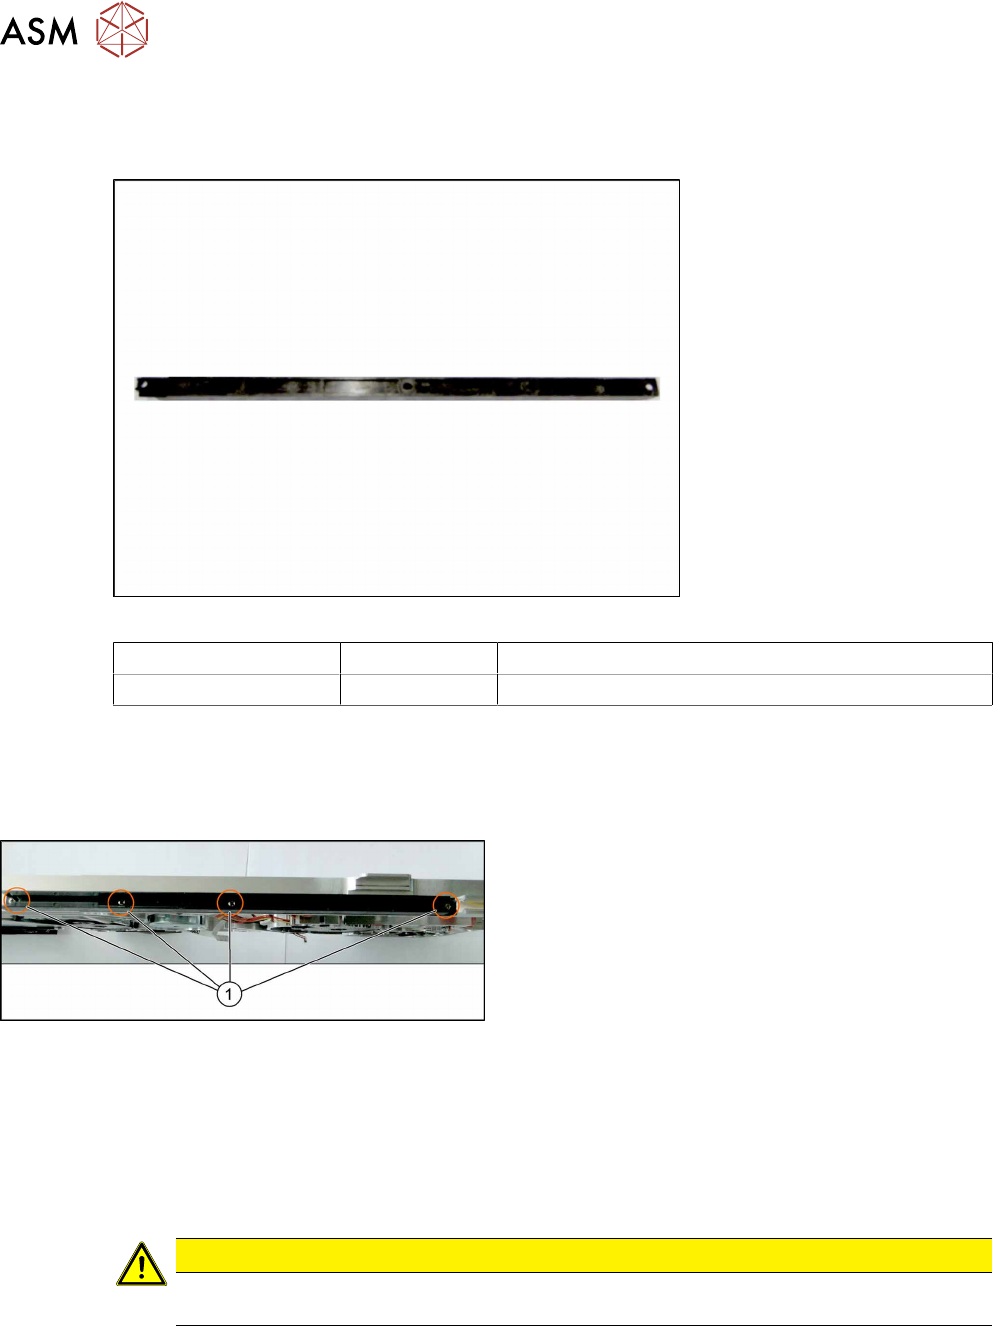
Required spare part
Fig.43: Rear sliding guide L200
Feeder module Item no. Designation
SmartFeeder 2x8mmX 03003994Sxx Rear sliding guide L200
Required tools
●
Phillips screwdriver 0.6Nm
8.2.1 Removing the Rear Sliding Guide
► Place the feeder on a stable, level and clean sur-
face.
► Loosen the 4 screws(1) on the sliding guide.
► Lift the sliding guide up at the back and pull up-
wards and off.
8.2.2 Fitting the Rear Sliding Guide
► Push the left part of the rear sliding guide as far as possible towards the front sliding guide,
and into the recess.
► Now lower the two snap tabs of the sliding guide into the openings provided on the underside
of the feeder module.
► Screw the sliding guide onto the bottom of the feeder module (M2.5x6mm).
CAUTION
► To prevent damage to the sprocket wheel, make sure that the pickup window is fitted
for this work.