00198505-01_SM_SIPLACE_SmartFeeder_EN.pdf - 第168页
8 Repairs to SmartFeeder 2x8 mm X 8.8 Foil rocker 168 Service Manual SIPLACE SmartFeeder 4 - 104 mm X 11/2017 8.8.2.3 Removing the Cable Photo Interrupter ► Place the feeder on a stable, level and clean sur- face. ► Remo…
8 Repairs to SmartFeeder 2x8 mm X
8.8 Foil rocker
Service Manual SIPLACE SmartFeeder 4 - 104 mm X 11/2017 167
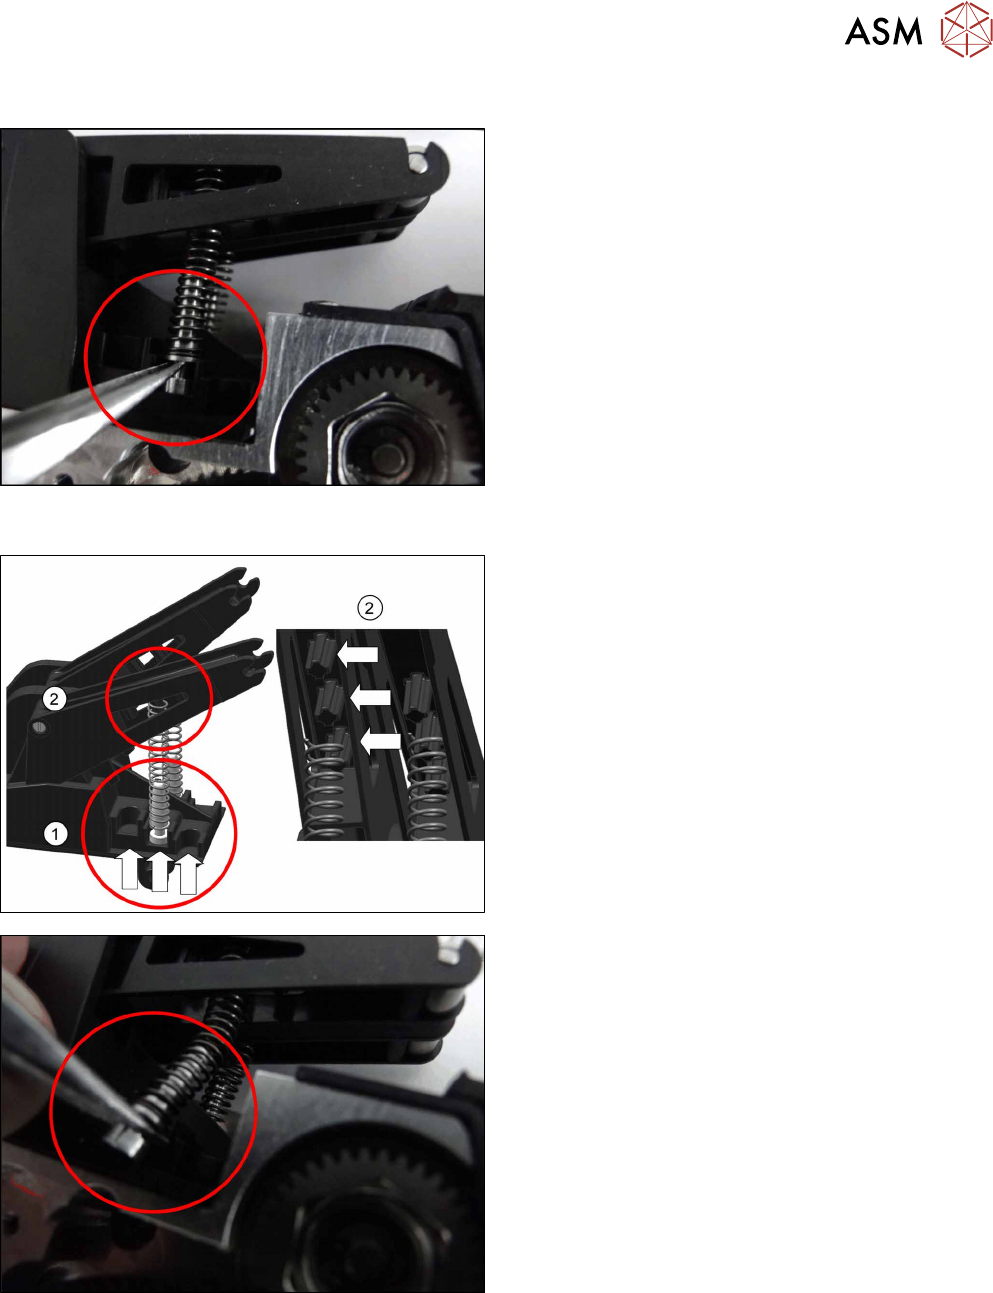
8.8.2.1 Removing the Spring Pin with Spring
► Remove the spring pin with a pair of tweezers.
► Remove the spring pin with spring.
8.8.2.2 Fitting the Spring Pin with Spring
The rocker bearing has 3 different positions for the
spring pin. (1)
The higher you position the spring pin, the greater the
tension on the foil will be.
There are 3 pins in the foil rocker, opposite to these 3
positions, so that the spring can be positioned exactly
over the spring pin. (2)
Select the position you want for the spring pin, de-
pending on the required foil tension.
► Insert the spring onto the pin in the foil rocker
which is vertically opposite to the spring pin posi-
tion you chose.
► Use a pair of tweezers to insert the spring pin into
the chosen position in the rocker bearing.
8 Repairs to SmartFeeder 2x8 mm X
8.8 Foil rocker
168 Service Manual SIPLACE SmartFeeder 4 - 104 mm X 11/2017
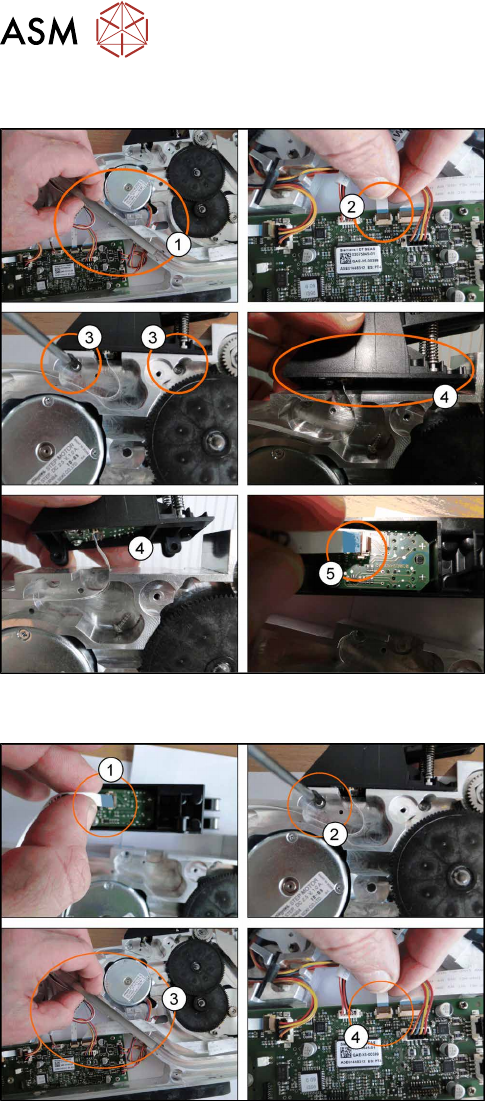
8.8.2.3 Removing the Cable Photo Interrupter
► Place the feeder on a stable, level and clean sur-
face.
► Remove the left and right side covers. (See 8.3.1
"Removing the Left Side Cover" [}135], 8.3.3
"Removing the Right Side Cover" [}136])
► Remove the tape duct.(1)
► Unplug the photo interrupter cable from the main
board.(2)
► Loosen and remove the TORX screws (RF-
SN75-2.5x8-9.8) from the foil rocker.(3)
► Push the foil rocker to the right(4) and unplug the
cable.(5)
8.8.2.4 Fitting the Cable Photo Interrupter
► Fasten the new cable at the same positions as
the old cable.
► Attach the cable to the foil rocker connector(1)
and fit the foil rocker back into place.(2)
► Replace the tape duct, making sure that the
cable is at the bottom.(3)
► Connect the cable to the main board. (4)
► Refit the left and right side covers (see 8.3.2 "Fit-
ting the Left Side Cover" [}136], 8.3.4 "Fitting the
Right Side Cover" [}137]).
8 Repairs to SmartFeeder 2x8 mm X
8.9 Rocker
Service Manual SIPLACE SmartFeeder 4 - 104 mm X 11/2017 169
8.9 Rocker
8.9.1 Rocker assembly
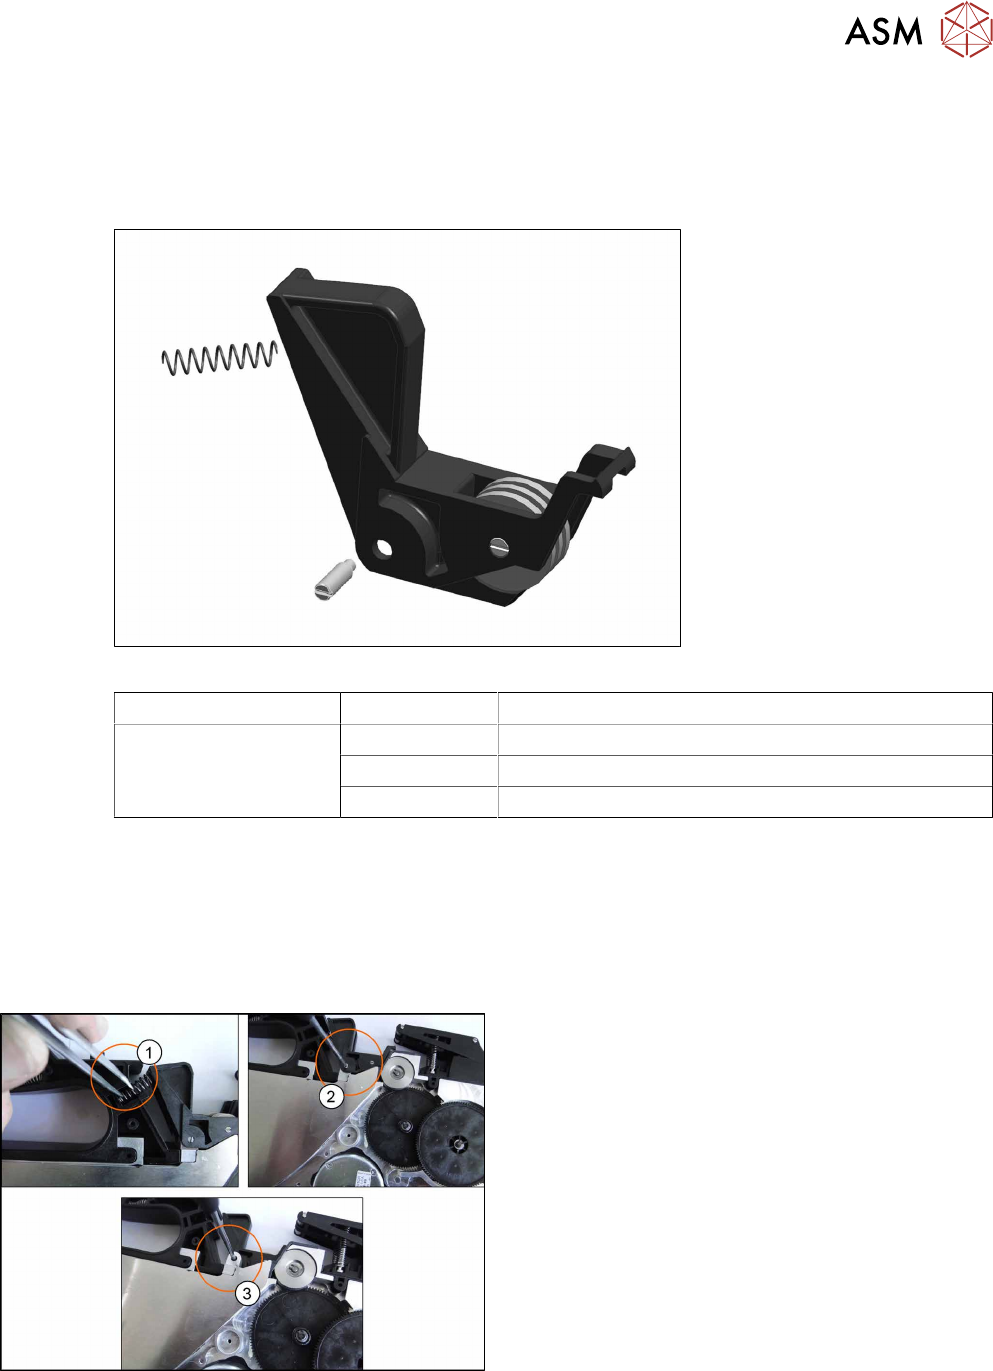
Required spare part
Fig.55: Rocker assembly /X8
Feeder module Item no. Designation
SmartFeeder 2x8mmX 03042320Sxx Rocker assembly /X8
03048855-xx Pressure spring 0.75x6.25x31x8.5
03042321-xx Bearing shaft for rocker /X8
Required tools
●
Flat-bladed screwdriver
●
Tweezers
●
Split pin punch size 1.4
8.9.1.1 Removing the Rocker Complete
► Place the feeder module with the left side down
on a stable, level and clean surface.
► Remove the right side cover (see 8.3.3 "Remov-
ing the Right Side Cover" [}136]).
► Remove the pressure springs.(1)
► Screw off the bearing shaft and remove the
rocker.(2)
► Where necessary, unscrew and remove the bear-
ing shaft and then remove the other rocker(3).