00198505-01_SM_SIPLACE_SmartFeeder_EN.pdf - 第239页
10 Repairs to SmartFeeder 24 - 104 mm X 10.5 Pickup window Service Manual SIPLACE SmartFeeder 4 - 104 mm X 11/2017 239 Underneath the pickup window, you will find the "Ejector X24-104 Smart" [03126631-xx]. This…
10 Repairs to SmartFeeder 24 - 104 mm X
10.5 Pickup window
238 Service Manual SIPLACE SmartFeeder 4 - 104 mm X 11/2017
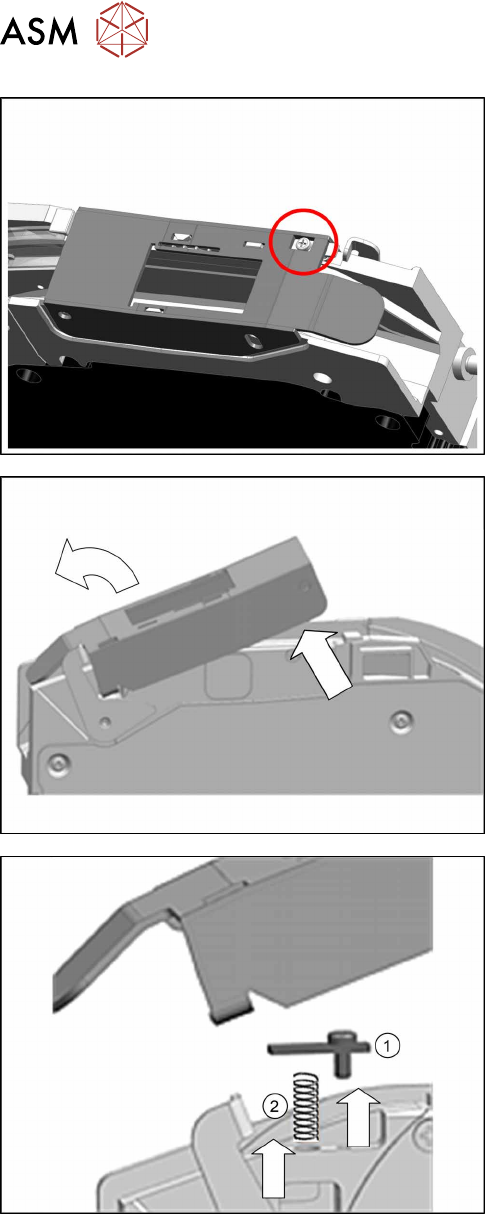
The pickup window is held in place with a pressure
spring and a holding plate.
► Loosen the "holding plate spring pickup window
X24-104" to relax the pressure spring.
► Remove the screw.
► Lift the pickup window at the back.
► Then tilt the pickup window forwards and away.
► Remove the holding plate(1).
► Remove the pressure spring(2).
10 Repairs to SmartFeeder 24 - 104 mm X
10.5 Pickup window
Service Manual SIPLACE SmartFeeder 4 - 104 mm X 11/2017 239
Underneath the pickup window, you will find the
"Ejector X24-104 Smart" [03126631-xx]. This can now
be replaced if needed.
The ejector is fixed with a "collar screw" [03020727-xx]
to the base unit.
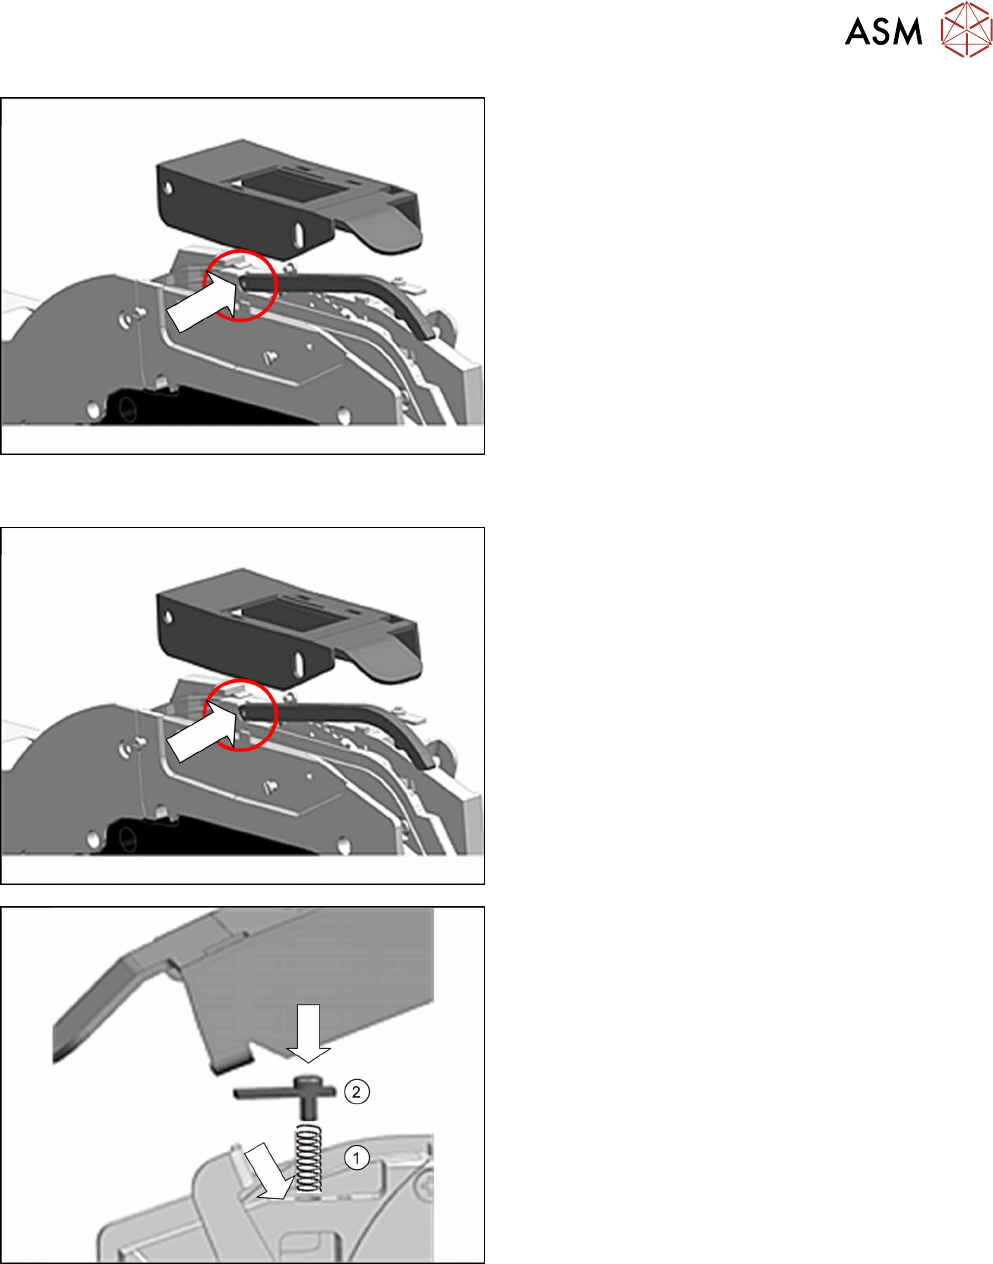
10.5.2 Fitting the pickup window
► Before fitting the pickup window, make sure that
the ejector is fitted with a "collar screw".
► Insert the pressure spring(1) into the hole.
► Insert the screw as shown into the holding plate
and then insert the holding plate(2).
10 Repairs to SmartFeeder 24 - 104 mm X
10.5 Pickup window
240 Service Manual SIPLACE SmartFeeder 4 - 104 mm X 11/2017
► Guide the bracket, located at the front left on the
pickup window, into the recess on the base unit.
► Position the pickup window as shown, diagonally
onto the base unit from above and lower it down,
towards the back.
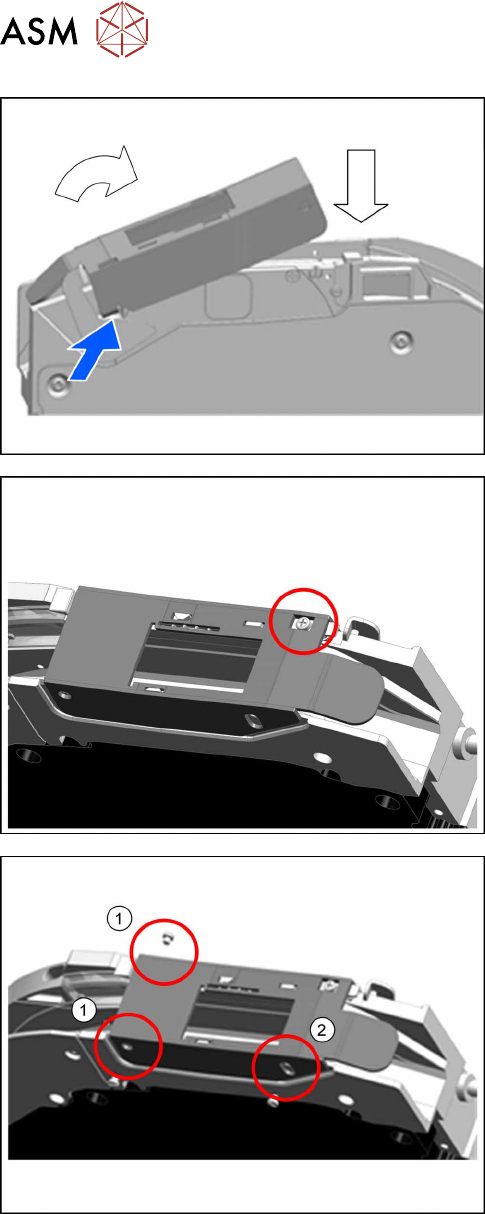
► Screw the holding plate tight.
Make sure that the pressure spring is pressed
into the drilled hole while you screw it in.
► Fasten the pickup window with the two screws at
the rear pivot point.(1)
► Fasten the pickup window guiding screw at the
front right.(2)