00198505-01_SM_SIPLACE_SmartFeeder_EN.pdf - 第241页
10 Repairs to SmartFeeder 24 - 104 mm X 10.6 Splice sensor Service Manual SIPLACE SmartFeeder 4 - 104 mm X 11/2017 241 10.5.3 Replacing the Öffner pickup window The opener for the pickup window is fitted with a M2.5 x 5m…
10 Repairs to SmartFeeder 24 - 104 mm X
10.5 Pickup window
240 Service Manual SIPLACE SmartFeeder 4 - 104 mm X 11/2017
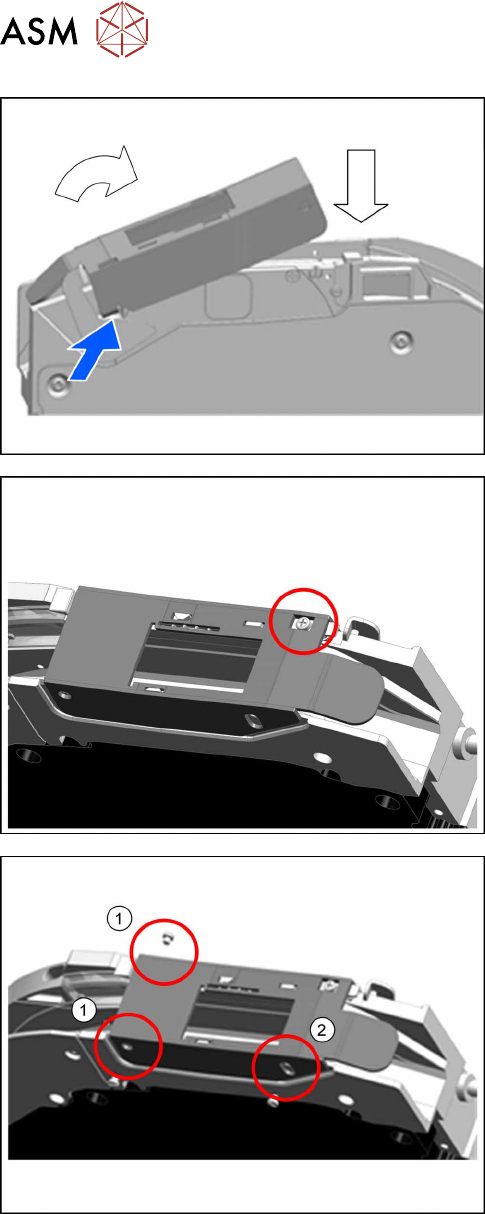
► Guide the bracket, located at the front left on the
pickup window, into the recess on the base unit.
► Position the pickup window as shown, diagonally
onto the base unit from above and lower it down,
towards the back.
► Screw the holding plate tight.
Make sure that the pressure spring is pressed
into the drilled hole while you screw it in.
► Fasten the pickup window with the two screws at
the rear pivot point.(1)
► Fasten the pickup window guiding screw at the
front right.(2)

10 Repairs to SmartFeeder 24 - 104 mm X
10.6 Splice sensor
Service Manual SIPLACE SmartFeeder 4 - 104 mm X 11/2017 241
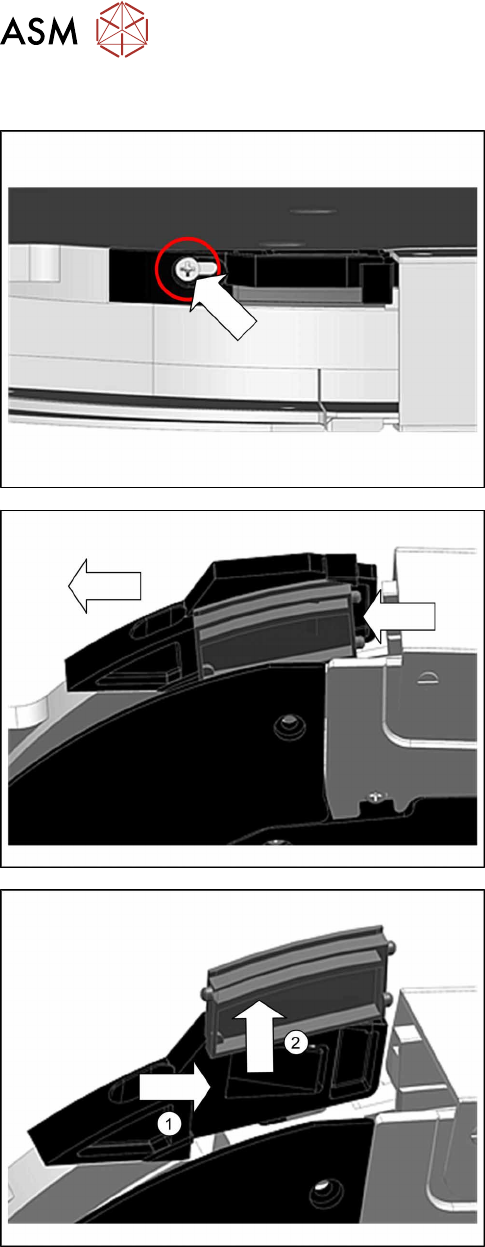
10.5.3 Replacing the Öffner pickup window
The opener for the pickup window is fitted with a M2.5
x 5mm Phillips screw and washer to the base unit.(1)
The screw is for loosening and fastening and can be
accessed via a hole on the left side of the tape
duct.(2)
10.6 Splice sensor
Required spare part
Fig.87: Splice sensor (left) / dummy splice sensor (right)
Feeder module Item no. Designation
SmartFeeder 24 - 104mmX 03107028 -xx
03104558 -xx
Splice sensor X8Smart assembly
Dummy splice sensor X8Smart
Required tools
●
TORX screwdriver 0.6Nm, size T8
10 Repairs to SmartFeeder 24 - 104 mm X
10.6 Splice sensor
242 Service Manual SIPLACE SmartFeeder 4 - 104 mm X 11/2017
10.6.1 Removing the splice sensor (dummy)
The splice sensor (dummy) is located behind the
pickup window and is held by the "filler piece splice
sensor".
► Place the feeder module in a stable, upright posi-
tion.
► Loosen the Phillips screw shown in the diagram,
until the filler piece can be moved.
► Carefully push the filler piece in the direction of
the arrow, as far as the stop.
► Push the splice sensor (-dummy) to the right and
out of the filler piece.(1)
► Lift the splice sensor (-dummy) up and out.(2)