00198505-01_SM_SIPLACE_SmartFeeder_EN.pdf - 第261页
10 Repairs to SmartFeeder 24 - 104 mm X 10.8 Foil rocker Service Manual SIPLACE SmartFeeder 4 - 104 mm X 11/2017 261 ► Press the foil rocker slightly down, to give access to the hole for the threaded axis. ► Insert the t…
10 Repairs to SmartFeeder 24 - 104 mm X
10.8 Foil rocker
260 Service Manual SIPLACE SmartFeeder 4 - 104 mm X 11/2017
10.8.1.1 Foil rocker
Required spare part
Fig.94: Rocker X24Smart assy.
Feeder module Item no. Designation
SmartFeeder 24mmX 03112580- xx Rocker X24Smart assy.
Required tools
●
Flat-bladed screwdriver size 1
Removing the foil rocker
► Carefully place the feeder module with the left
side down on a stable, level and clean surface.
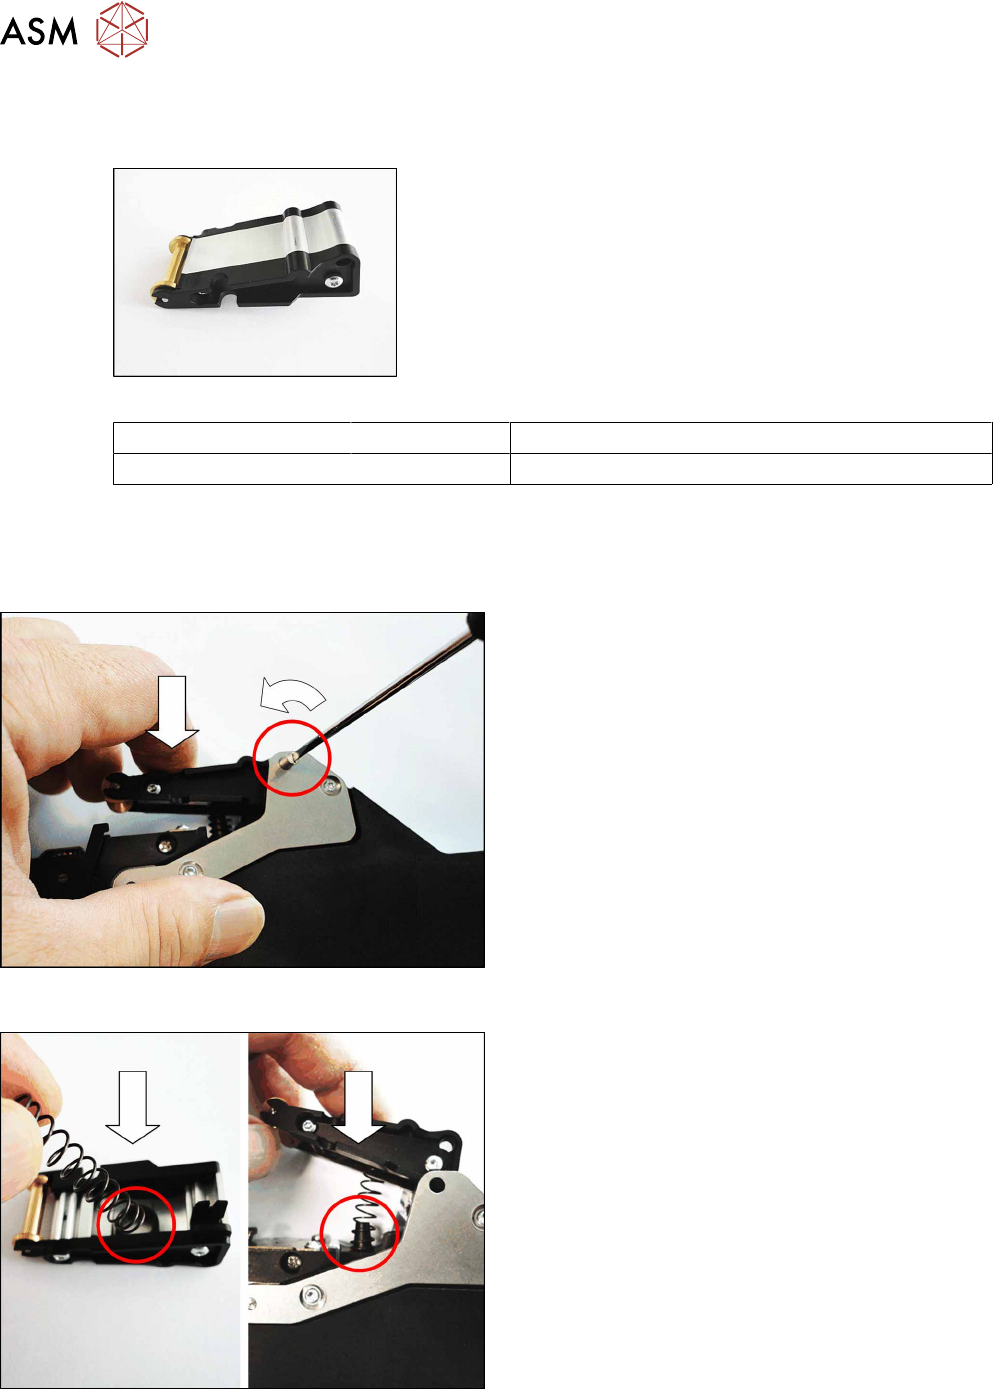
► Press the foil rocker slightly down, to relieve the
threaded axis of pressure from the spring.
► Use a flat-bladed screwdriver to loosen the
threaded axis, until the thread no longer en-
gages.
► Pull the threaded axis out of the hole.
► Remove the foil rocker up and out.
Make sure that the pressure spring does not get
lost.
Fitting the foil rocker assembly
► Carefully place the feeder module with the left
side down on a stable, level and clean surface.
► Insert the pressure spring into the holding device
on the underside of the foil rocker.
► Turn the foil rocker and pressure spring around
as shown.
► Insert the pressure spring into the catch shown in
the diagram.
10 Repairs to SmartFeeder 24 - 104 mm X
10.8 Foil rocker
Service Manual SIPLACE SmartFeeder 4 - 104 mm X 11/2017 261
► Press the foil rocker slightly down, to give access
to the hole for the threaded axis.
► Insert the threaded axis as far as the stop into the
hole.
► Fasten the threaded axis with a flat-bladed
screwdriver and 0.6 Nm.
10.8.1.2 Light barrier transmitter
Required spare part
Fig.95: Light barrier transmitter
Feeder module Item no. Designation
SmartFeeder 24 - 104mmX 03100381- xx Light barrier transmitter flat assy. X8Smart
Required tools
●
TORX screwdriver 0.6Nm, size T8
Removing the light barrier transmitter
► Remove the left side plate (see 10.3.1 "Remov-
ing/fitting the left side plate" [}230]).
► Remove the foil rocker (see 10.8.1.1.1 "Remov-
ing the foil rocker" [}260]LINK).
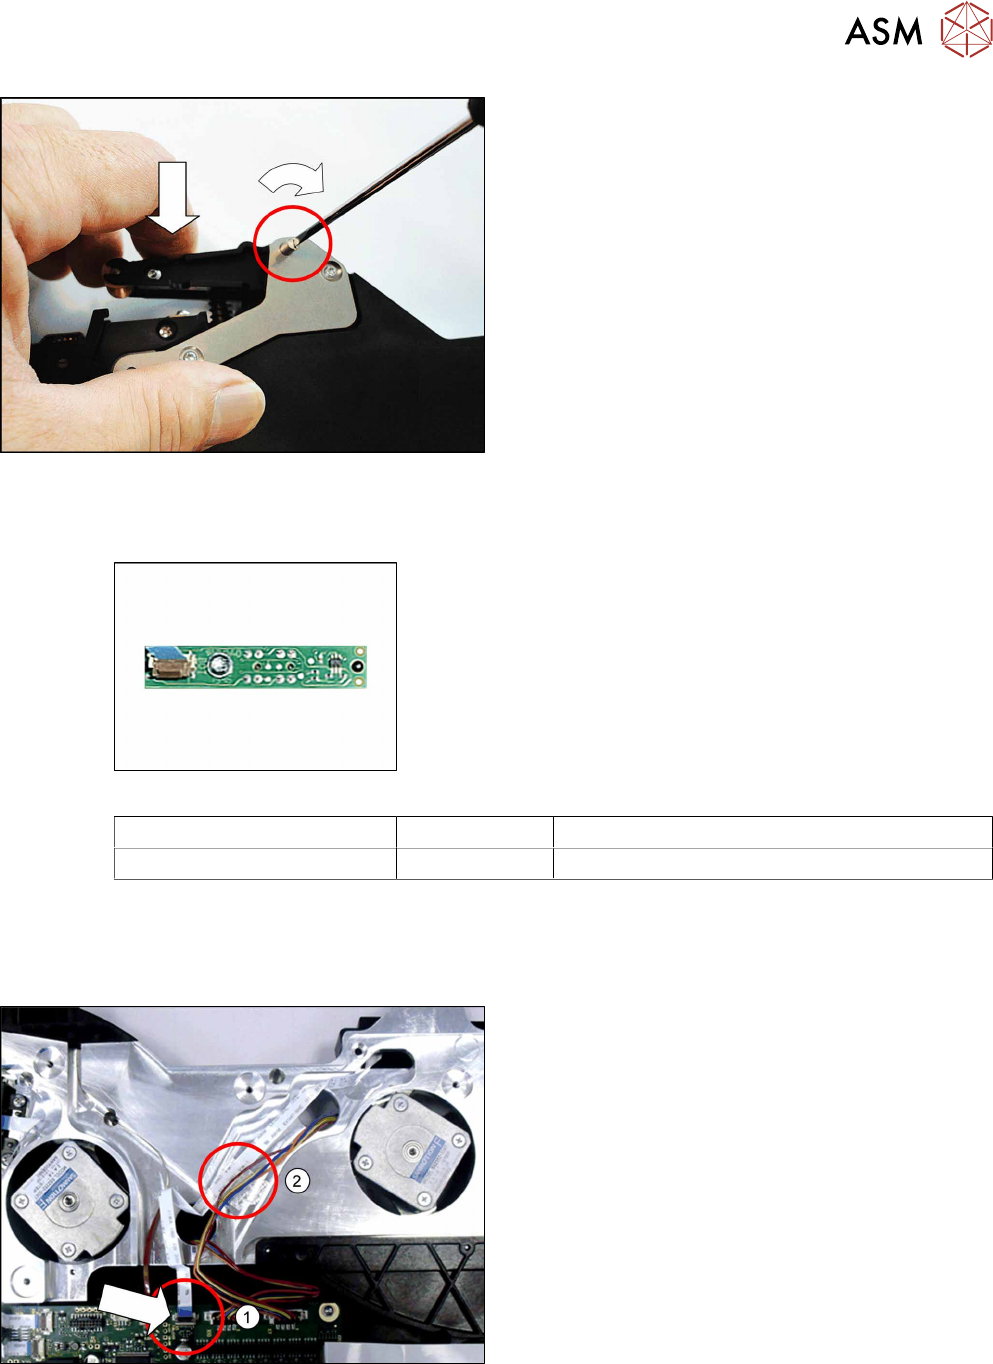
► Swing the holder on the flat ribbon connection X5
of the control board up and pull out the flat-ribbon
cable. (1).
► Pull the flat ribbon cable off the double-sided ad-
hesive tape at the marked point. (2)
10 Repairs to SmartFeeder 24 - 104 mm X
10.8 Foil rocker
262 Service Manual SIPLACE SmartFeeder 4 - 104 mm X 11/2017
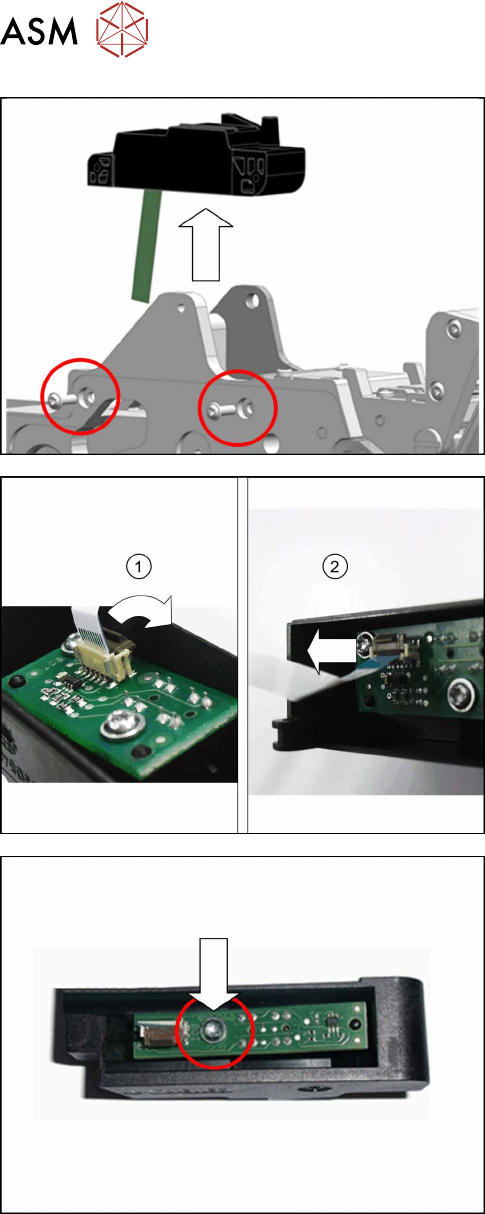
► Use a T8 TORX screwdriver to remove the two
screws shown in the diagram, which fasten the
foil rocker housing.
Make sure that the two spring washers DIN 127-
B2.5-A2 are not lost.
► Pull the foil rocker housing with the flat ribbon
cable up and off the base unit.
► Turn the foil rocker housing into the position
shown.
► Swing the holder on the flat ribbon connection
up.(1)
► Pull the flat ribbon cable out.(2)
► Use a T8 TORX screwdriver to remove the screw
marked in the diagram, which fastens the light
barrier transmitter to the foil rocker housing.
► Remove the light barrier transmitter.