00198505-01_SM_SIPLACE_SmartFeeder_EN.pdf - 第48页
6 Repairs to SmartFeeder 4 mm X 6.8 Foil rocker 48 Service Manual SIPLACE SmartFeeder 4 - 104 mm X 11/2017 6.8.1.1 Removing the Foil Rocker Assembly ► Carefully place the feeder module with the right side down on a stabl…
6 Repairs to SmartFeeder 4 mm X
6.8 Foil rocker
Service Manual SIPLACE SmartFeeder 4 - 104 mm X 11/2017 47
6.8 Foil rocker
6.8.1 Foil rocker assembly
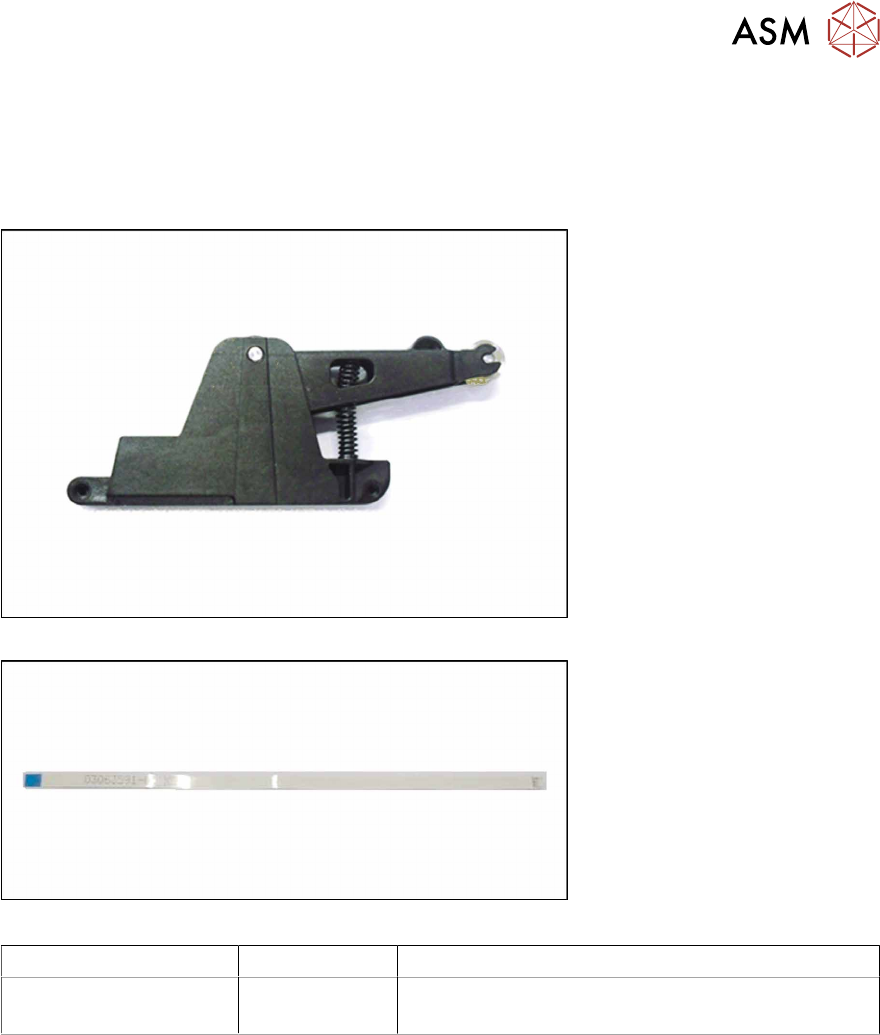
Required spare part
Fig.9: Foil rocker assembly
Fig.10: Cable light barrier transmitter
Feeder module Item no. Designation
SmartFeeder 4mm X 03105315Sxx
03063591-xx
Foil rocker assembly /X4Smart
Cable for light barrier transmitter 2x8
Required tools
●
Flat-bladed screwdriver size 1 or tweezers
●
TORX screwdriver size T8
6 Repairs to SmartFeeder 4 mm X
6.8 Foil rocker
48 Service Manual SIPLACE SmartFeeder 4 - 104 mm X 11/2017
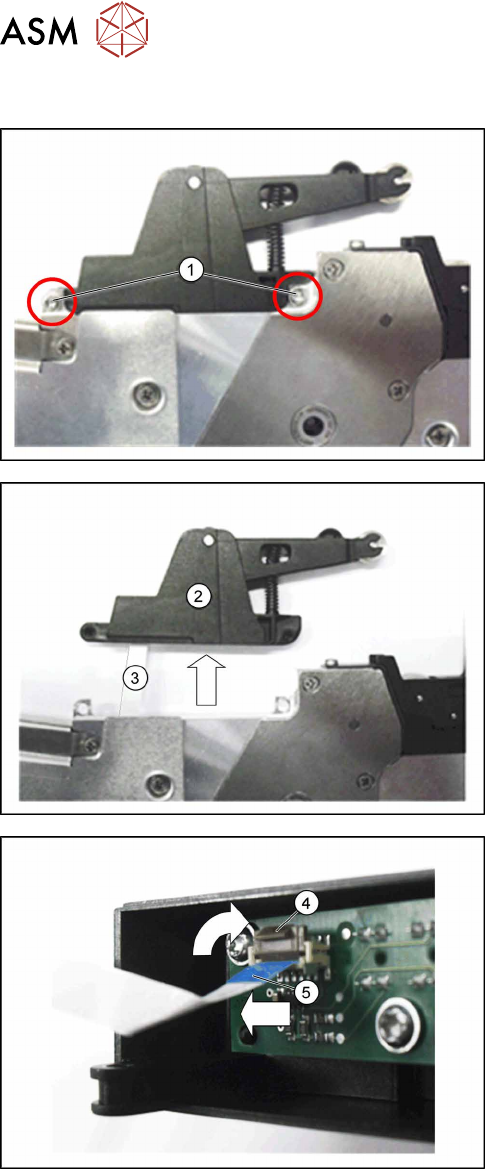
6.8.1.1 Removing the Foil Rocker Assembly
► Carefully place the feeder module with the right
side down on a stable, level and clean surface.
► Remove the two screws(1) which fasten the foil
rocker.
Use a size T8 TORX screwdriver for this.
► Pull the foil rocker up and off(2).
► Make sure that the flat ribbon cable(3) is not
stretched too much.
► Turn the foil rocker into the position shown in the
diagram.
► Swing the holder on the flat ribbon connection
up(4).
► Pull the flat ribbon cable(5) out of the flat ribbon
cable connection.
6 Repairs to SmartFeeder 4 mm X
6.8 Foil rocker
Service Manual SIPLACE SmartFeeder 4 - 104 mm X 11/2017 49
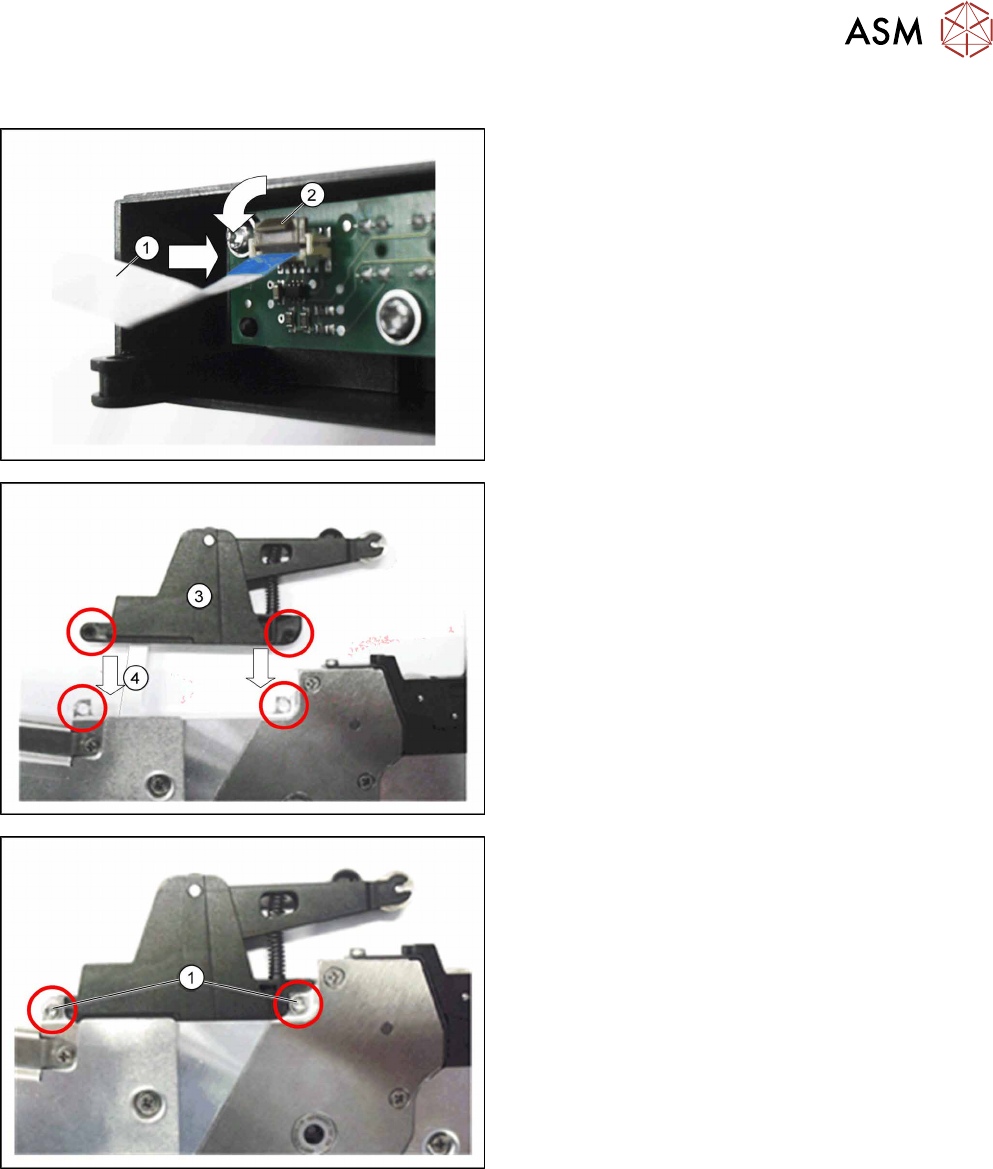
6.8.1.2 Fitting the Foil Rocker Assembly
► Turn the foil rocker into the position shown in the
diagram.
► If this is not open, swing the bracket on the flat
ribbon connection(2) upwards.
► Push the flat ribbon cable(1), with the blue side
pointing upwards, into the flat ribbon cable con-
nection(2), as far as the stop.
► Make sure that the flat ribbon cable contacts lie
against the contacts on the connection.
► Swing the bracket on the flat ribbon connection
down(2).
► Carefully place the foil rocker unit(3) onto the
marked fixture holes.
Make sure that the cable(4) slides into the duct well
during insertion and is not bent. If there are any prob-
lems with this, open the left side cover of the feeder
module.
► Very carefully fasten the foil rocker unit with the
two marked TORX screws hand-tight. Use a size
8 TORX screwdriver for this.