00198505-01_SM_SIPLACE_SmartFeeder_EN.pdf - 第56页
6 Repairs to SmartFeeder 4 mm X 6.9 Rocker 56 Service Manual SIPLACE SmartFeeder 4 - 104 mm X 11/2017 ► Fasten the bearing shaft hand-tight with a size 1 flat-bladed screwdriver. 6.9.3 Replacing individual rocker parts R…
6 Repairs to SmartFeeder 4 mm X
6.9 Rocker
Service Manual SIPLACE SmartFeeder 4 - 104 mm X 11/2017 55
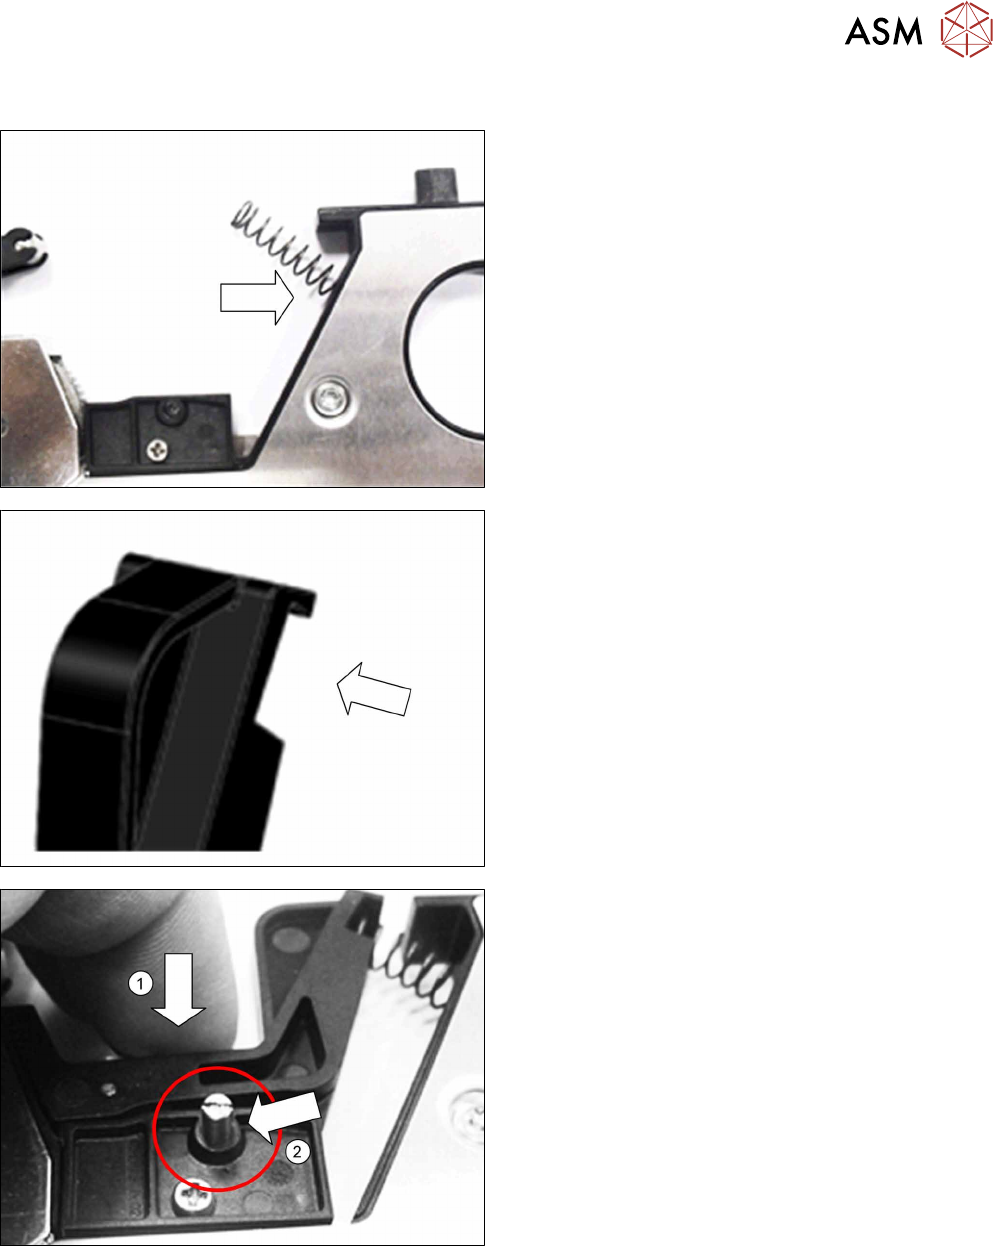
6.9.2 Fitting the rocker
► Carefully place the feeder module with the right
side down on a stable, level and clean surface.
► Fit the pressure springs into the feeder module
base unit.
► Push the pressure spring sideways into the
rocker guidance.
► Press the rocker from above (as shown) into a
position from which you have a full view of the
bearing shaft hole.(1)
► Insert the bearing shaft with its thread first into
this hole.(2)
6 Repairs to SmartFeeder 4 mm X
6.9 Rocker
56 Service Manual SIPLACE SmartFeeder 4 - 104 mm X 11/2017
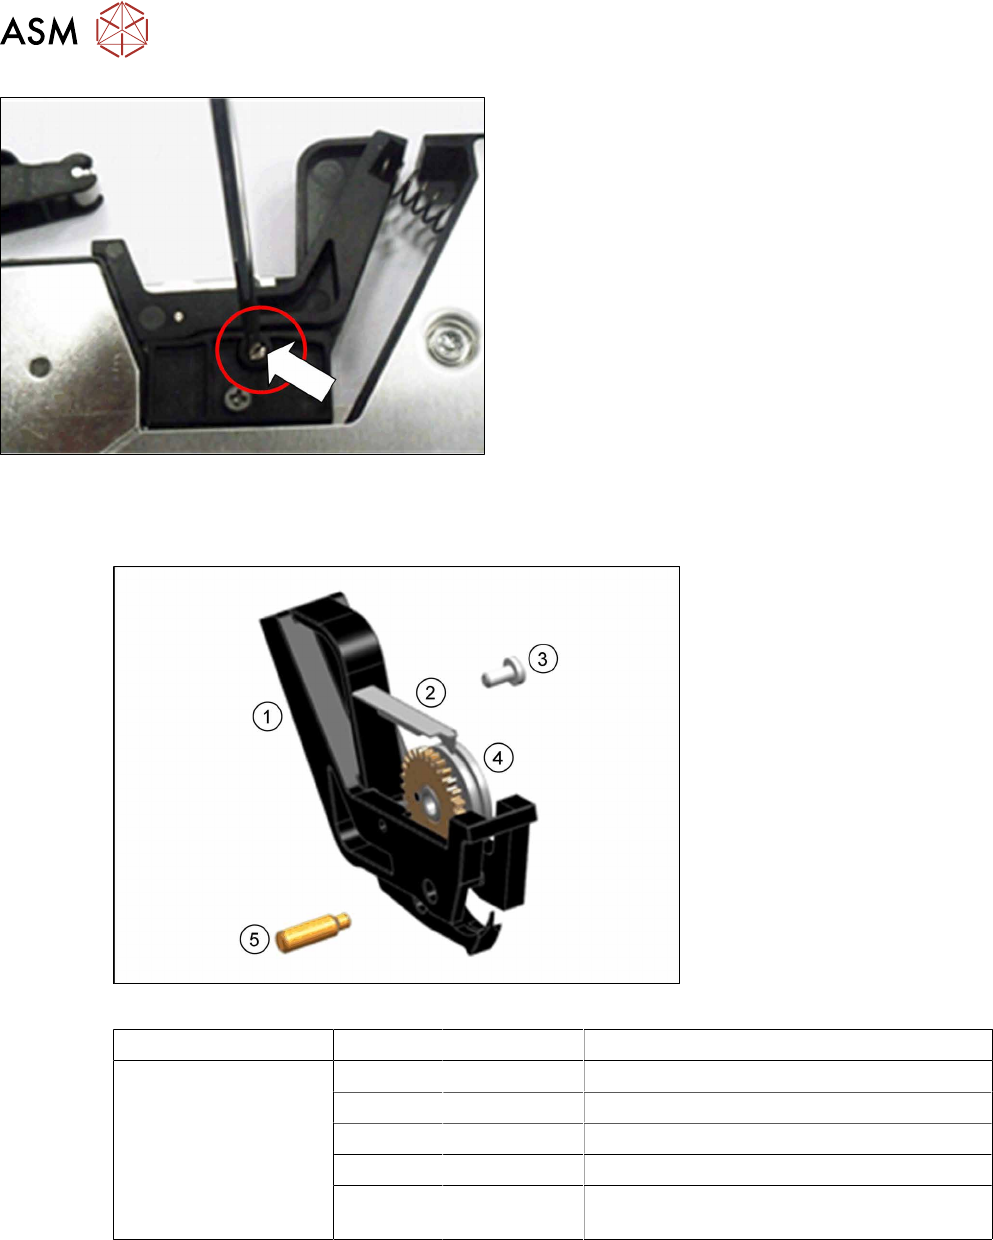
► Fasten the bearing shaft hand-tight with a size 1
flat-bladed screwdriver.
6.9.3 Replacing individual rocker parts
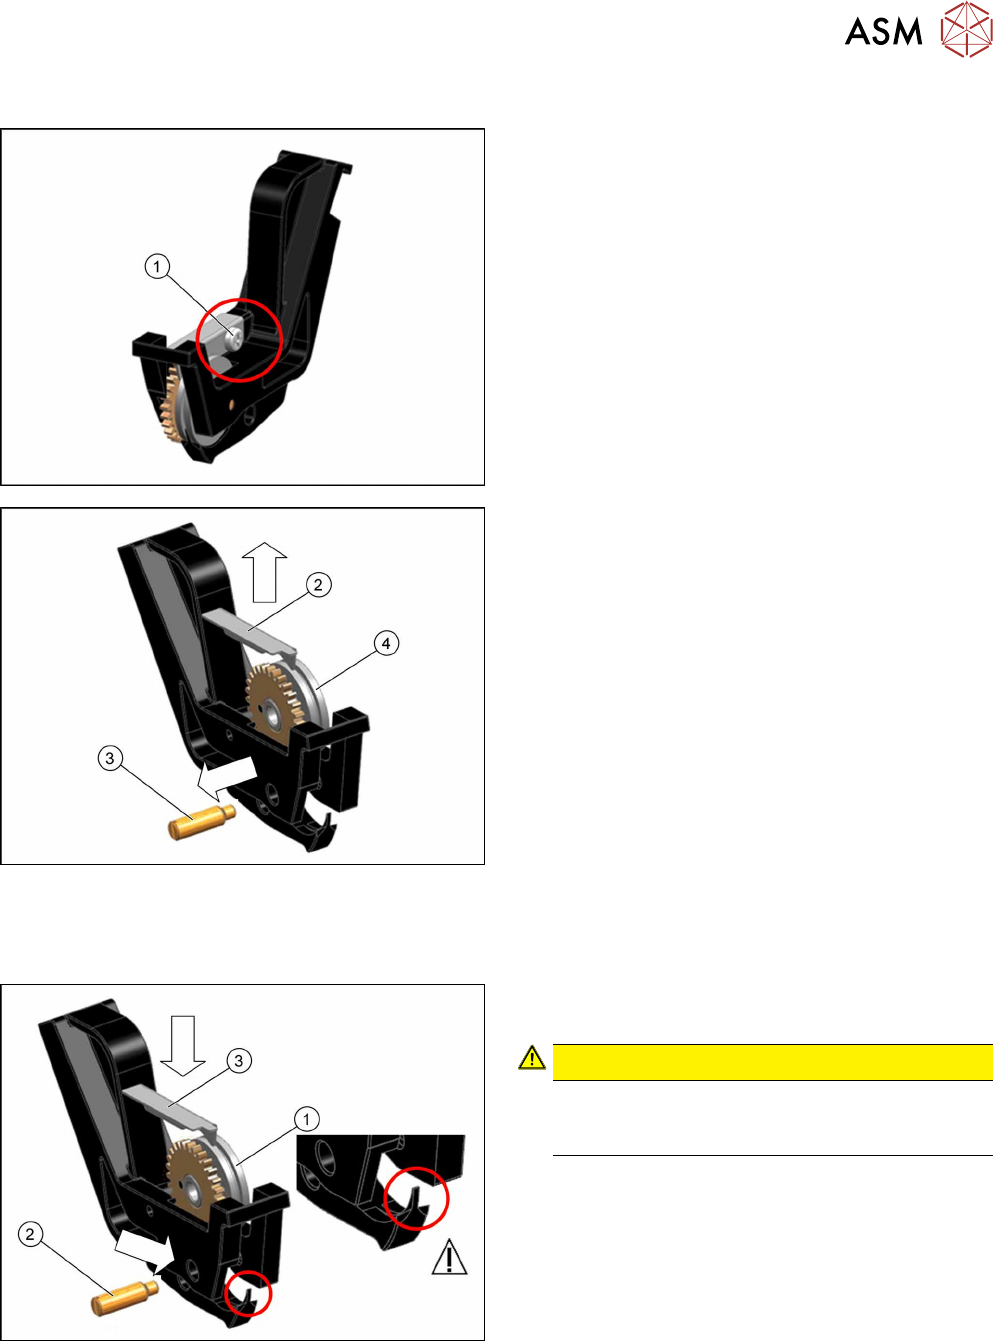
Required spare parts
Fig.13: Individual rocker parts
Feeder module Position Item no. Designation
SmartFeeder 4mm X 1 03135354-xx Rocker for foil disposal X4Smart
2 03135459Sxx Cover plate, rocker V2 X4Smart
3 00322564-xx SN 213307-H-M2 x 4-A2
4 03134326Sxx Tamp wheel assy. steel X4Smart V2
5 03122867Sxx Bearing shaft, bronze, tamp wheel rocker
X4Smart
Tools required:
●
Flat-bladed screwdriver size 1
●
TORX screwdriver T8
6 Repairs to SmartFeeder 4 mm X
6.9 Rocker
Service Manual SIPLACE SmartFeeder 4 - 104 mm X 11/2017 57
Removing individual parts
To gain access to the individual spare parts of the
rocket foil disposal assembly, first remove the cover
plate.
► Remove the screw(1), fastening the cover plate..
Use a size T8 TORX screwdriver for this.
► Remove the cover plate.(2)
► Remove the bearing shaft.(3)
Use a size 1 flat-bladed screwdriver for this.
► Remove the tamp wheel.(4)
The spare parts in the rocker foil disposal assembly package can now be accessed and replaced
where necessary.
Fitting individual parts
► Insert the tamp wheel into the rocker, as shown
in the diagram.(1)
CAUTION!
When inserting the tamp wheel, make sure
that the plastic tab on the rocker is not bent
or broken off!
.
► Fasten the tamp wheel with the bearing shaft.(2)
Use a size 1 flat-bladed screwdriver to help you.
► Insert the cover plate as shown.(3)