00198505-01_SM_SIPLACE_SmartFeeder_EN.pdf - 第62页
6 Repairs to SmartFeeder 4 mm X 6.10 Tamp wheel 62 Service Manual SIPLACE SmartFeeder 4 - 104 mm X 11/2017 ► Fit the tamp wheel on the axis, as shown in the diagram. ► Place the top washer onto the tamp wheel. ► Insert t…
6 Repairs to SmartFeeder 4 mm X
6.10 Tamp wheel
Service Manual SIPLACE SmartFeeder 4 - 104 mm X 11/2017 61
► Remove the tamp wheel.
► If the bottom washer is still stuck to the spiral
gear, take it and place it back on the axis.
6.10.2 Fitting the tamp wheel
► Carefully place the feeder module with the right
side down on a stable, level and clean surface.
► Make sure that there is a washer on the axis.
6 Repairs to SmartFeeder 4 mm X
6.10 Tamp wheel
62 Service Manual SIPLACE SmartFeeder 4 - 104 mm X 11/2017
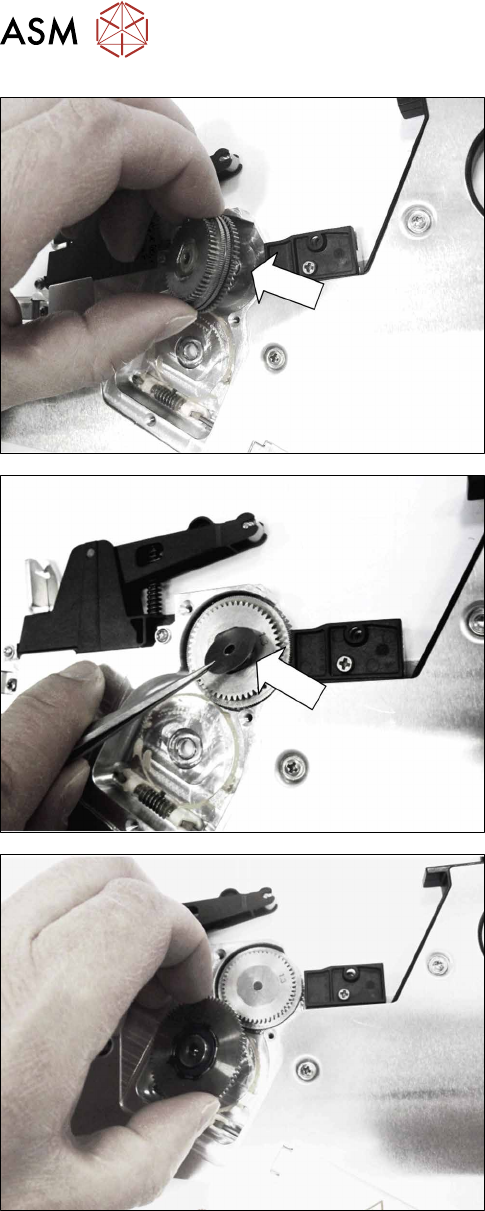
► Fit the tamp wheel on the axis, as shown in the
diagram.
► Place the top washer onto the tamp wheel.
► Insert the spiral gear as shown in the diagram.
6 Repairs to SmartFeeder 4 mm X
6.10 Tamp wheel
Service Manual SIPLACE SmartFeeder 4 - 104 mm X 11/2017 63
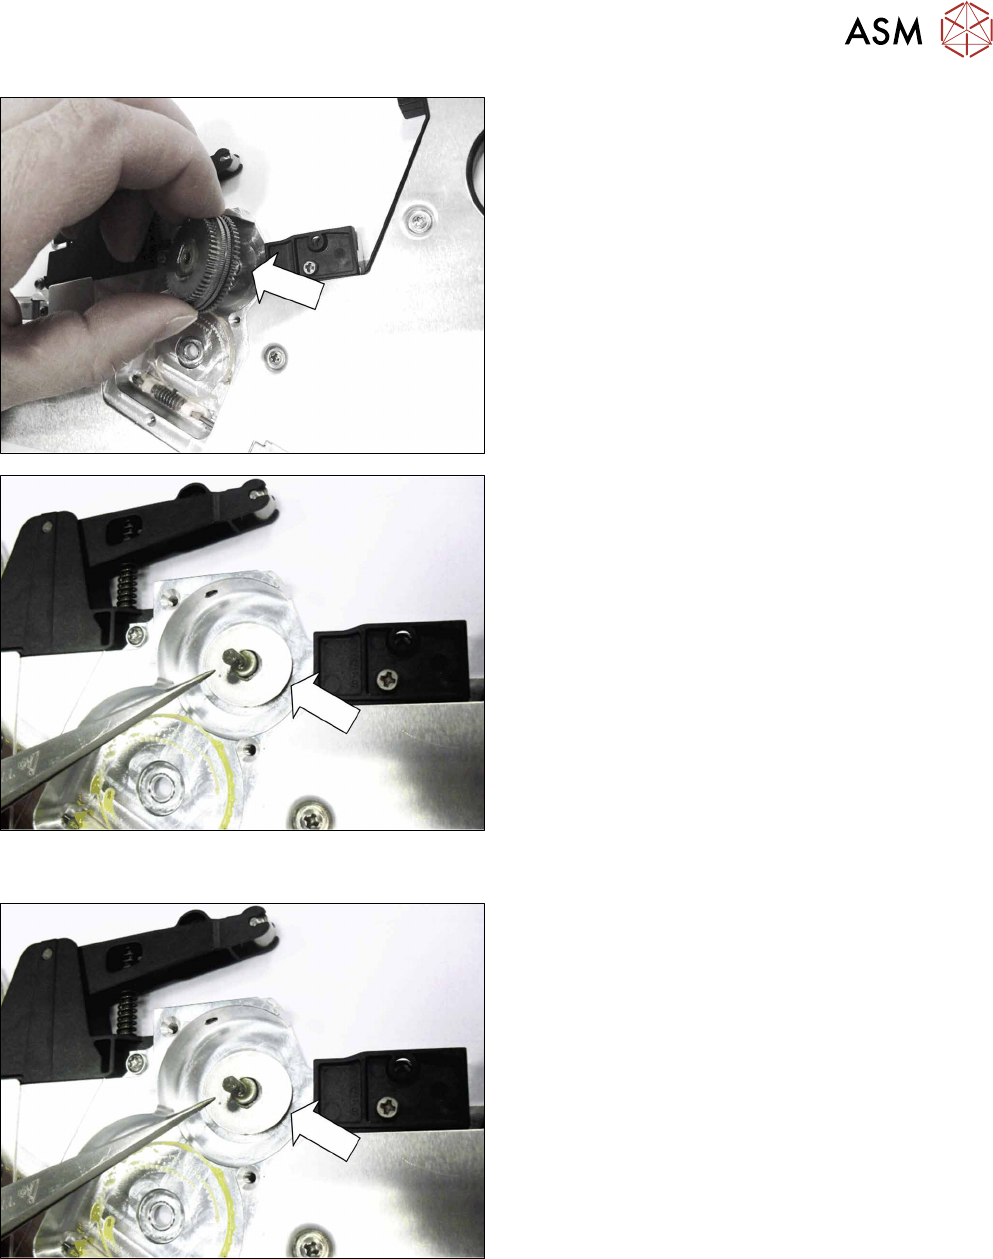
► Tilt the feeder module to the right and hold the Al-
len screw on the spiral gear with one finger.
► Fasten the slotted screw.
Use a flat-bladed screwdriver for this.
► Fasten the Allen screw to the spiral gear on the
left side.
Use a size 4 Allen key with 0.9Nm for this.
► Fasten the wiper (see 6.11.2 "Fitting the wiper 4
mm X" [}65]).
► Fasten the rocker (see 6.9.2 "Fitting the
rocker" [}55]).
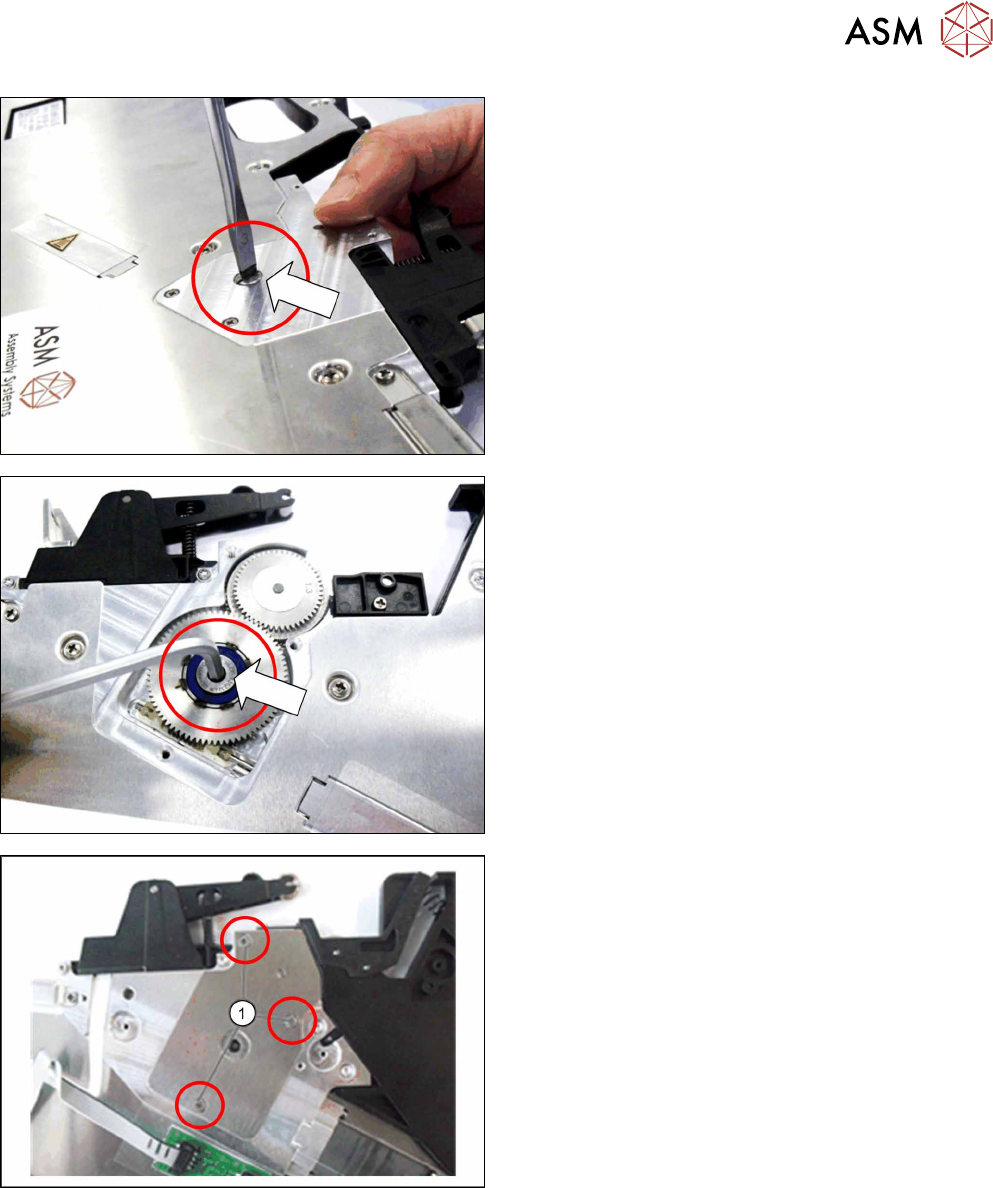
► Fit the bearing cap onto the foil stripping unit, as
shown.
► Fasten the bearing cap with the three screws
shown(1). Use a Phillips screwdriver with 0.9 Nm
for this.
► Fasten the left side cover (see 6.3.2 "Fitting the
Left Side Cover" [}31]).