MV-9_Chapter 5. Teaching.pdf - 第10页
MV -9 Use r Manual 5- 10 [Figure 5-1 1 conveyor skip mod e] 5.2. Creating and opening PCB model In chapter 5.2 , w e descri b e ab o ut cr eating a new PC B m ode l or open in g m odel for w hi ch teaching is already com…
错误!使用“开始”选项卡将 제목 2 应用于要在此处显示的文字。错误!使用“开始”选项卡将 제목 2 应用
于要在此处显示的文字。 .
5-9
Robot reset
Select this item to conduct origin return and reset conveyor status.
Conveyor reset
Select this to reset PCB without conducting origin return.
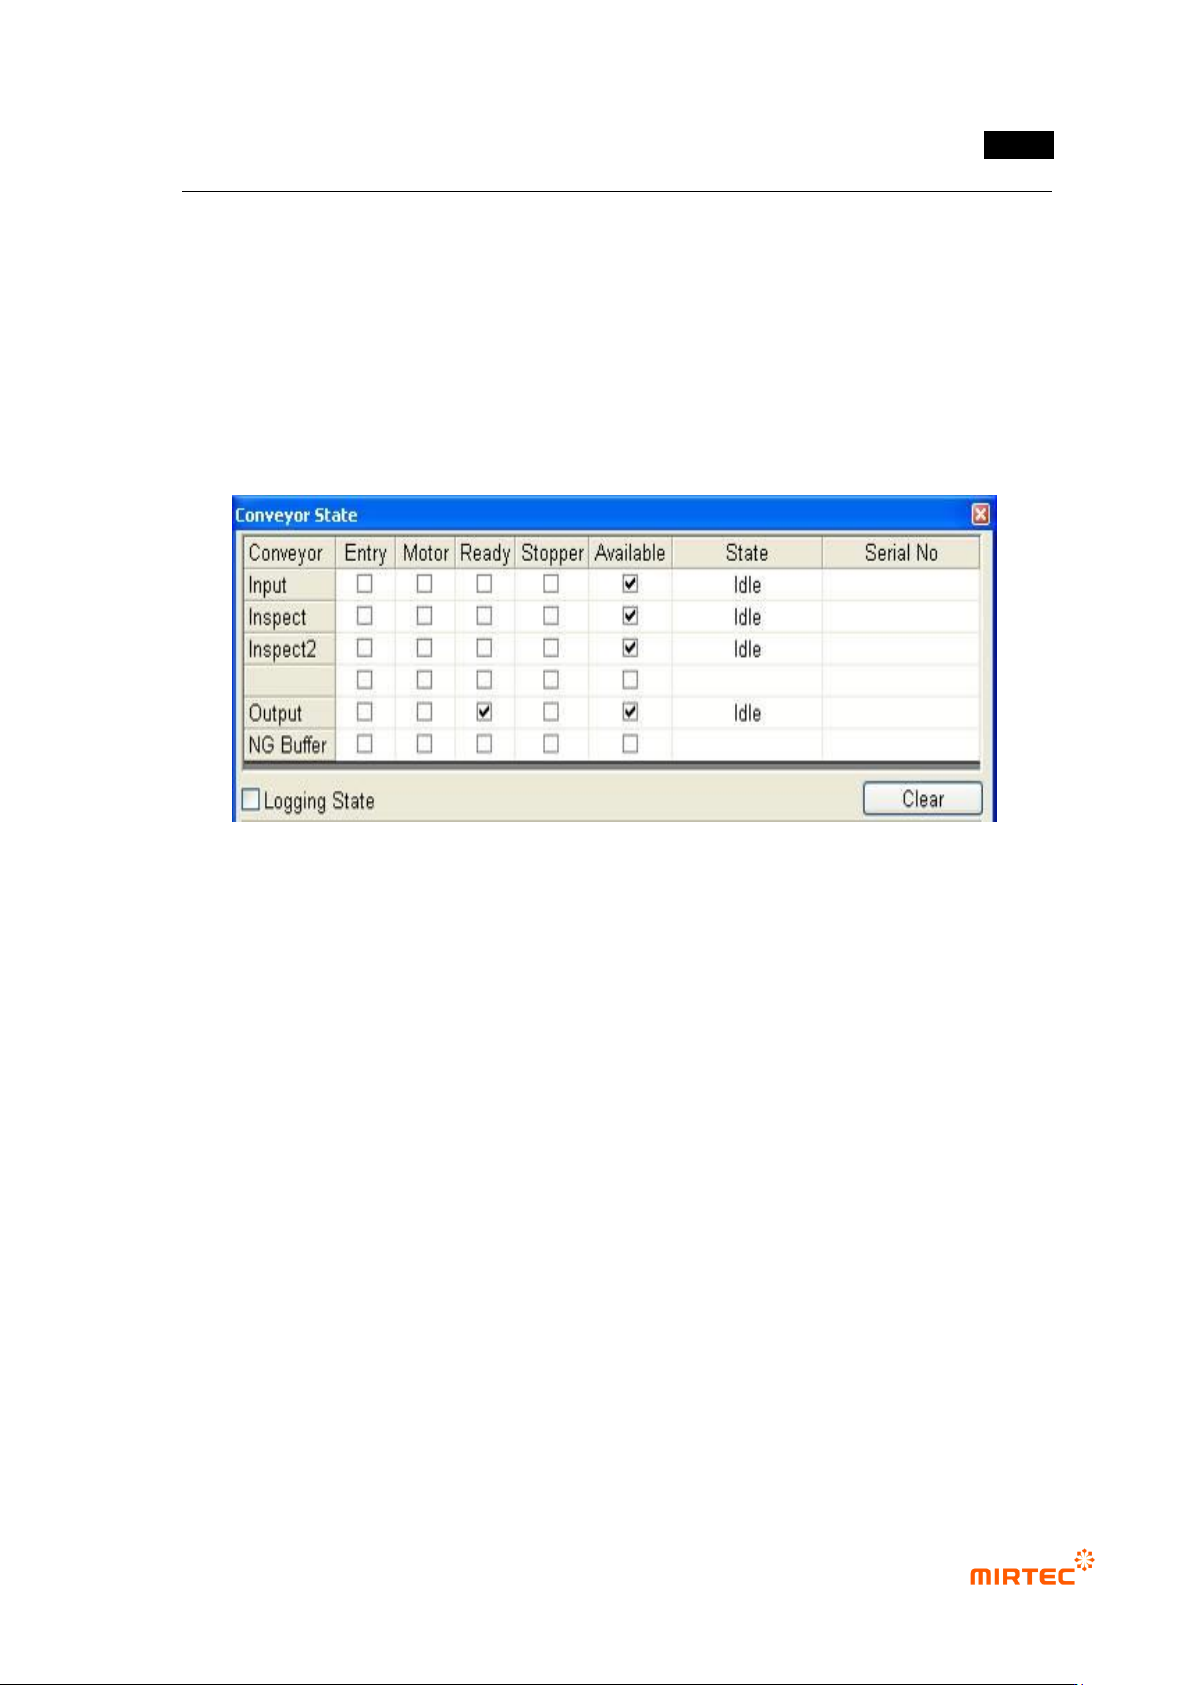
Conveyor status check
Select this to check setting status of the conveyor. Conveyor setting status will be displayed in
the screen in [Figure 5-10].
[Figure 5-10 Conveyor status screen]
Laser origin
Select this to move the laser to the origin.
Rail width change to current model value
Select this to change to rail width that is lastly saved.
Rail width adjust
Select this to adjust rail width according to PCB size.
No use door open sensor
Select this not to use door sensor.
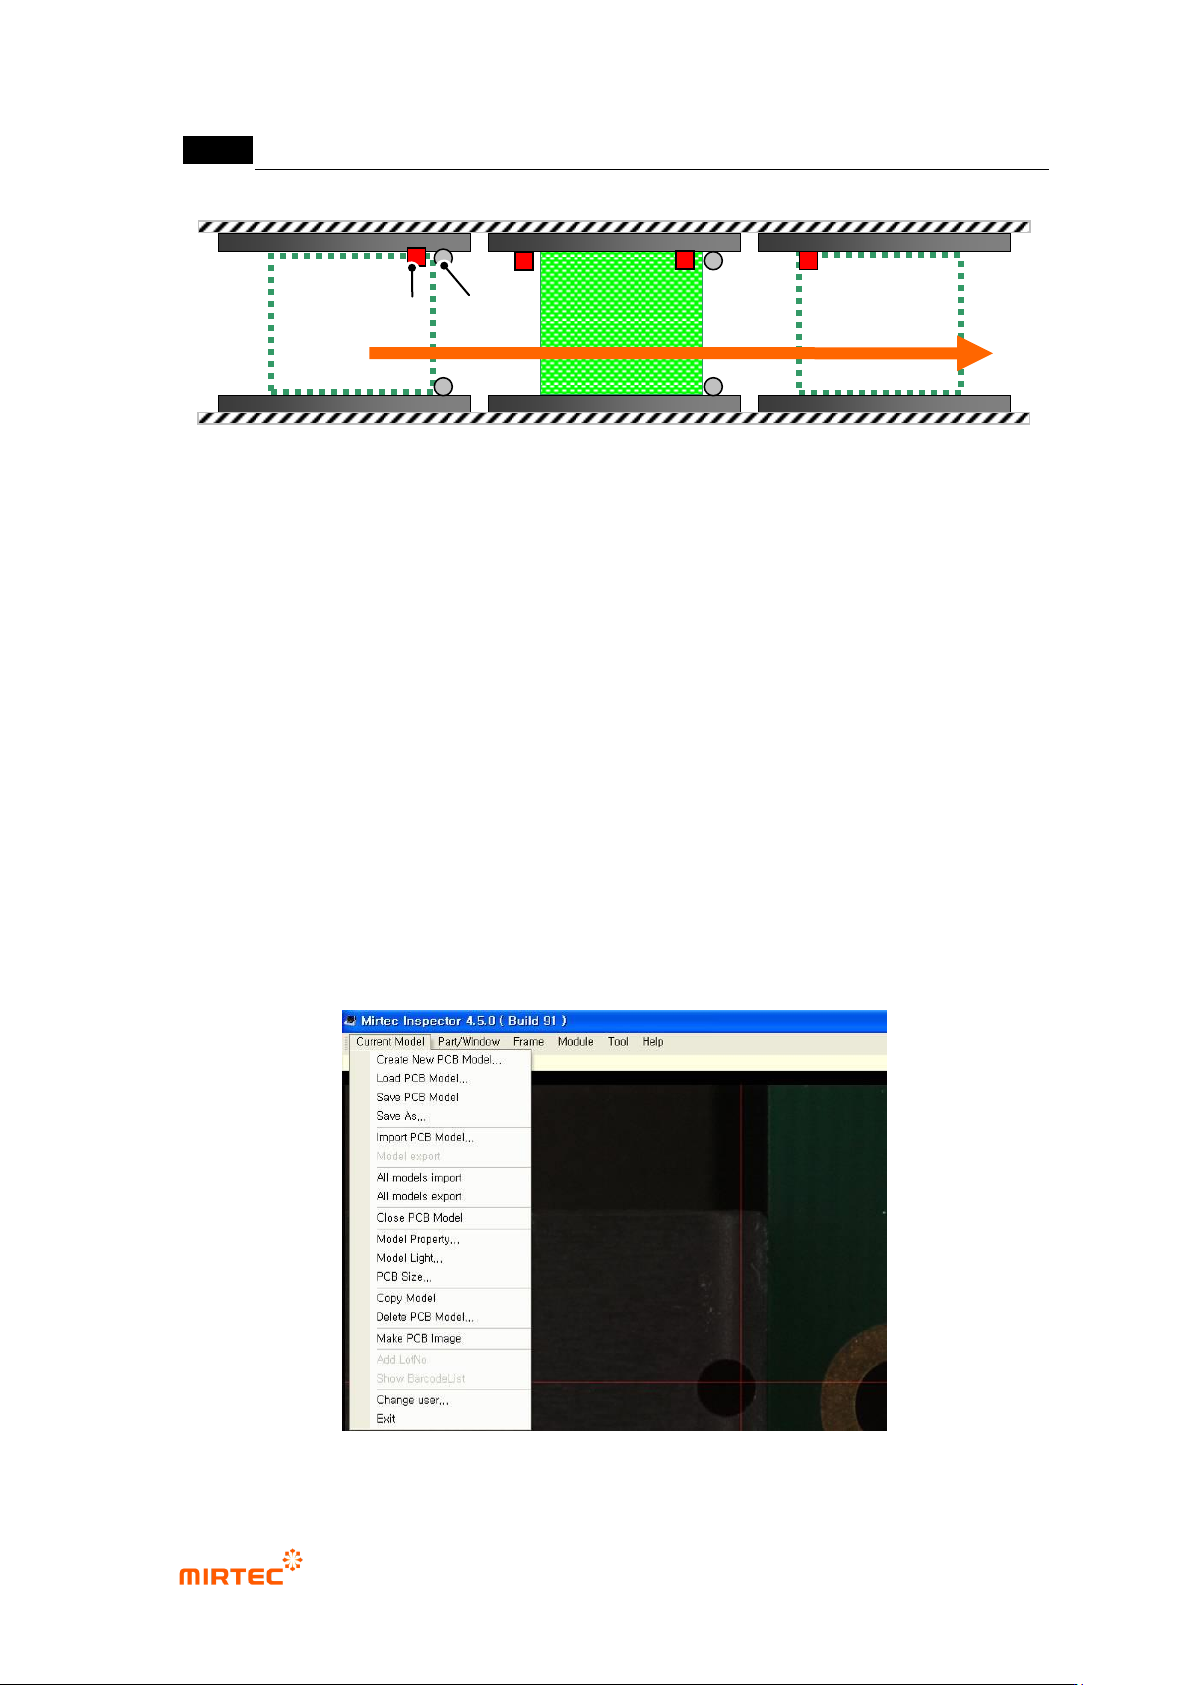
Skip mode
Select this function to eject PCB from inlet part to ejection part at a time. The machine will skip
inspection in inspection part when the machine is in skip mode.
MV-9 User Manual
5-10
[Figure 5-11 conveyor skip mode]
5.2. Creating and opening PCB model
In chapter 5.2, we describe about creating a new PCB model or opening model for which
teaching is already completed.
5.2.1. Creating new model
If there is no model for which teaching is already completed or to create a new model, create a
new model according to the following sequence.
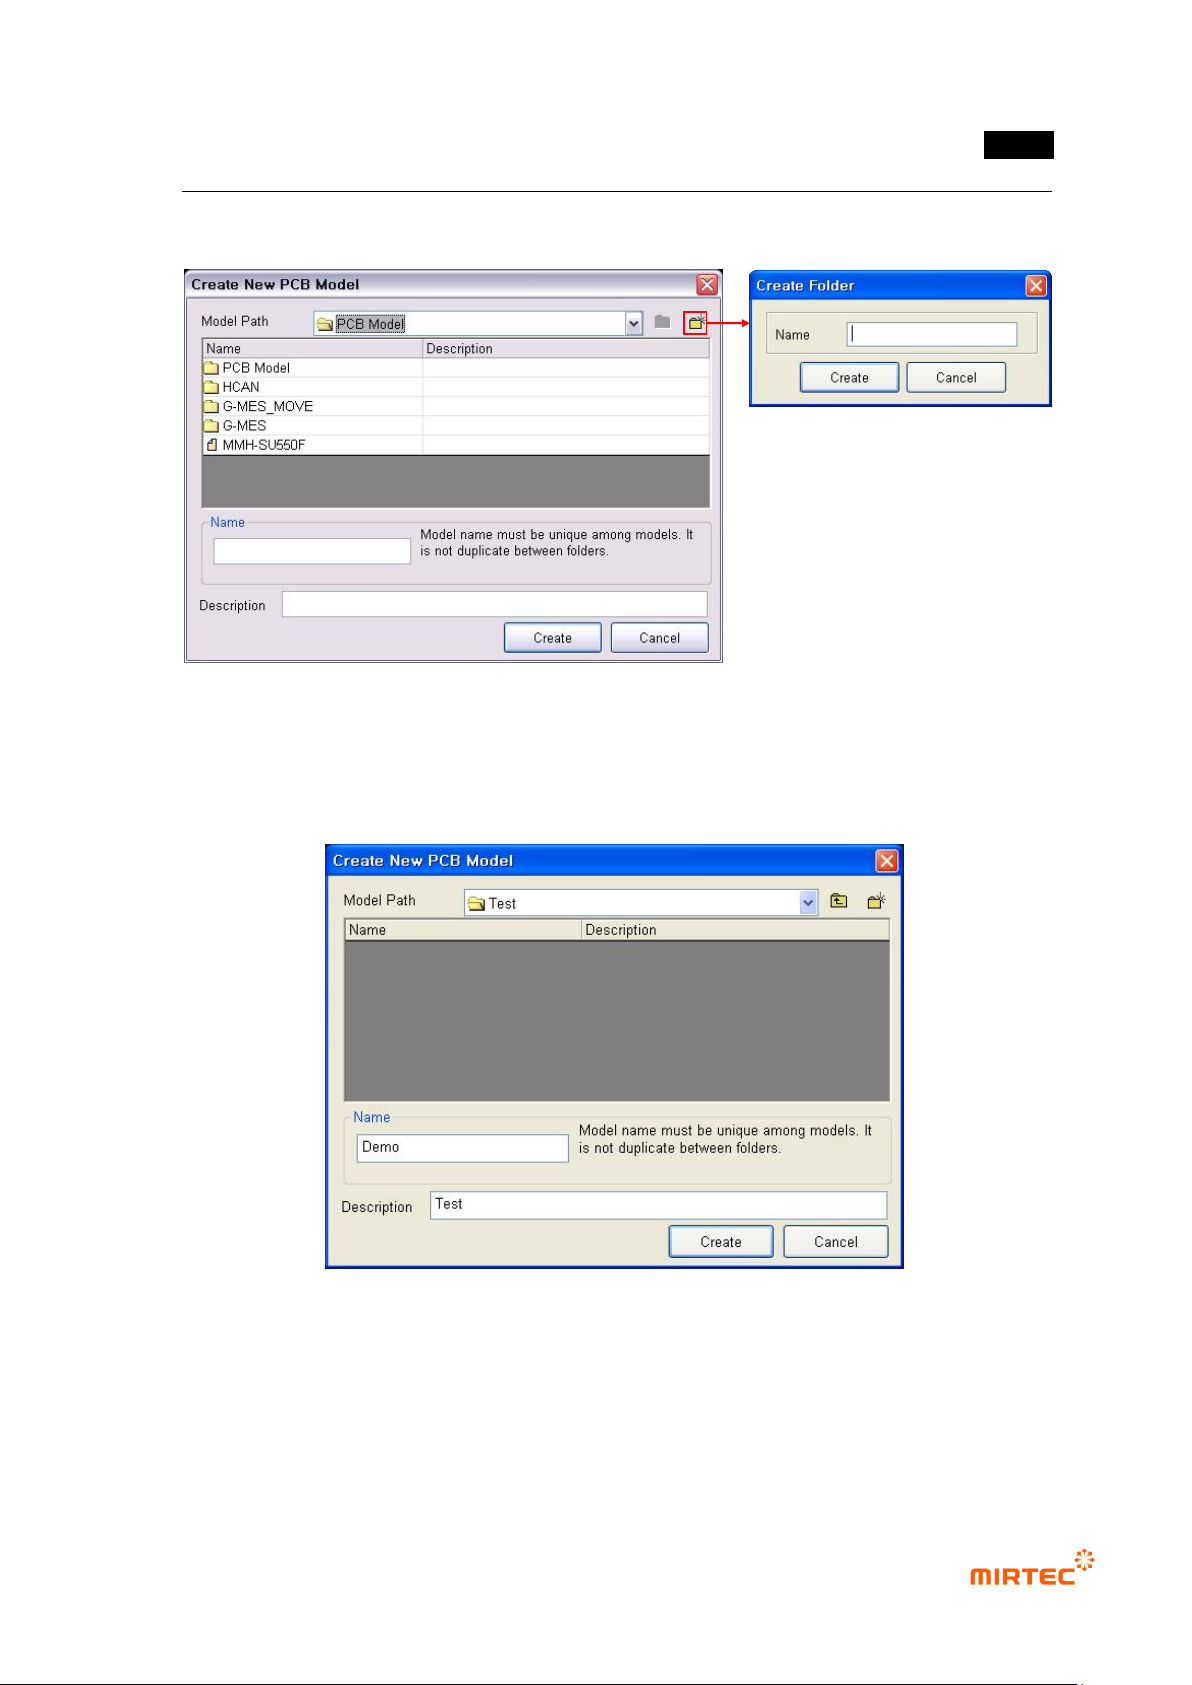
1) Creating a new PCB model
① Select „Create new PCB model‟ in „current model‟.
[Figure 5-12 Screen to create a new PCB model]
[Inlet part]
[Inspection
part]
[Ejection
part]
Sensor Stopper
错误!使用“开始”选项卡将 제목 2 应用于要在此处显示的文字。错误!使用“开始”选项卡将 제목 2 应用
于要在此处显示的文字。 .
5-11
② To create a new PCB model in a new folder, as shown in [Figure5-13], click <folder> button
and enter folder name to be newly created.
[Figure 5-13 screen to create a new PCB model folder]
③ Click newly created folder, input name and description of a model that will be created, and
then click <Create> button. At this point, name of the model to be created must have unique
name among the whole registered model names.
[Figure 5-14 Screen to input name of a new PCB model folder]
④ Register a name of a new PCB model to display model area screen to set PCB area as
shown in the figure below.