MV-9_Chapter 5. Teaching.pdf - 第6页
MV -9 Use r Manual 5-6 5.1. Mounting PCB For teaching a nd in spection , operat i on progra m m ust be executed after turning this system and PC ON. 5.1.1. Executing program Select ex ecuting program i n the main screen …

错误!使用“开始”选项卡将 제목 2 应用于要在此处显示的文字。错误!使用“开始”选项卡将 제목 2 应用
于要在此处显示的文字。 .
5-5
5.10.5.Inspection Mode Setting ............................................................................ 5-284
5.10.6.Criteria Setting ........................................................................................... 5-284
5.10.7.Inspection Results ..................................................................................... 5-285
MV-9 User Manual
5-6
5.1. Mounting PCB
For teaching and inspection, operation program must be executed after turning this system and
PC ON.
5.1.1. Executing program
Select executing program in the main screen for operation.
5.1.2. Mounting PCB
Mounting PCB
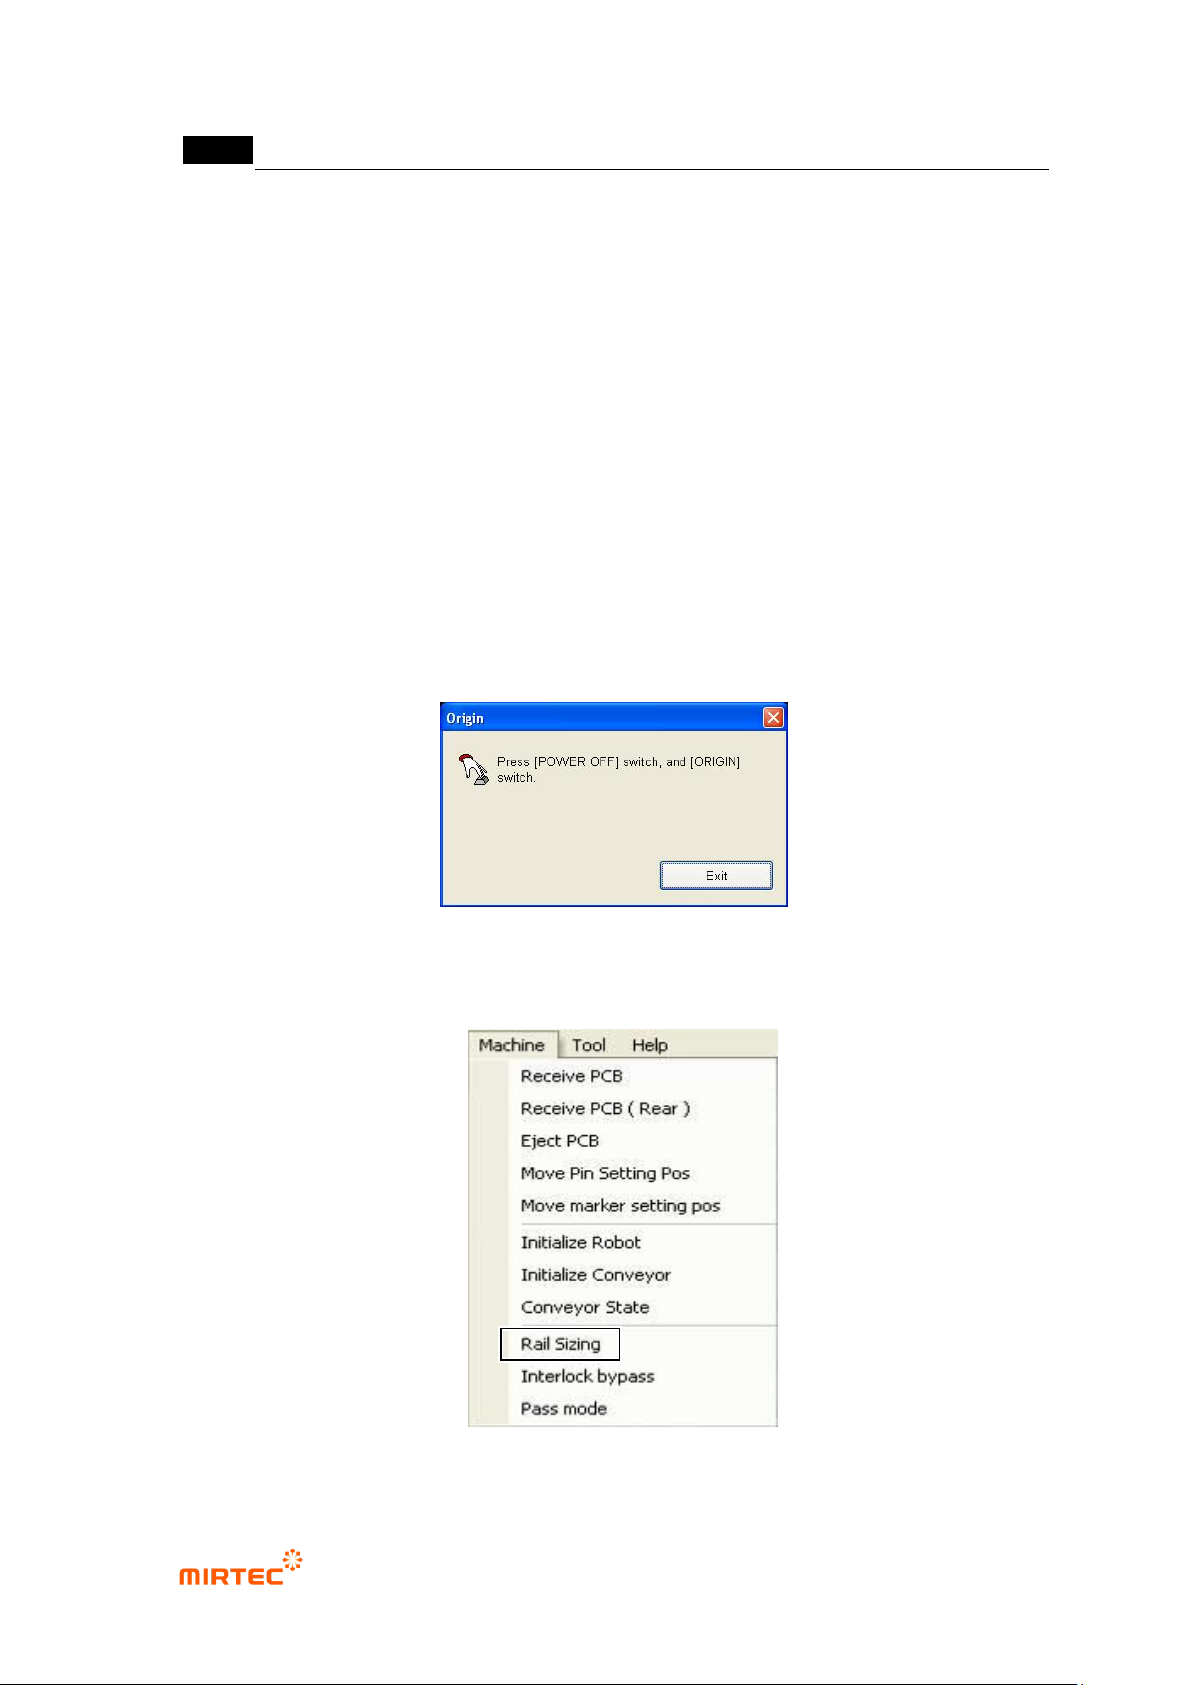
① Click origin return button to reset the machine.
[Figure 5-4 Machine reset screen]
② If conveyor width is not adjusted for PCB mounting, select „Adjust rail width‟ in the menu bar
to adjust rail width.
[Figure 5-5 Adjusting conveyor rail width]
错误!使用“开始”选项卡将 제목 2 应用于要在此处显示的文字。错误!使用“开始”选项卡将 제목 2 应用
于要在此处显示的文字。 .
5-7
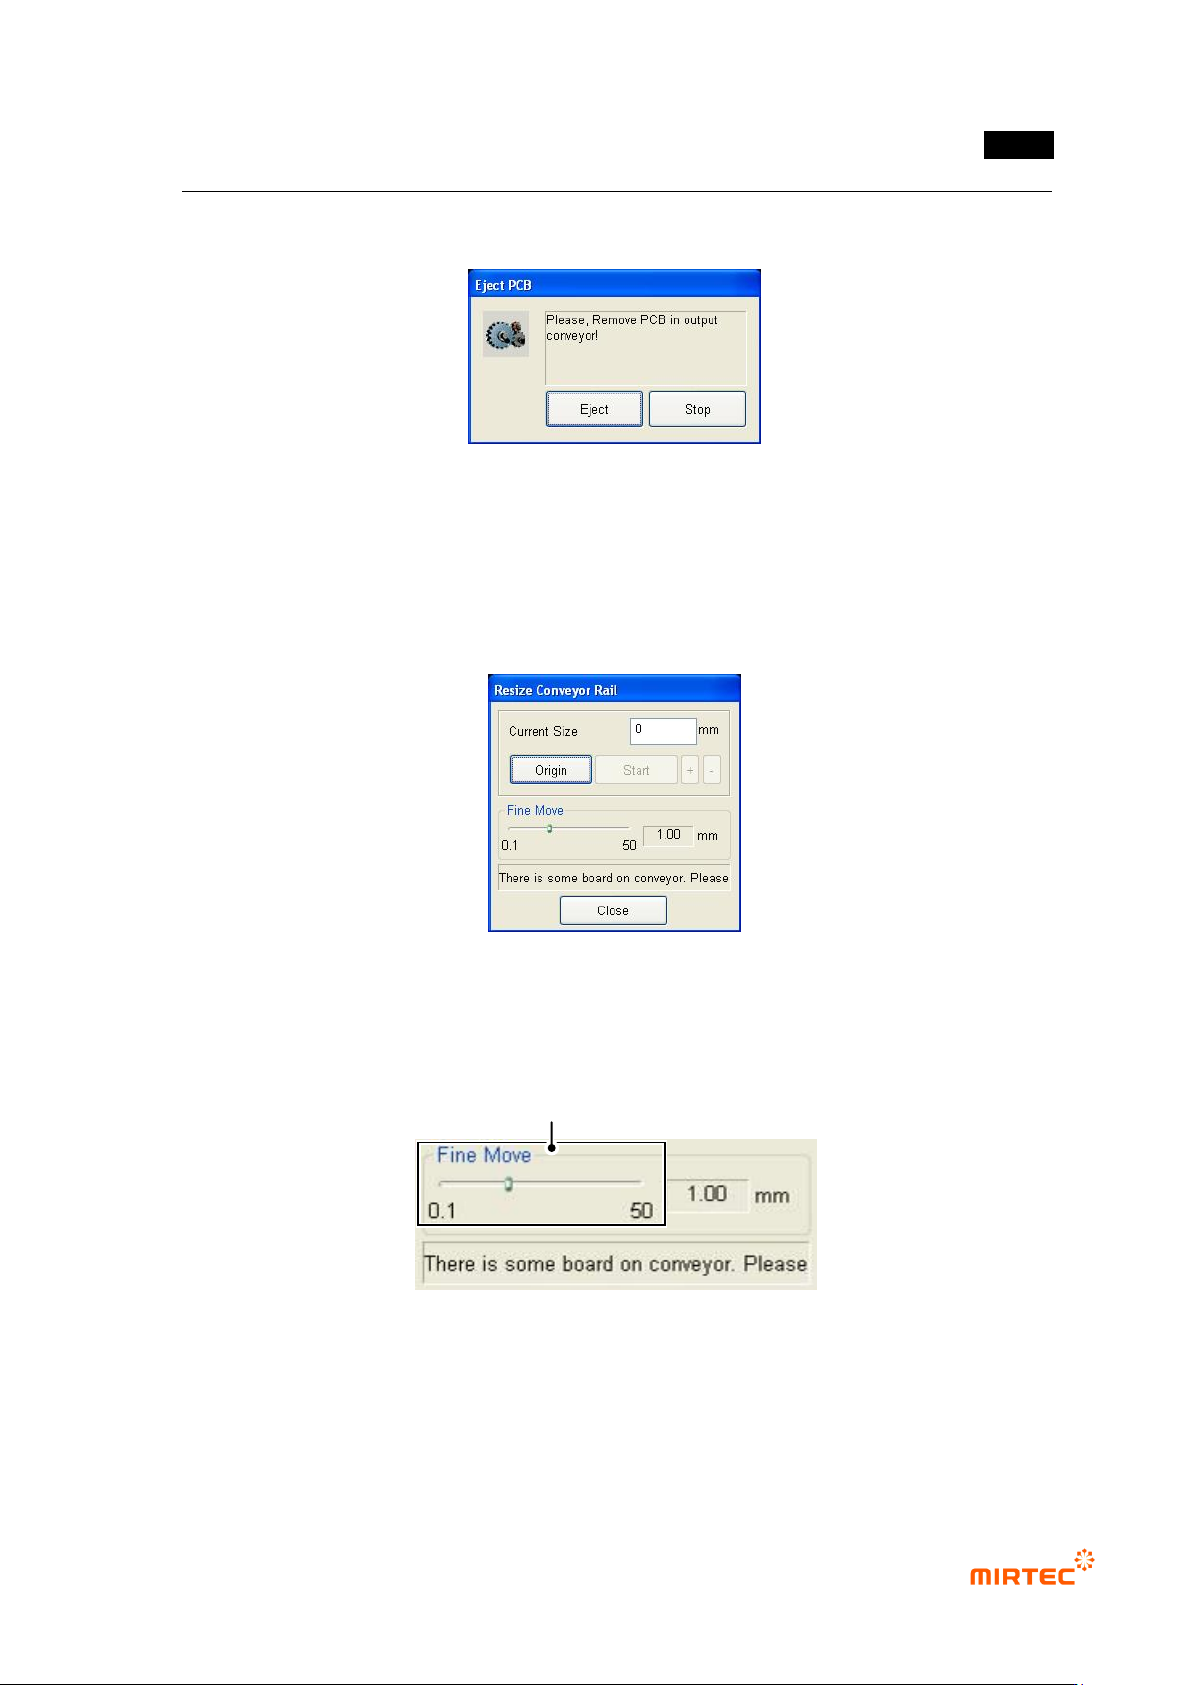
i. Firstly, select „Adjust rail width‟ in „Machine‟ menu. At this point, PCB will be
automatically ejected if there is PCB in the conveyor.
[Figure 5-6 PCB auto eject screen]
ii. If origin of the front axis and rear axis is not set, click <origin return> button for
origin return of axis on the front and rear of the conveyor.
iii. Measure width of PCB to be inspected and enter the value in „width input‟. In case
of error of ± 1mm, click „+/ −‟ button to adjust width.
[Figure 5-7 Screen to adjust conveyor rail width]
iv. To move within 1mm of adjusted width, use fine adjustment interval slide to adjust
the width.
[Figure 5-8 Fine move of conveyor rail width]
v. After adjusting conveyor width, inflow PCB into conveyor in inlet part for actual
inspection to check smooth flow of PCB.
Fine Adjustment Gap Slide Button