MV-9_Chapter 5. Teaching.pdf - 第65页
错误 ! 使用“开始” 选项卡将 제목 2 应用于要在此处显示的文字。 错误 ! 使用“开始”选项卡将 제목 2 应用 于要在此处显示的 文字。 . 5- 65 2) T eaching example of repres ent ative compo nent [Figure 5- 70 T eachin g example in optical character insp ection window] 3) Parameter …
MV-9 User Manual
5-64
5.3.4. Optical character inspection window
Optical character inspection window is used to inspect wrong mounting or non-mounting of
component with character (number and upper character of alphabet).
1) Teaching method
① Click <OCR inspection window> button among operating buttons.
② Select light for the inspection to clearly display character on component in light change tap
on the bottom of frame image screen. In general, horizontal light is recommended.
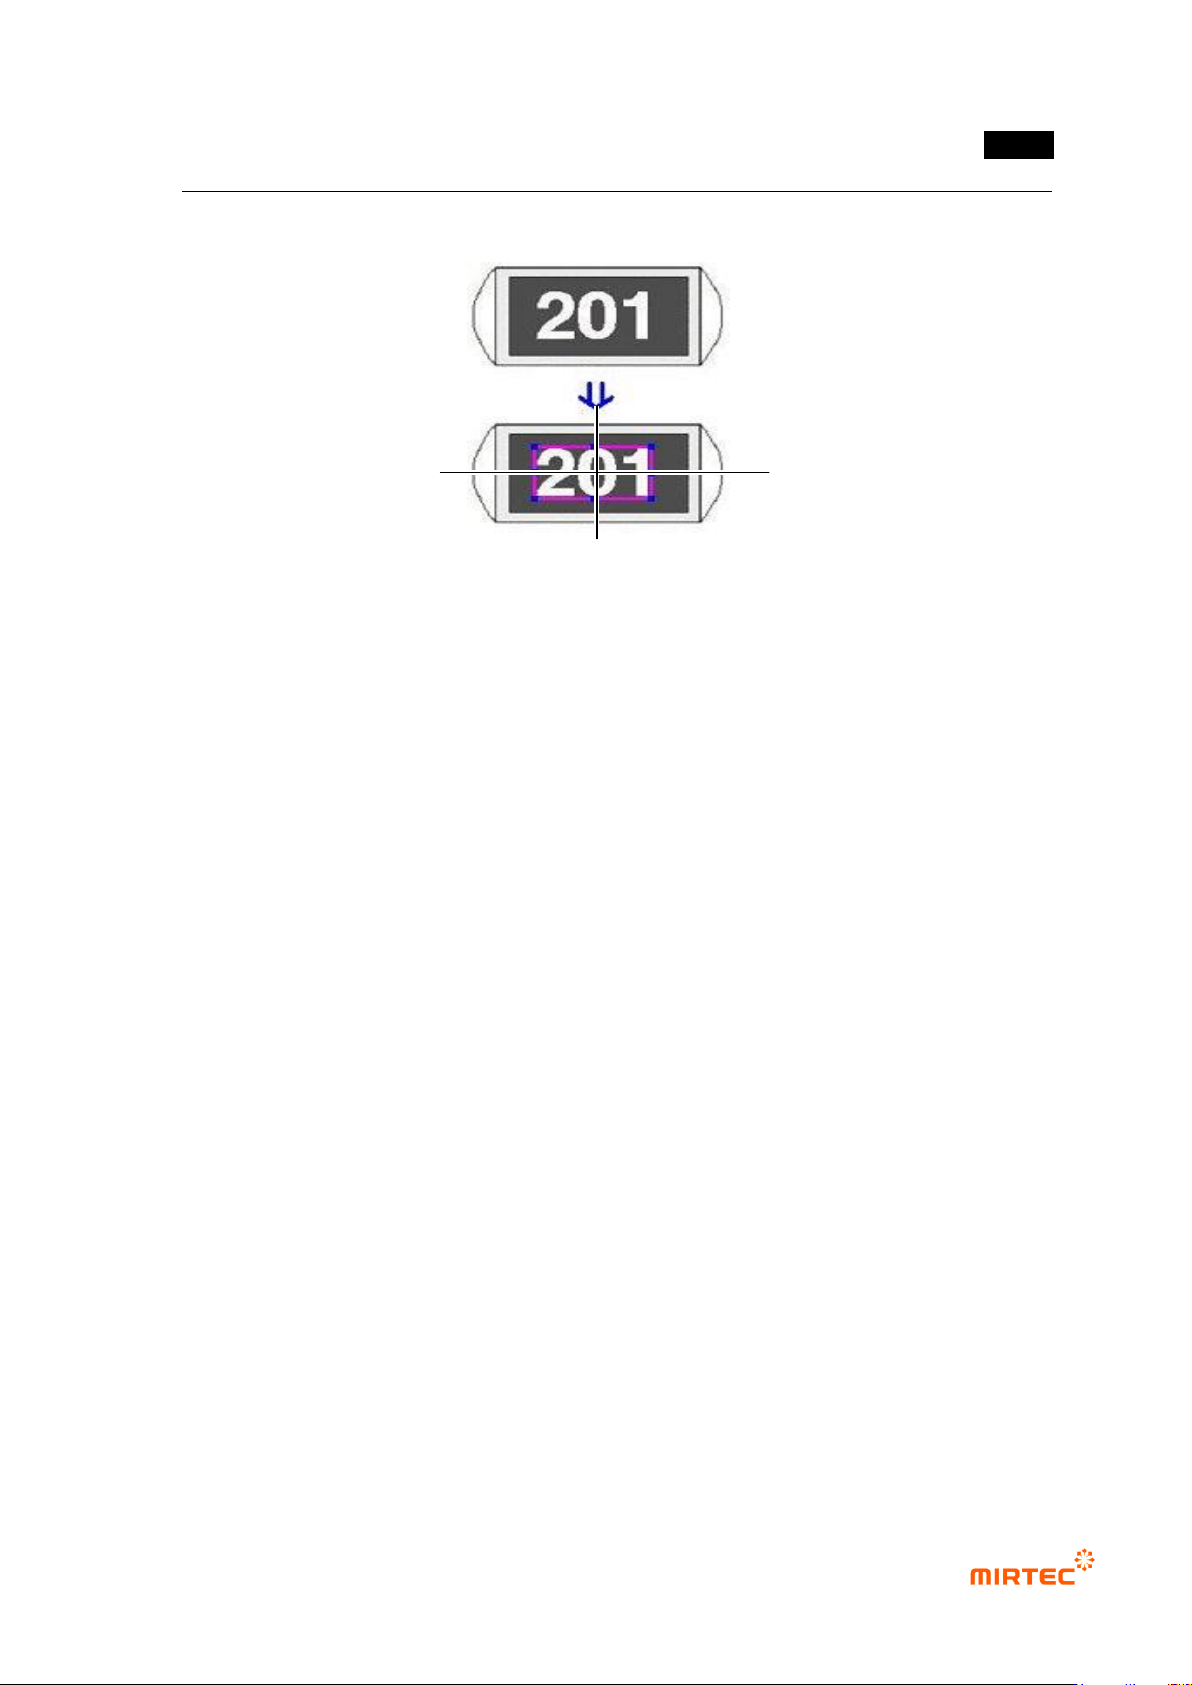
③ Draw inspection window in character part of interesting component. At this point, create
window that has with same size with character string.
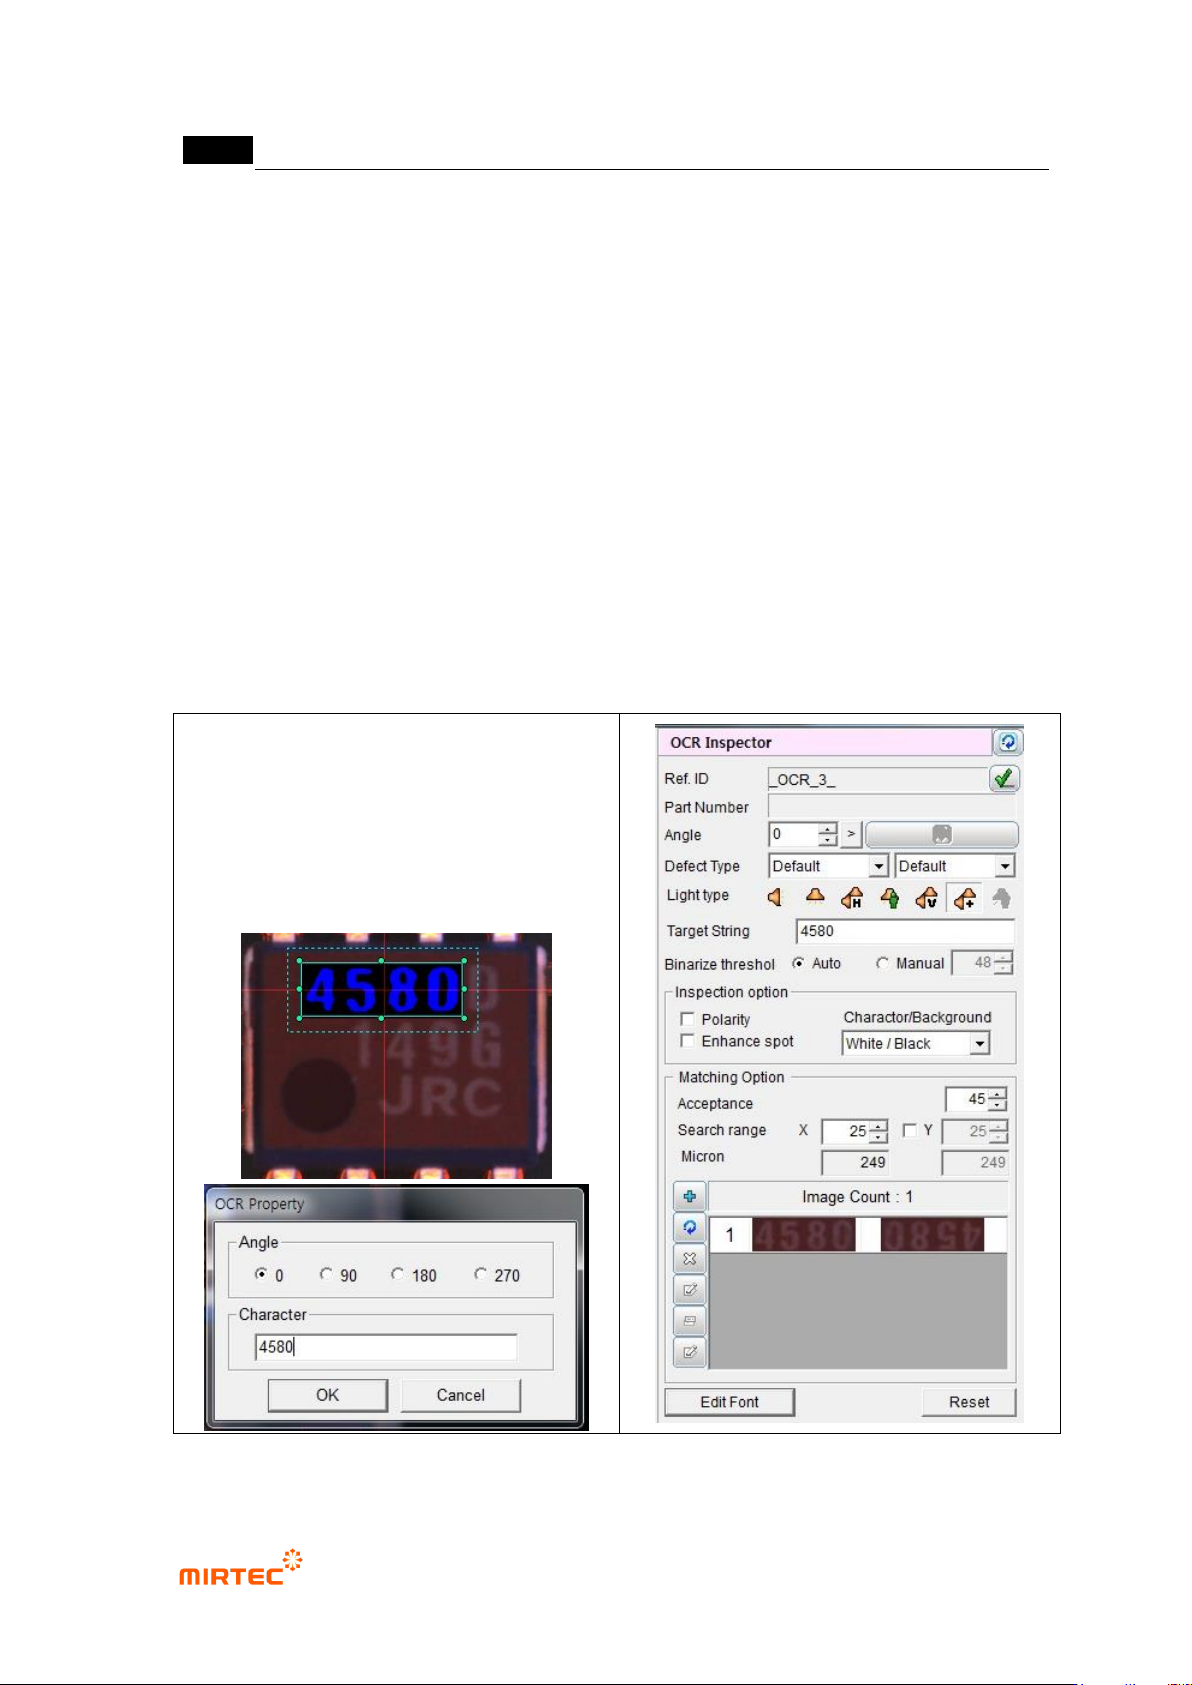
④ Enter character of character string for inspection window and select angle (Based on CCW).
[Figure 5-69 Character string and angle setting in optical character inspection window]
错误!使用“开始”选项卡将 제목 2 应用于要在此处显示的文字。错误!使用“开始”选项卡将 제목 2 应用
于要在此处显示的文字。 .
5-65
2) Teaching example of representative component
[Figure 5-70 Teaching example in optical character inspection window]
3) Parameter of optical character inspection window
Reference name
- Refer to „reference name (page5-21)‟ in „5.3.1 mounting inspection window‟ excepting
shape.
- Created in „_OCR_0_‟ format. „OCR‟ means Optical Character Recognition and number
means creation order of optical character inspection window.
Component name
- Refer to „component name (page5-21)‟ in '5.3.1 mounting inspection window‟.
Rotation angle
- Refer to „rotation angle (page5-22)‟ in '5.3.1 mounting inspection window‟.
Defect type
- Refer to „defect type (page)‟ in '5.3.1 mounting inspection window‟
Light type
- Refer to „light type (page5-22)‟ in '5.3.1 mounting inspection window‟.
Target character string
- Comparison character string for optical character inspection. Character string that is
entered during creation of inspection window will be displayed.
Binarization boundary value
- Auto level is used to automatically set binarization value for image binarization.
- Manual level is used to manually set binarization value for image binarization.
0°
90°
180°
360°

MV-9 User Manual
5-66
Inspection option:
- Polarity component: Refer to polarity item (page5-23)‟ in '5.3.1 mounting inspection
window‟ Spot improvement: use this to fill inside of the character with white for binarization
of character part.
- Character/background setting: set contrast between character string and component body.
Select „White/Black‟ when character string is white and body is dark.
Select „Black/White‟ when character string is black and body is white.
Matching Option
- Matching ratio
If character string is not found using OCR‟s recognition algorithm, conduct inspection
using algorithm that is used for mounting inspection. At this point, normal judgment
reference matching value that is used.
- Search range
Set search area to find character string that completed teaching in X/Y pixel unit.
Pattern image screen
- Refer to „pattern image screen (page5-25)‟ in '5.3.1 mounting inspection window‟
Character edit
- This function is used for users to directly register character in order to increase recognition
rate of various character fonts on component. The following is the way to register it.
① Click <character teaching> button.
② If font of character desired to be registered differs from font of already registered character,
select character font to be registered as shown in the figure below and enter character to be
registered in data box on the left of <Add> button and then click <Add> button to register the
relevant font.
③ To edit font of character desired to be registered, click <Edit> button in user font
management screen.
[Figure 5-71 User font management screen]