Maintenance Manual.pdf - 第207页
RL131 MAINTENANCE MANUAL 9.1 Movem ent Check DA8MEC-71-010- A0 9.1-4 9.1.2 NC A x is Jog Check Be sure to retur n all axes to their origins b efore jogging or m oving axes. 2. 1. Press [Mach ine Adjustm ent] from the mai…
RL131
MAINTENANCE MANUAL
9.1 Movement Check
DA8MEC-71-010-A0
9.1-3
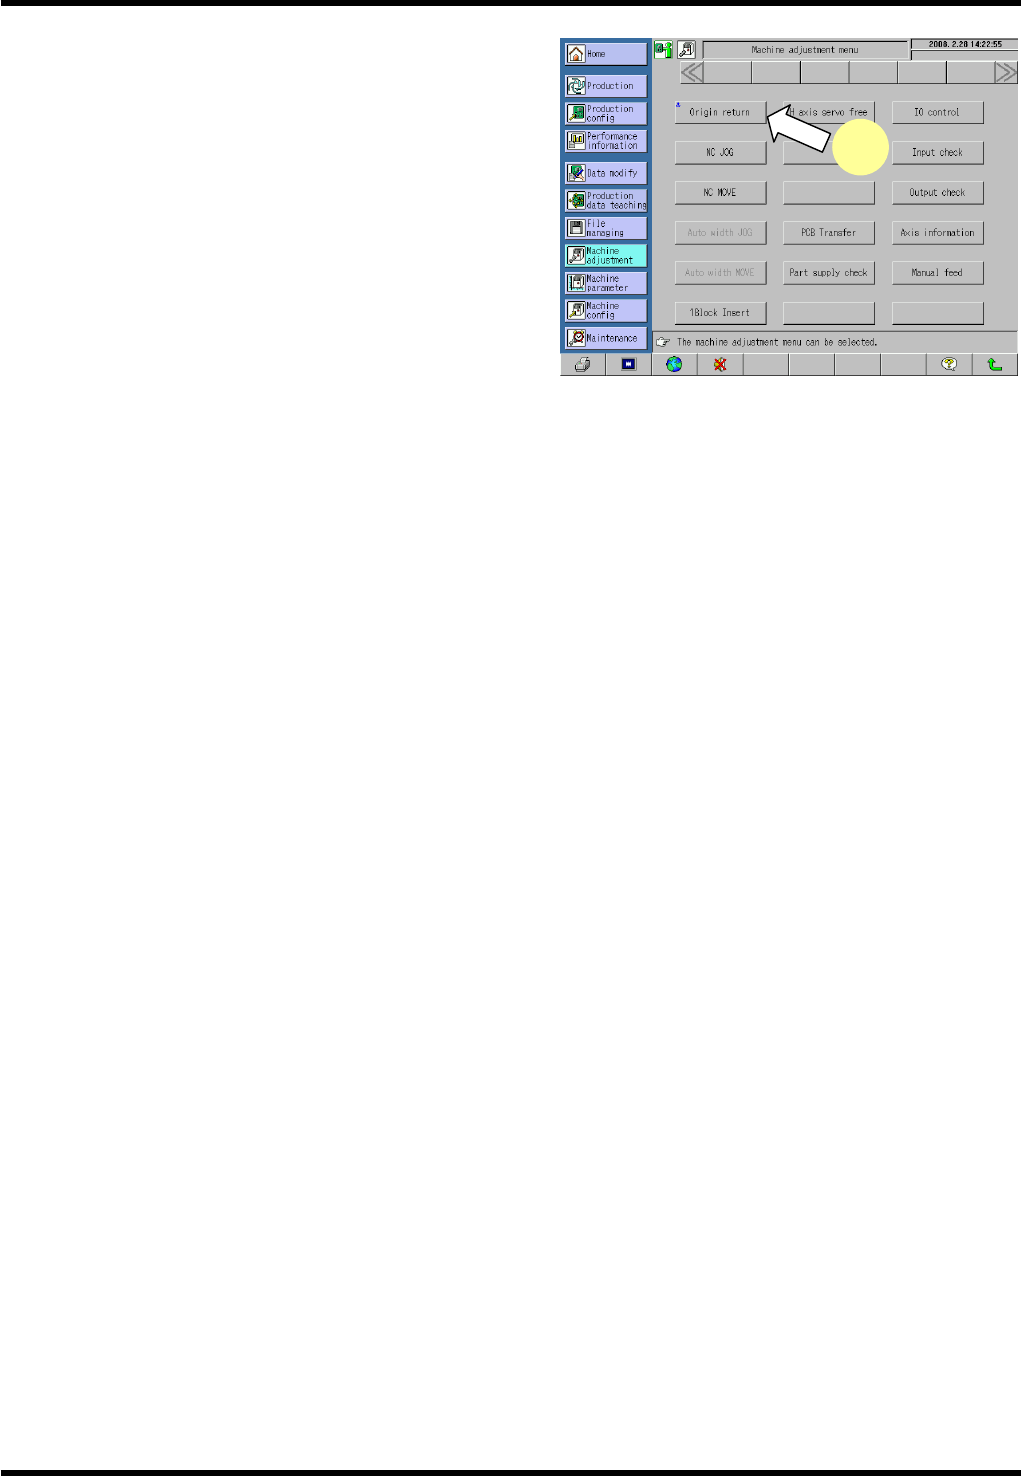
4. Press <ENABLING> + [Origin return].
This returns all axes to their origins.
* The <ENABLING> switch is located in the lower left
part of the main panel.
=REMARKS=
Note that the qH axis cannot be returned to its
origin if it is not near the origin.
4
RL131
MAINTENANCE MANUAL
9.1 Movement Check
DA8MEC-71-010-A0
9.1-4
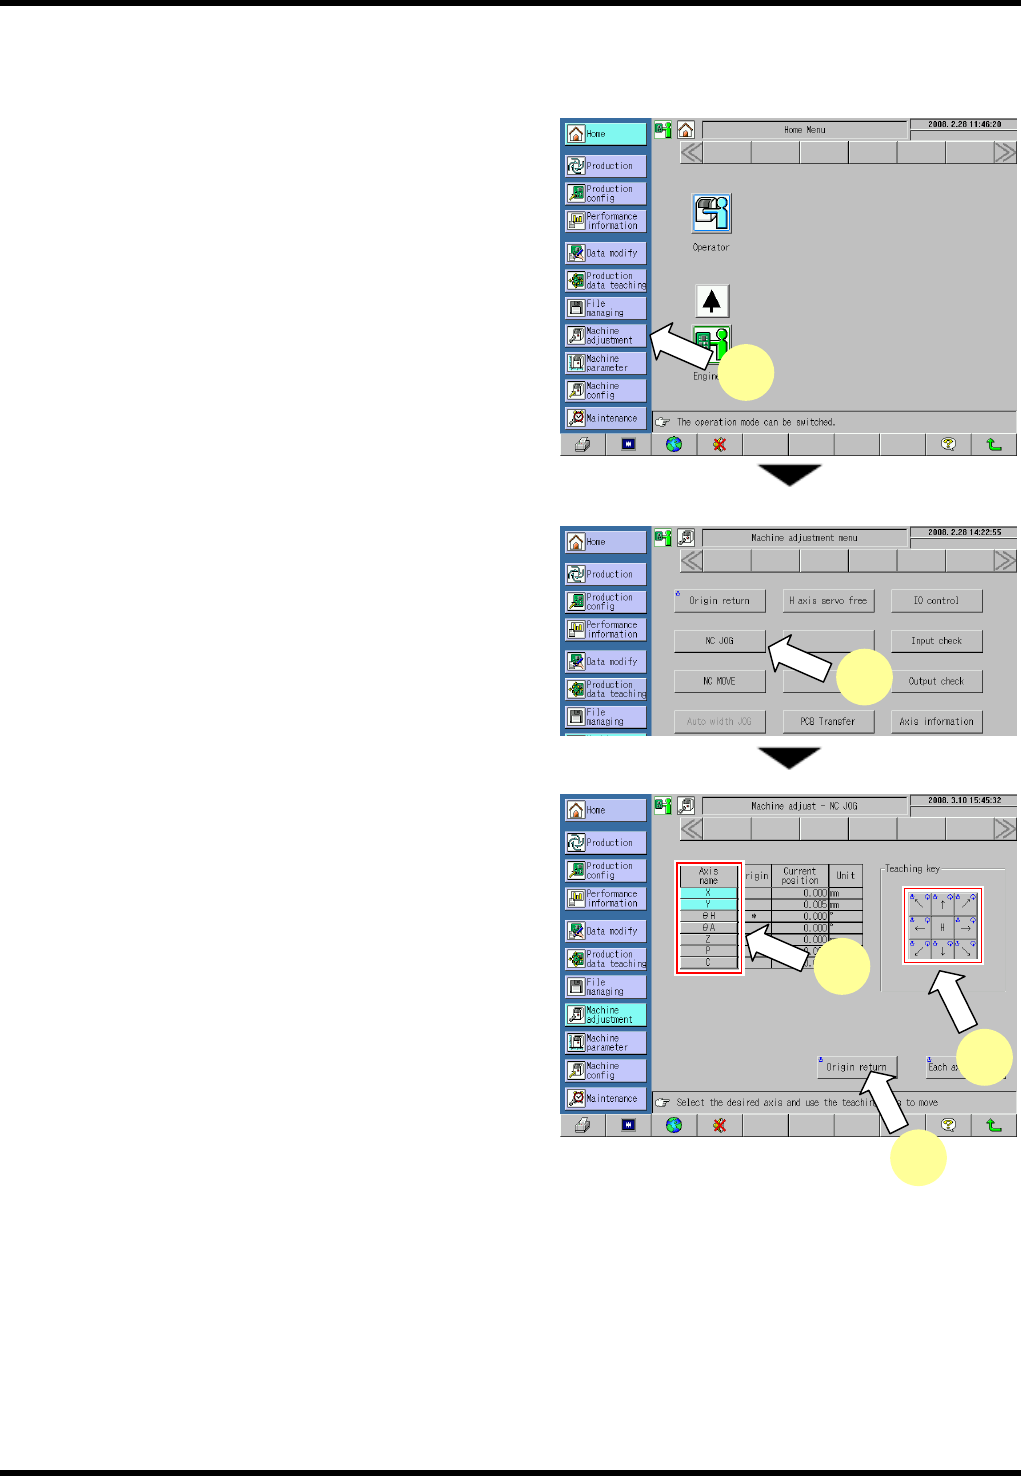
9.1.2 NC Axis Jog Check
Be sure to return all axes to their origins before jogging or moving axes.
2.
1. Press [Machine Adjustment] from the main menu.
The “Machine adjustment menu” screen appears.
=REMARKS=
The following steps are required to jog the qH
axis:
1. Select the I/O control menu.
2. Press the button for returning the
transfer head to move the transfer chuck
to the right.
3. Move the qU axis to the retract position
(16°). Move the qU axis to around the
16° position or move it to the waiting
position via [NC MOVE] (See 9.1.3.)
2. Press [NC JOG].
The “Machine adjust - NC JOG” screen appears.
3. Select the NC axis to be moved.
4. Press <ENABLING> + teaching keys to move each
axis.
=REMARKS=
Press any teaching key for the desired
direction.
Care should be taken because the selected
axis moves.
(The current positions of the axes are
displayed rounded off to three decimal
places.)
=HINT=
Pressing [H] (high speed) in advance enables
the axis to be moved faster.
When the [H] key is ON, the selected axis moves at a speed ten times the pulse of normal jog.
5. Press <ENABLING> + [Origin return] after completing movement check.
=REMARKS=
It is not possible to return to their origins unless only the qH axis is returned to around its origin (0°±5°).
1
3
4
5
2
RL131
MAINTENANCE MANUAL
9.1 Movement Check
DA8MEC-71-010-A0
9.1-5
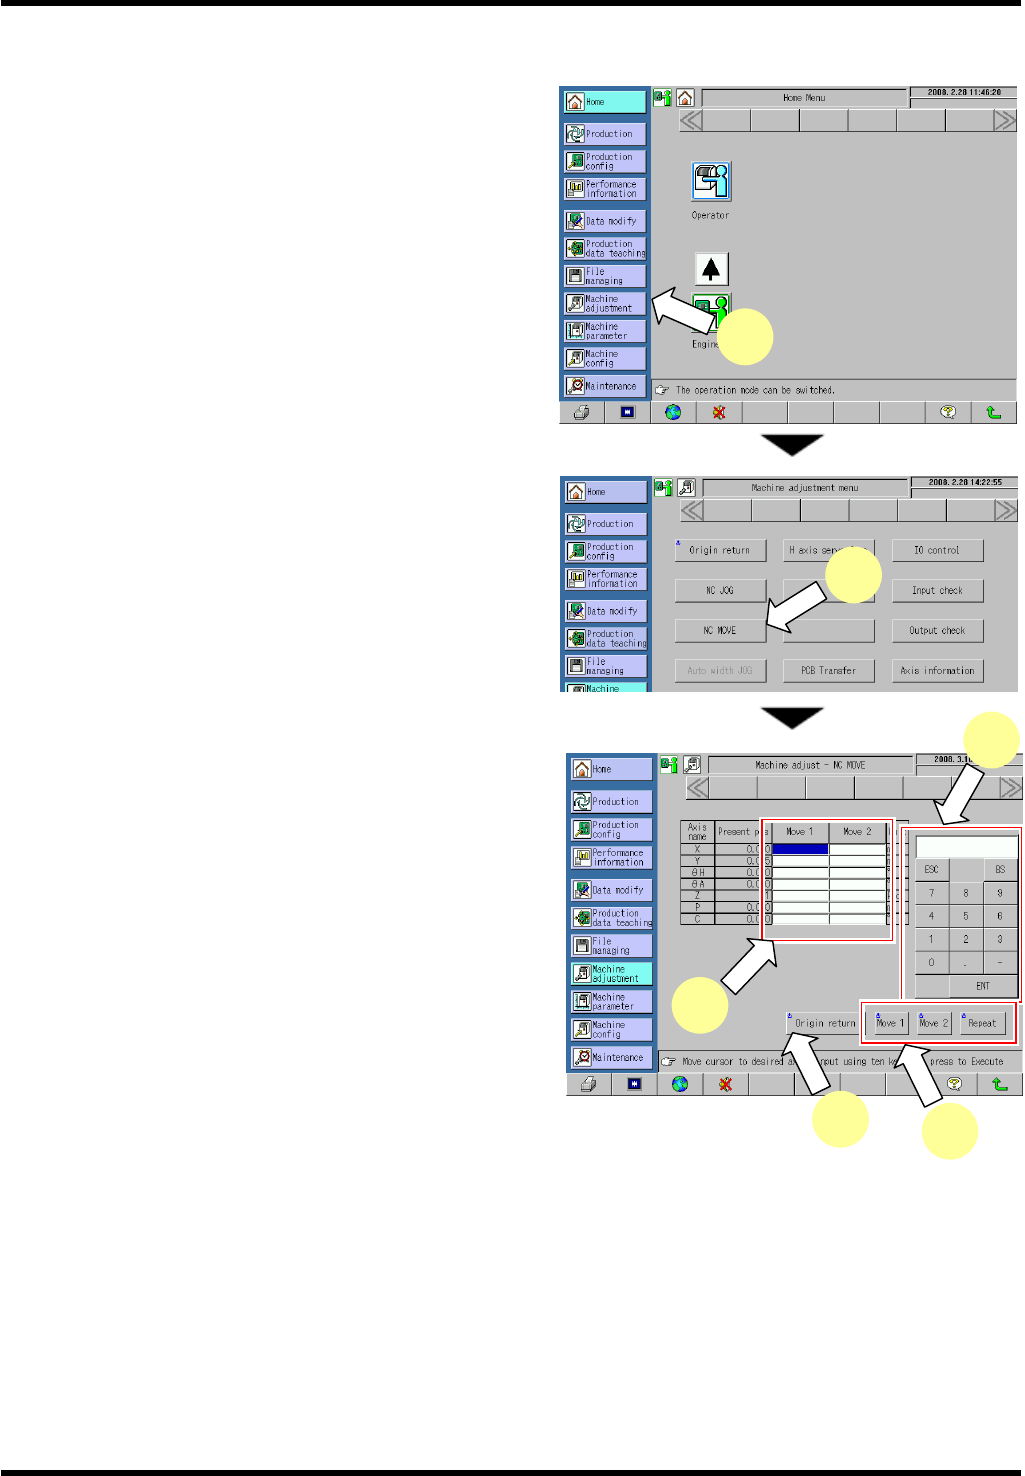
9.1.3 NC Axis Move Check
3.
1. Press [Machine Adjustment] from the main menu.
The “Machine adjustment menu” screen appears.
2. Press [NC MOVE].
The “Machine adjust - NC MOVE” screen
appears.
3. Press the [Move 1] or [Move 2] field for the axis to
be moved.
4. Input a coordinate of the target position to move the
selected axis to.
5. Pressing <ENABLING> + [Move 1], [Move 2] or
[Repeat] moves the NC axis to the designated
coordinate.
=HINT=
Input the coordinates in [Move 1] and [Move 2]
respectively and press [Repeat] to repeat the
positioning to the designated coordinates of
MOVE 1 and MOVE2.
6. Press <ENABLING> + [Origin return] after completing movement check.
1
5
3
6
4
2