Maintenance Manual.pdf - 第209页
RL131 MAINTENANCE MANUAL 9.1 Movem ent Check DA8MEC-71-010- A0 9.1-6 9.1.4 Width Adjust Axis Jog (Option) Be sure to retur n all axes to their origins b efore m oving axes. 4. 1. Press [Mach ine Adjustm ent] from the mai…
RL131
MAINTENANCE MANUAL
9.1 Movement Check
DA8MEC-71-010-A0
9.1-5
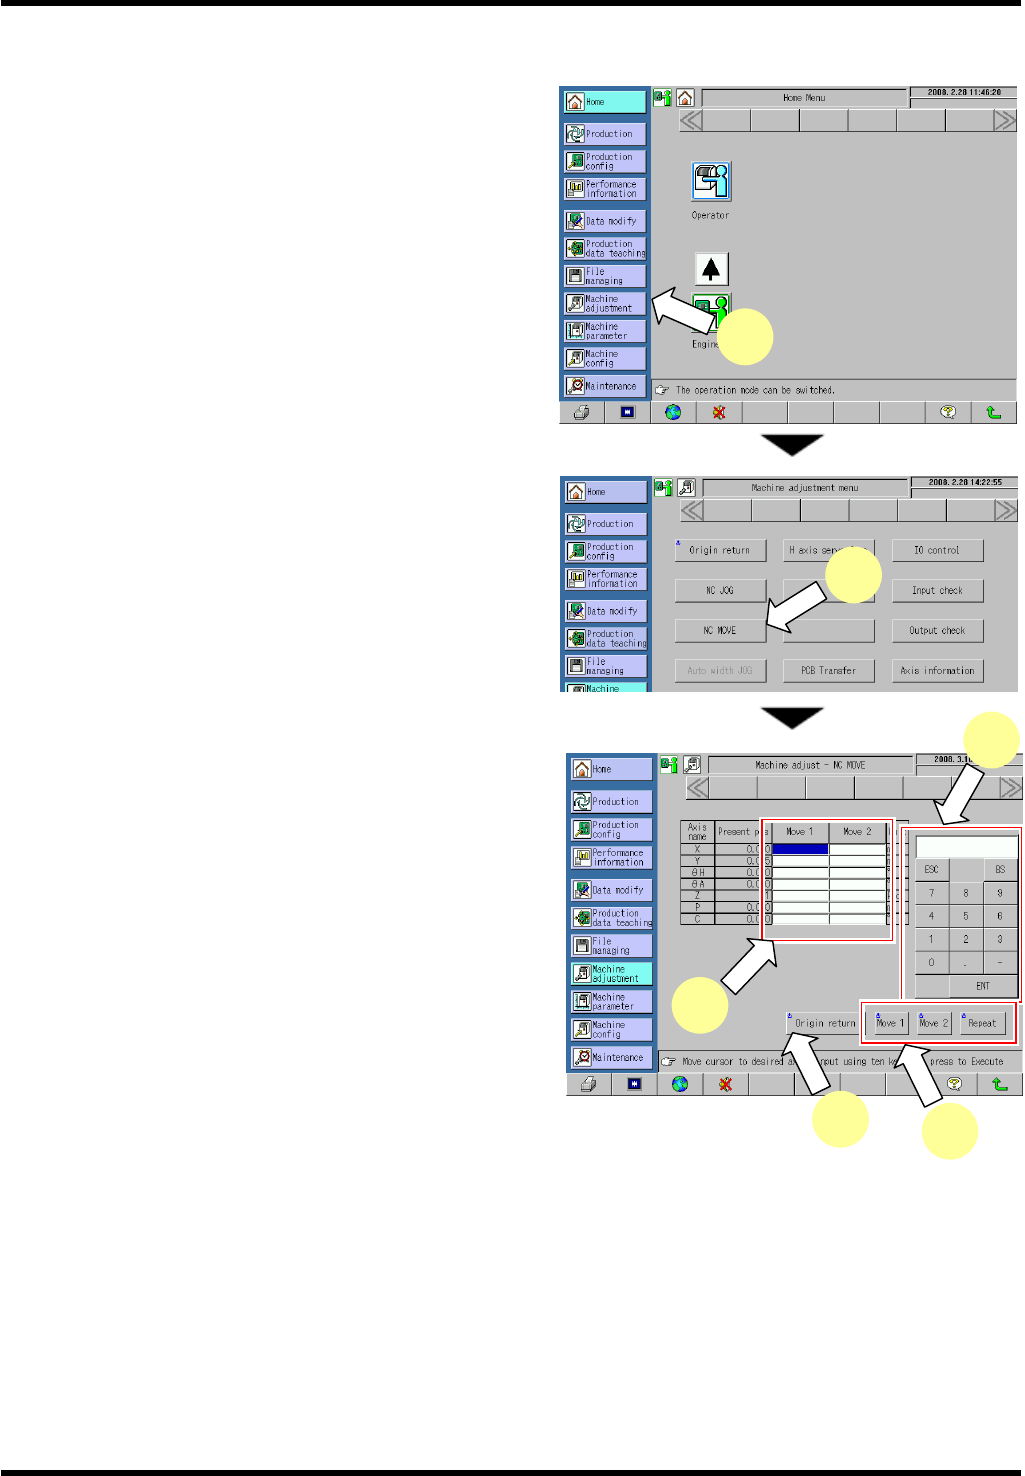
9.1.3 NC Axis Move Check
3.
1. Press [Machine Adjustment] from the main menu.
The “Machine adjustment menu” screen appears.
2. Press [NC MOVE].
The “Machine adjust - NC MOVE” screen
appears.
3. Press the [Move 1] or [Move 2] field for the axis to
be moved.
4. Input a coordinate of the target position to move the
selected axis to.
5. Pressing <ENABLING> + [Move 1], [Move 2] or
[Repeat] moves the NC axis to the designated
coordinate.
=HINT=
Input the coordinates in [Move 1] and [Move 2]
respectively and press [Repeat] to repeat the
positioning to the designated coordinates of
MOVE 1 and MOVE2.
6. Press <ENABLING> + [Origin return] after completing movement check.
1
5
3
6
4
2
RL131
MAINTENANCE MANUAL
9.1 Movement Check
DA8MEC-71-010-A0
9.1-6
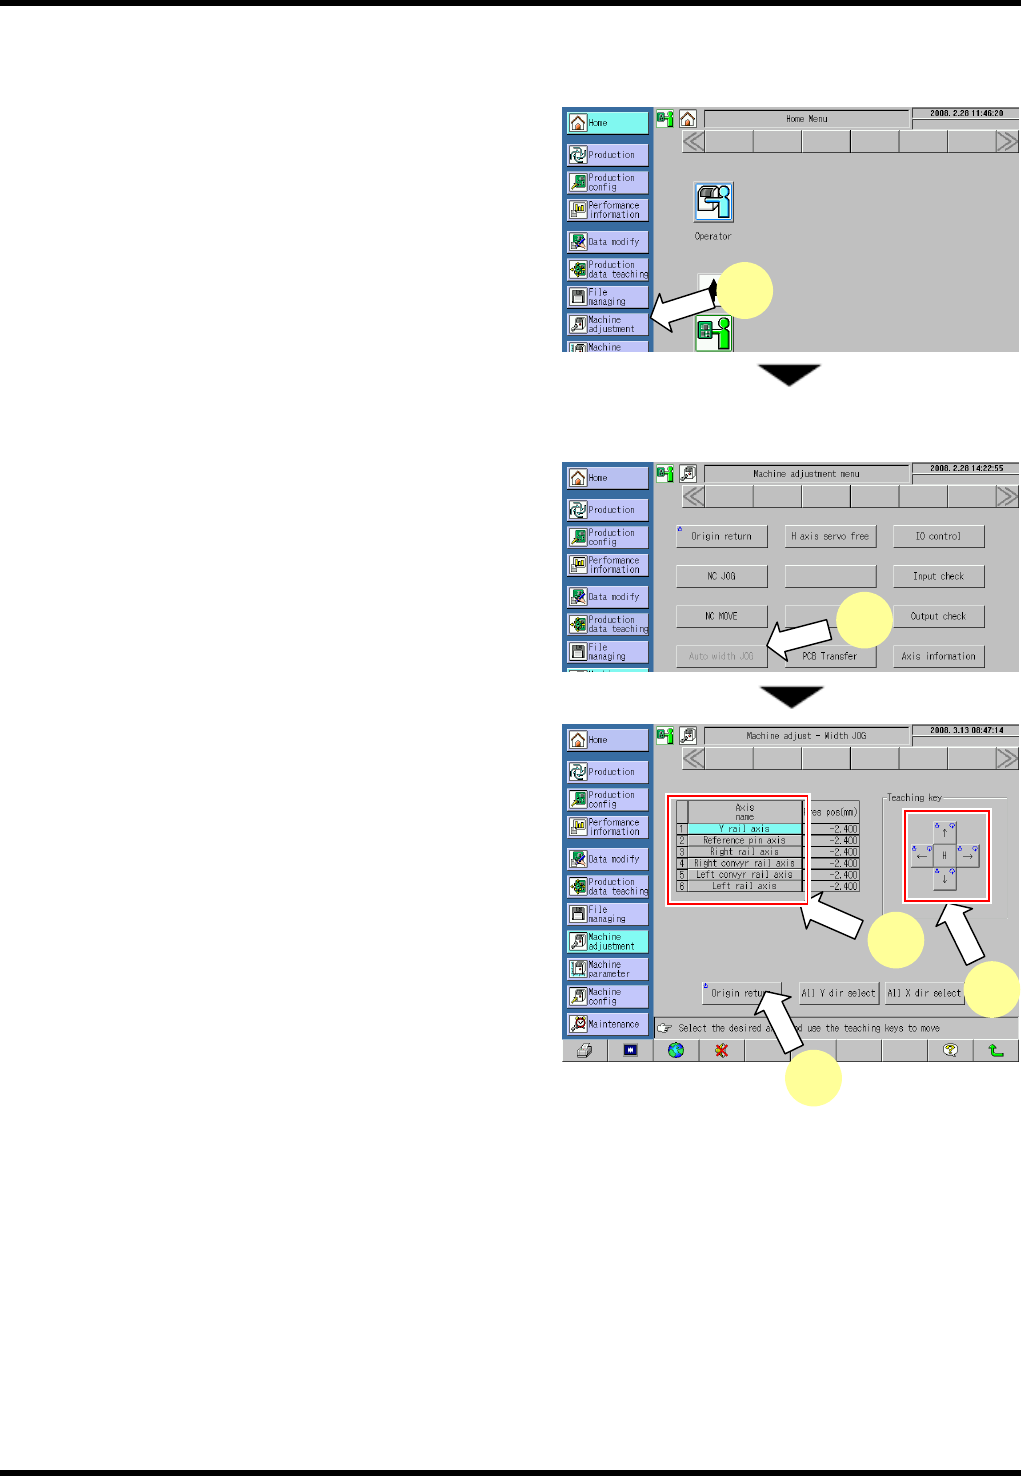
9.1.4 Width Adjust Axis Jog (Option)
Be sure to return all axes to their origins before moving axes.
4.
1. Press [Machine Adjustment] from the main menu.
The “Machine adjustment menu” screen appears.
=REMARKS=
The following steps are required to jog the qH
axis:
1. Select the I/O control menu.
2. Press the button for returning the transfer
head to move the transfer chuck to the
right.
3. Move the qU axis to the retract position
(16°).
2. Press [Auto width JOG].
The “Machine adjust - Width JOG” screen
appears.
3. Select the axis to be moved.
Pressing [All Y dir select] selects all rail axes.
Pressing [All X dir select] selects the reference
pin axis.
4. Press <ENABLING> + teaching keys to move each
axis.
=REMARKS=
Press any teaching key for the desired
direction.
Care should be taken because the selected
axis moves.
=HINT=
Pressing [H] in advance enables the axis to move faster.
5. Press <ENABLING> + [Origin return] after completing movement check.
3
4
5
1
2
RL131
MAINTENANCE MANUAL
9.1 Movement Check
DA8MEC-71-010-A0
9.1-7
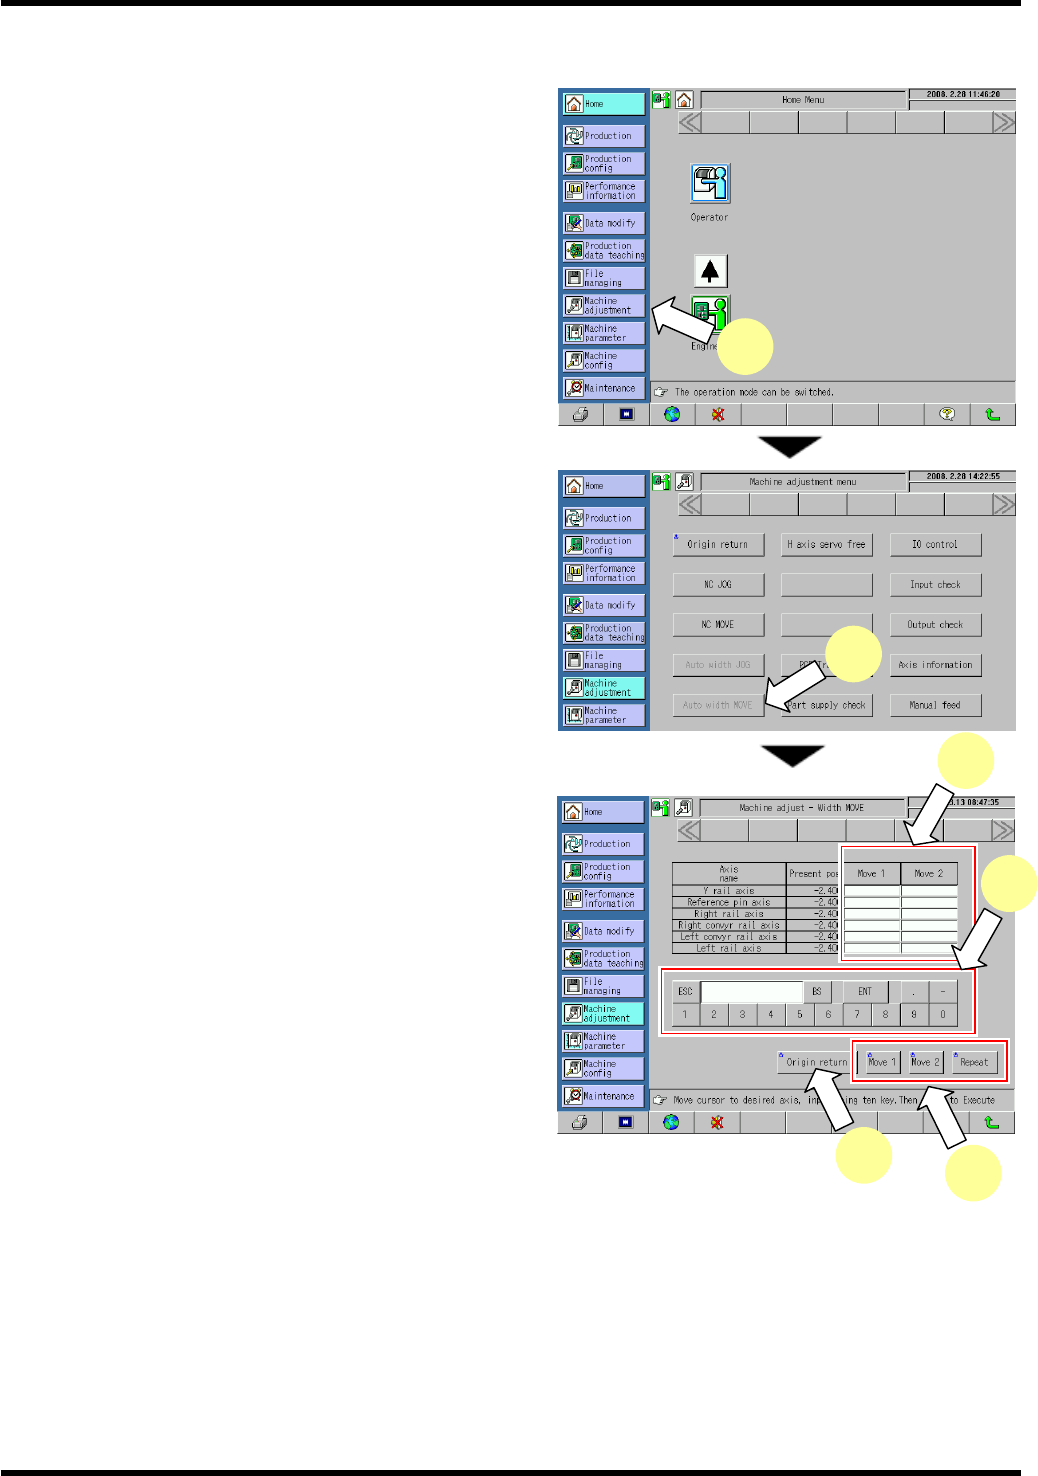
9.1.5 Width Adjust Axis Move Check (Option)
5.
1. Press [Machine Adjustment] from the main menu.
The “Machine adjustment menu” screen appears.
2. Press [Auto width MOVE].
The “Machine adjust - Width MOVE” screen
appears.
3. Press [Move 1] or [Move 2] field for the axis to be
moved.
4. Input a coordinate of the target position to move the
selected axis to.
5. Pressing <ENABLING> + [Move 1], [Move 2] or
[Repeat] moves the NC axis to the designated
coordinate.
=HINT=
Input the coordinates in [Move 1] and [Move 2]
respectively, and press [Repeat] to repeat
the movement to the designated coordinates of
MOVE 1 and MOVE2.
6. Press <ENABLING> + [Origin return] after completing movement check.
3
5
6
4
1
2