4OM-1050-002.pdf - 第85页
1.4 Maintenance Method 0307-005 1-69 AFO01ETRP (2) When the [Start Oil Supply] button is pressed in the "Oil Supply" tab sheet, the following sheet appears. Fig. 4A84-6 (3) Press the [ALL] button entitled "…
1.4 Maintenance Method
0307-007 1-68 AFO01ETRP
••
••
• Lubrication Procedure
The linear guide in the feeder carriage section must
be lubricated with the [POWER ON] button on the
operation panel being pressed ("ON" condition).
It is dangerous. Be sure to lubricate alone (without
any other attended personnel).
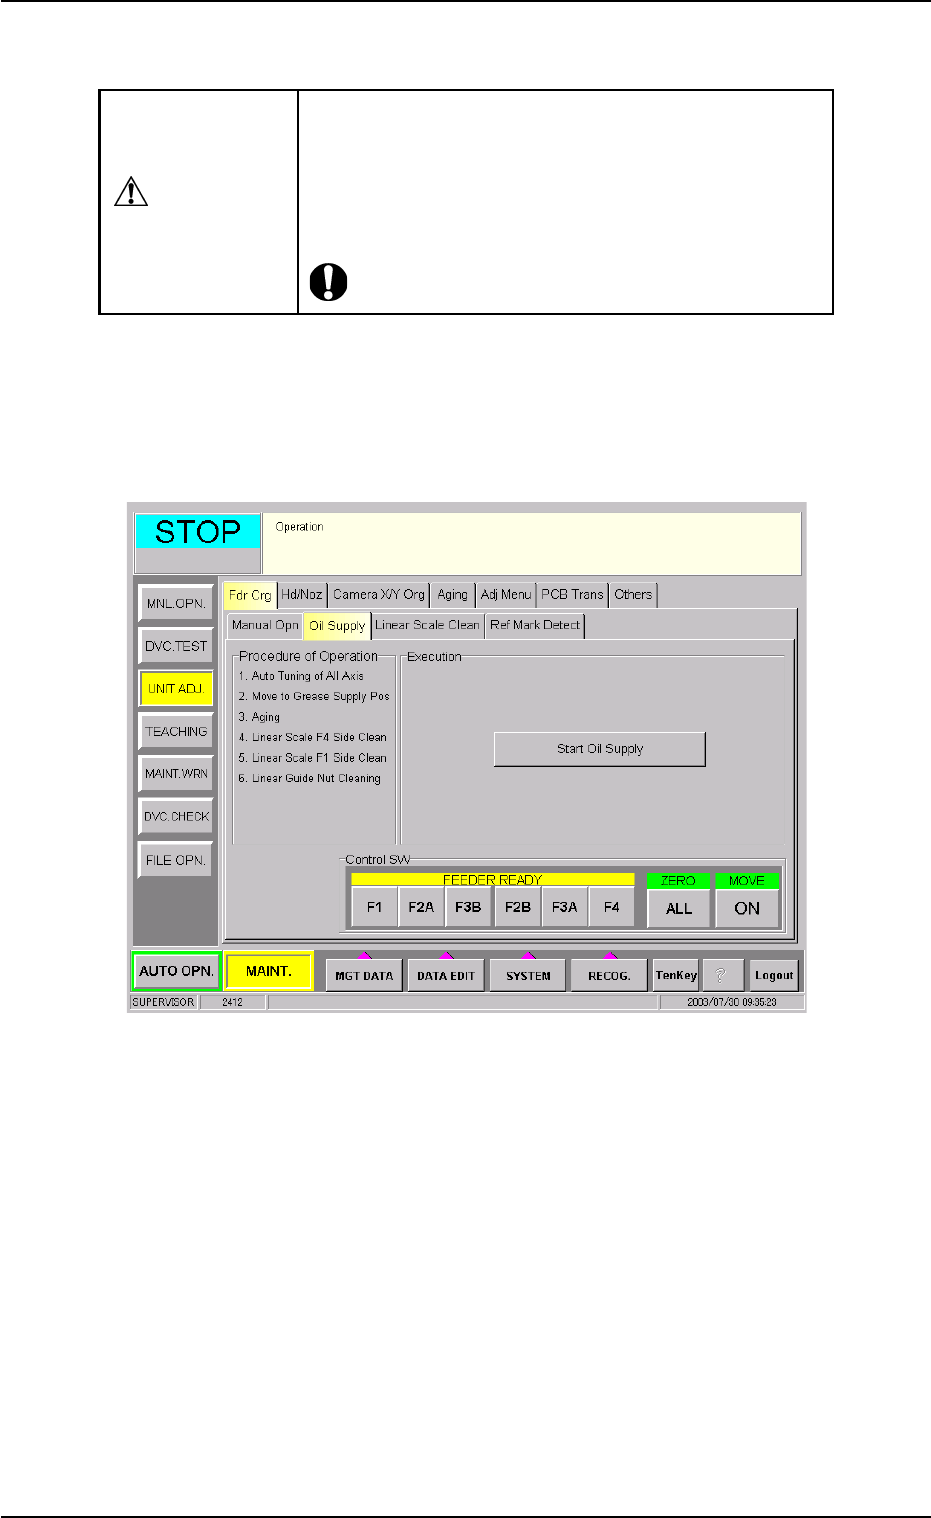
(1) Press the [UNIT ADJ.] button on the submenu bar that appears after
the [MAINT.] button is selected.
When the [Oil Supply] tab is pressed in the "Fdr Crg." tab sheet, the
following tab sheet appears.
Fig. 4A84-5 "Oil Supply" Tab Sheet
CAUTION
1.4 Maintenance Method
0307-005 1-69 AFO01ETRP
(2) When the [Start Oil Supply] button is pressed in the "Oil Supply" tab
sheet, the following sheet appears.
Fig. 4A84-6
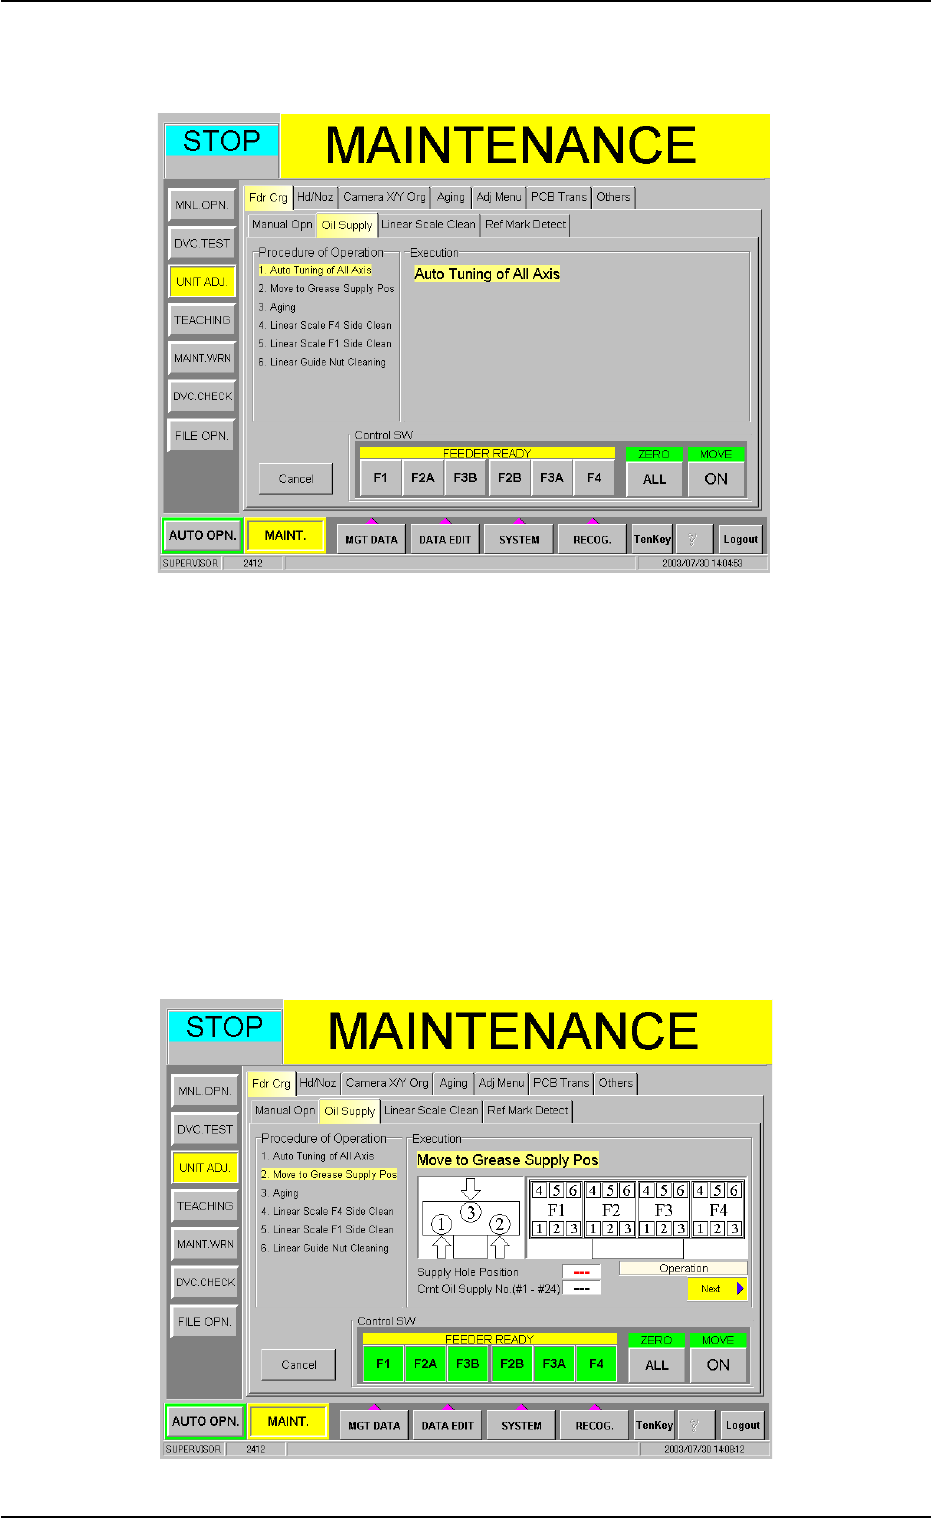
(3) Press the [ALL] button entitled "ZERO". In 2 seconds, press the
[ENABLE] button on the operation panel. All devices are zeroed.
(4) Press one of the [F1], [F2A], [F3B], [F2B], [F3A] and [F4] buttons
entitled "FEEDER READY".
(5) Press the [ON] button entitled "MOVE". In 2 seconds, press the [EN-
ABLE] button on the operation panel.
All axis automatic tuning takes place and the following sheet ap-
pears. (The feeder carriage moves slightly.)
Fig. 4A84-7
1.4 Maintenance Method
0307-005 1-70 AFO01ETRP
(6) Press the [ON] button entitled "MOVE". In 2 seconds, press the [EN-
ABLE] button on the operation panel.
The grease nipple of No. 3 on Feeder Carriage #2 (F2) moves to the
grease supply position and the following sheet appears.
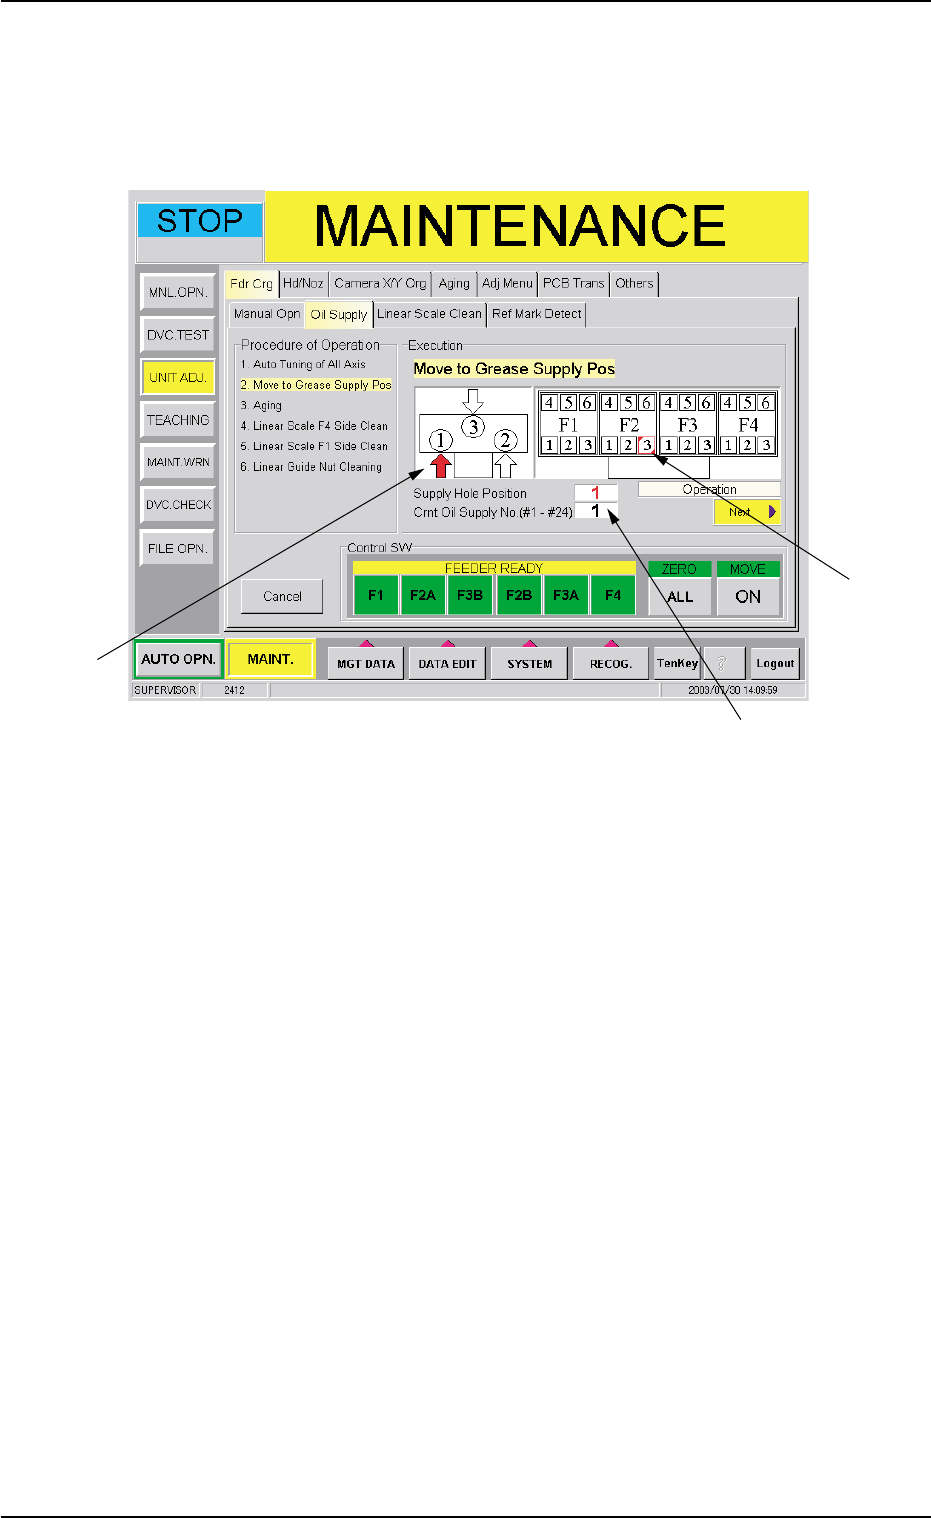
Fig. 4A84-8 "Oil Supply" Tab Sheet (First Grease Supply Position)
*1 Supply Hole Position
*2 First Grease Supply Position
The current grease supply position is indicated in red.
*3 Current Oil Supply No.
(7) Use the FL- and P-type attachments.
Give one push to the grease gun to inject grease from the relevant
nipple.
*1
*3
*2