4OM-1050-002.pdf - 第87页
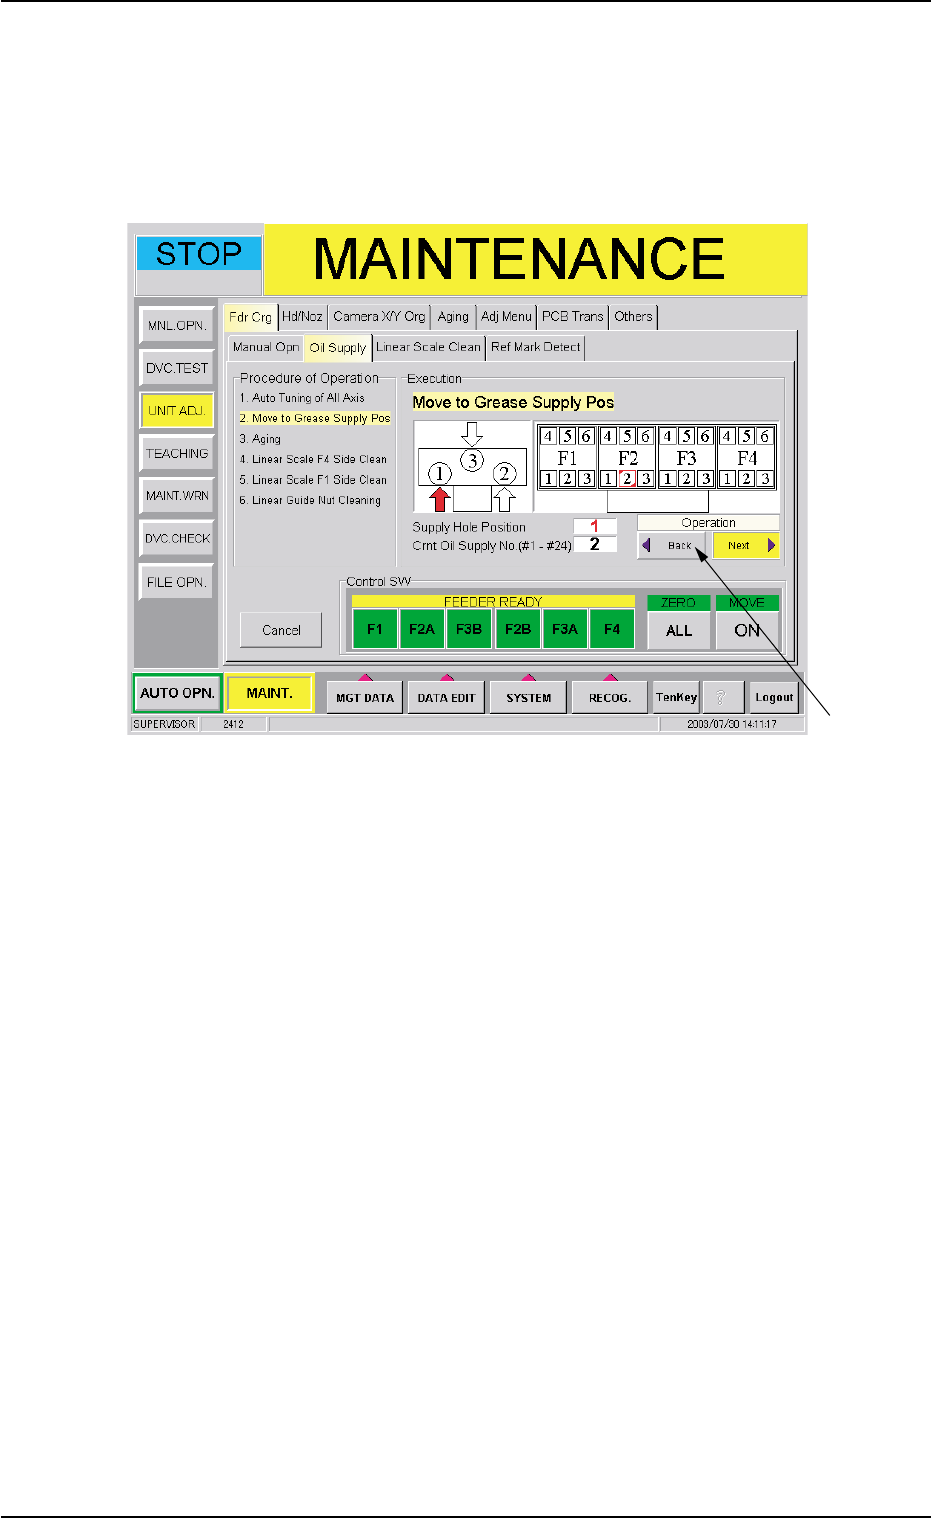
1.4 Maintenance Method 0307-005 1-71 AFO01ETRP (8) Press the [ON] button entitled "MOVE". In 2 seconds, press the [ENABLE] button on the operation panel. The grease nipple of No. 2 on Feeder Carriage #2 moves t…
1.4 Maintenance Method
0307-005 1-70 AFO01ETRP
(6) Press the [ON] button entitled "MOVE". In 2 seconds, press the [EN-
ABLE] button on the operation panel.
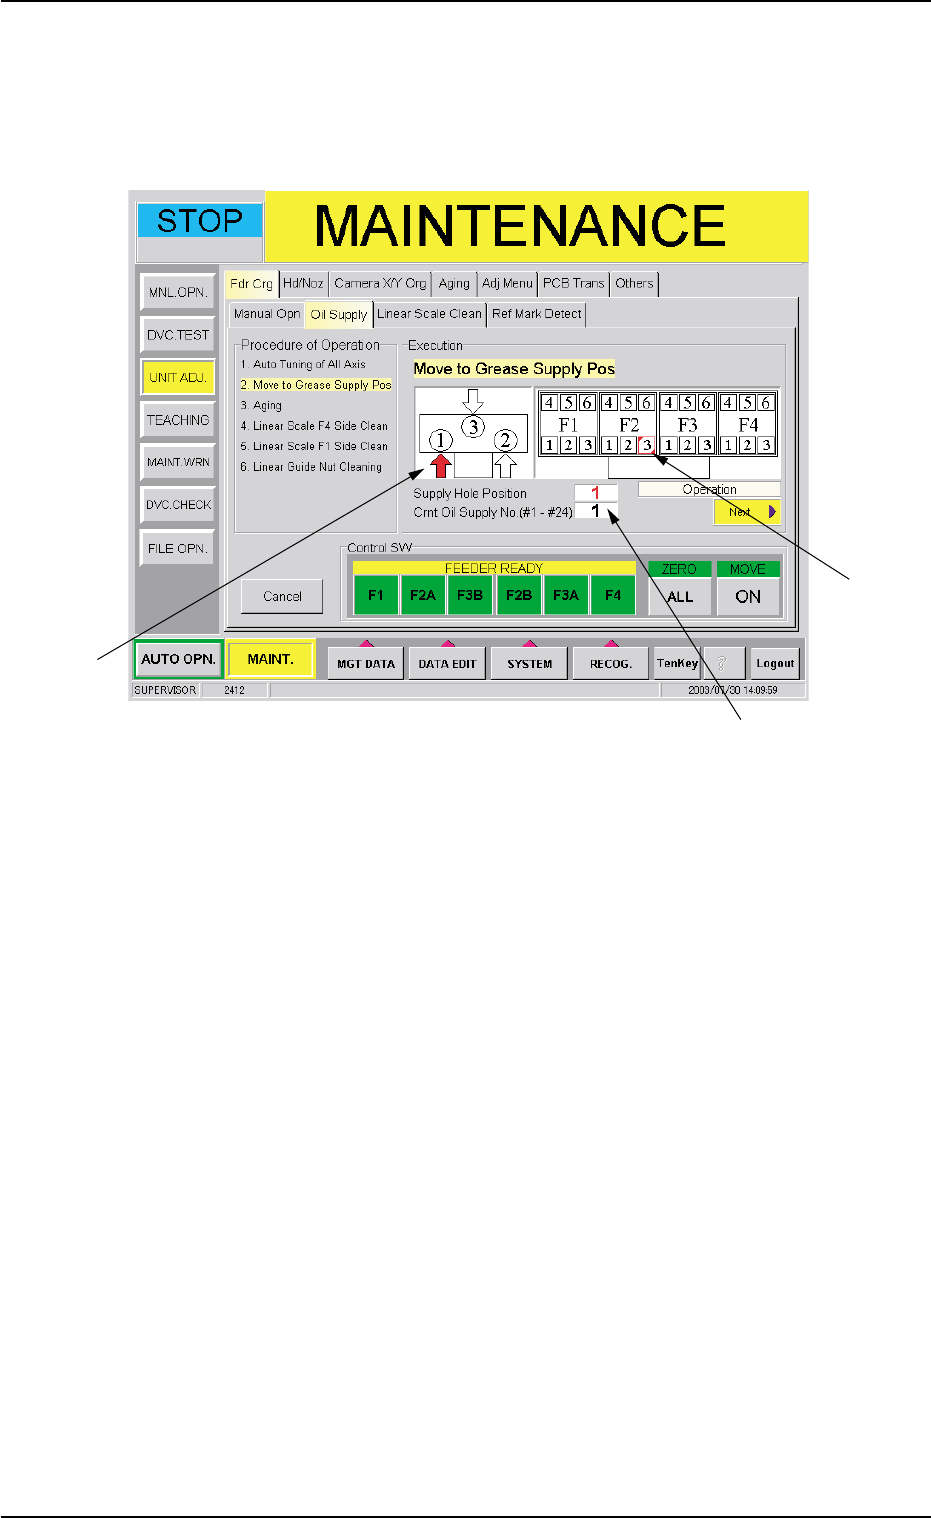
The grease nipple of No. 3 on Feeder Carriage #2 (F2) moves to the
grease supply position and the following sheet appears.
Fig. 4A84-8 "Oil Supply" Tab Sheet (First Grease Supply Position)
*1 Supply Hole Position
*2 First Grease Supply Position
The current grease supply position is indicated in red.
*3 Current Oil Supply No.
(7) Use the FL- and P-type attachments.
Give one push to the grease gun to inject grease from the relevant
nipple.
*1
*3
*2
1.4 Maintenance Method
0307-005 1-71 AFO01ETRP
(8) Press the [ON] button entitled "MOVE". In 2 seconds, press the
[ENABLE] button on the operation panel.
The grease nipple of No. 2 on Feeder Carriage #2 moves to the
grease supply position and the following sheet appears. Inject
grease from the nipple.
Fig. 4A84-9
"Oil Supply" Tab Sheet (Second Grease Supply Position)
(9) Apply grease to 24 spots (the front and rear sides of the machine)
in the same way.
Whenever you notice that you forgot to supply grease to a spot,
press the [Back] button (*1) and the [ON] button (entitled
"MOVE"). In 2 seconds, press the [ENABLE] button on the opera-
tion panel. The previous grease supply position is selected.
*1
(10) After the lubrication is all completed (Supply Hole Position: 3,
Crnt Oil Supply No. (#1 - #24): 24), press the [Next] button. The
following sheet appears.
Fig. 4A84-10
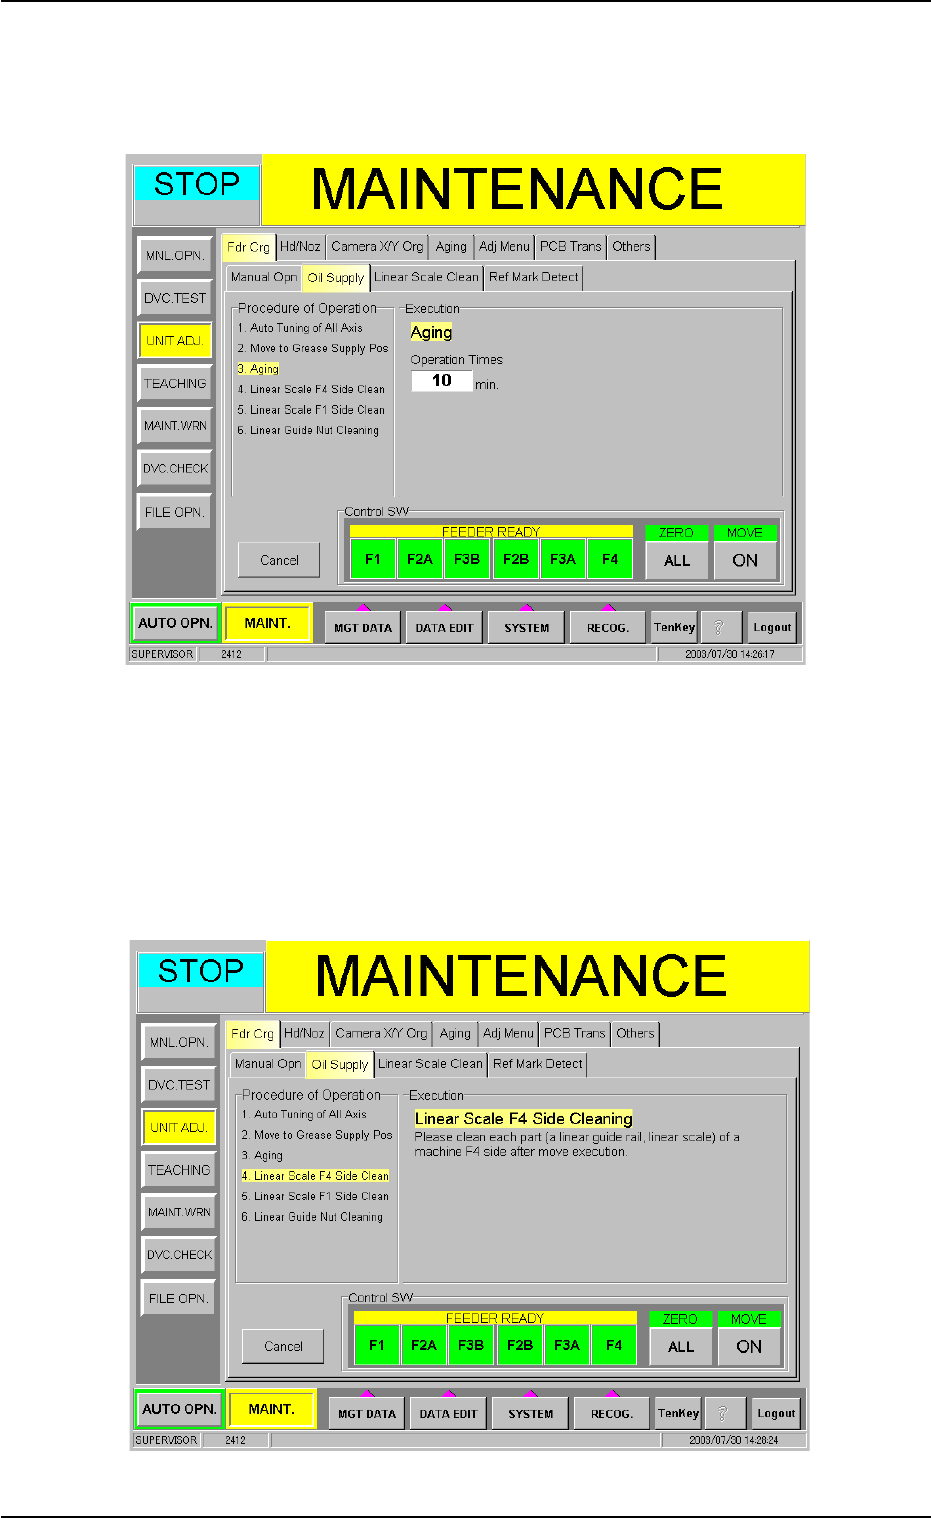
(11) Press the [ON] button entitled "MOVE". In 2 seconds, press the
[ENABLE] button on the operation panel. The aging of the feeder
carriage section starts.
(12) After the aging is completed, the following tab sheet appears.
Fig. 4A84-11
1.4 Maintenance Method
0307-005 1-72 AFO01ETRP