Installation_Manual_SIPLACE_Explorer_2.4_EN - 第61页
Installation and Configuration Guide SIPLACE Explorer 4 Configuration Edition 08/2008 EN 4.1 Standard Monitoring Application (SMA) 61 NOTE If the Select SQL Server inst ance dialog box shows no entries, you nee d to spec…
4 Configuration Installation and Configuration Guide SIPLACE Explorer
4.1 Standard Monitoring Application (SMA) Edition 08/2008 EN
60
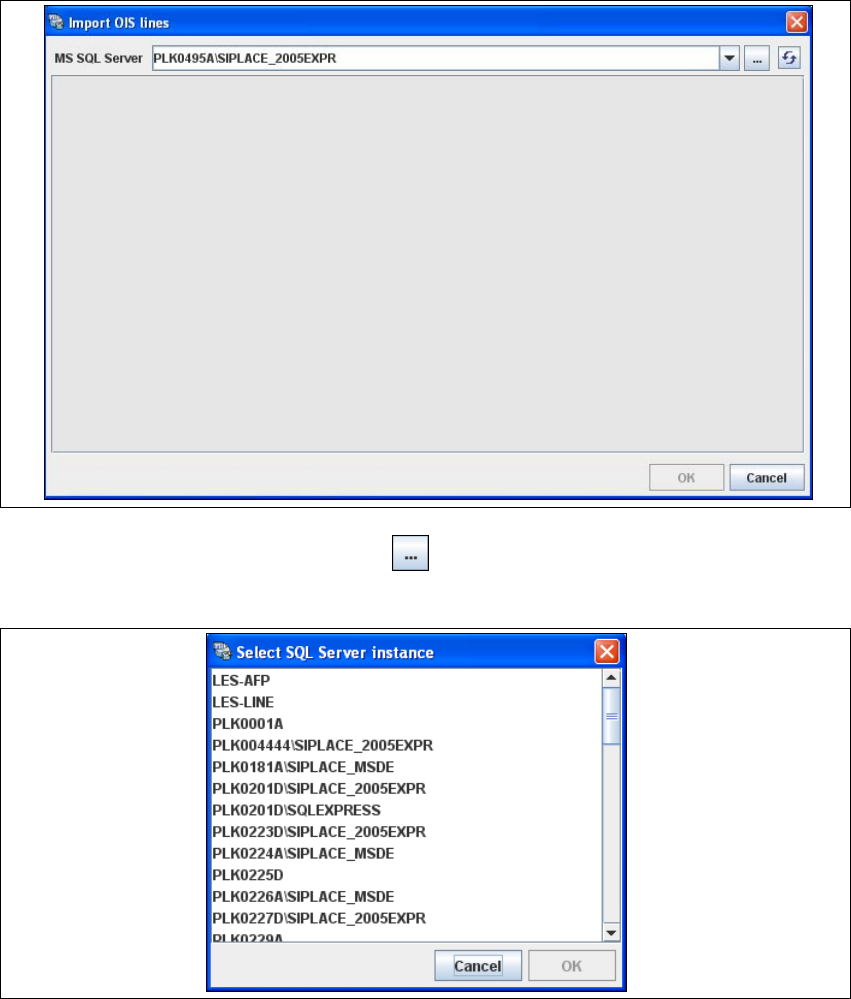
→ The Import OIS Lines dialog box will open.
4
Fig. 4 - 3 Step 1: import OIS lines
→ Click on the Browse for SQL instances icon. All SQL server instances available will be
shown in the Select SQL Server instance dialog box.
4
Fig. 4 - 4 Step 1: Select SQL Server instance
→ Select the required SQL server instance and confirm with OK. You will be taken back to the
Import OIS Lines dialog box.
Installation and Configuration Guide SIPLACE Explorer 4 Configuration
Edition 08/2008 EN 4.1 Standard Monitoring Application (SMA)
61
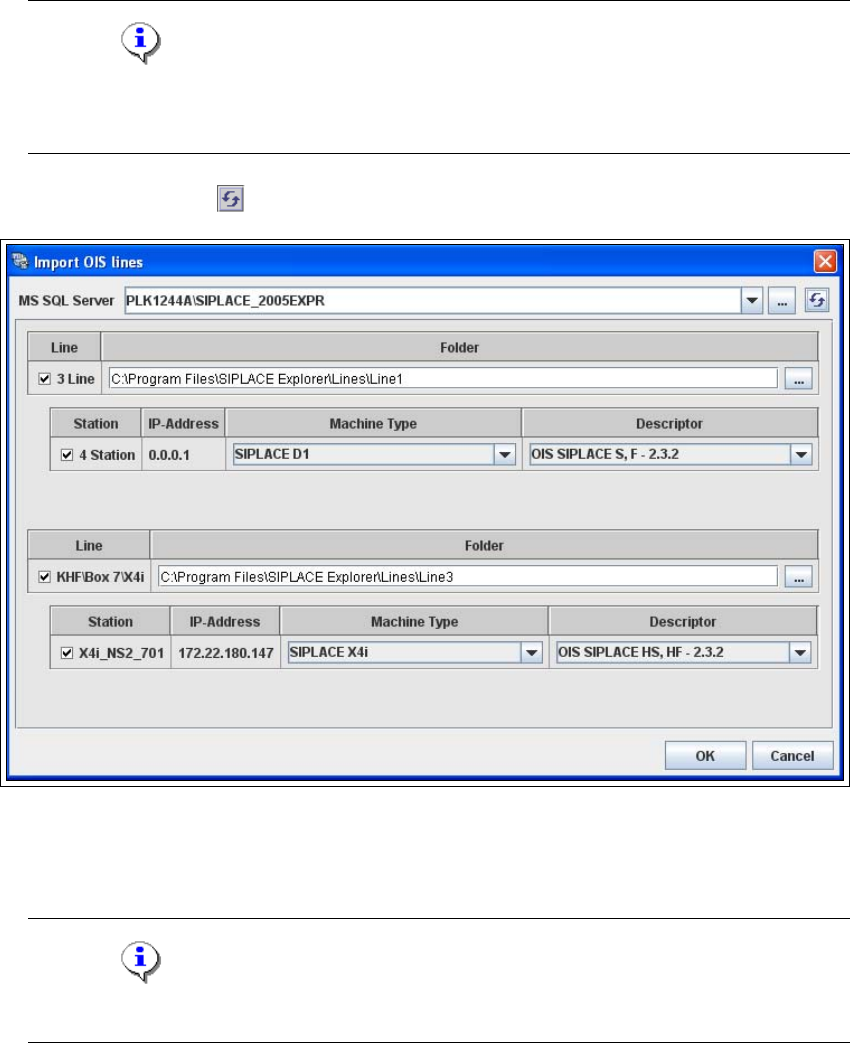
NOTE
If the Select SQL Server instance dialog box shows no entries, you need to specify the SQL
server instance manually. 4
→ Click on the Refresh icon. All production lines available for import from OIS will be shown.
4
Fig. 4 - 5 Step 1: import OIS lines
→ Now select the relevant machine type for each station and production line, at Machine Type.
The corresponding OIS descriptor will then be automatically displayed in the Descriptor field.
NOTE
It is assumed that the machine types are known for each production line. 4
→ Once you have entered all settings, confirm your choice with OK.
4 Configuration Installation and Configuration Guide SIPLACE Explorer
4.1 Standard Monitoring Application (SMA) Edition 08/2008 EN
62
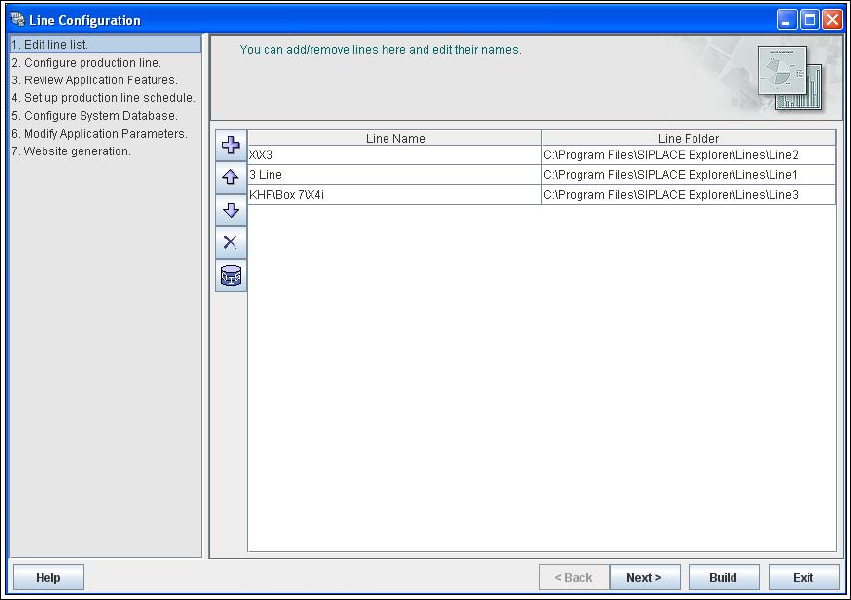
→ The added production lines will be shown in the Line Configuration - Edit Line List dialog
box.
4
Fig. 4 - 6 Step 1: edit line list
→ Specify the production line name and the line folder at which the configured monitoring
application is to be stored for this production line. A *.gms file with the configuration settings
for the corresponding monitoring application will then be saved at the specified path.
→ Click on Next to continue with the next step.