NPM-D3维修手册.pdf - 第53页
NPM-D3 SERVICE MANUAL 4.2 XY Drive Axes EJM6D3-MB-04SM-02.DOC Page 4-15 4.2.3 Y-axis Interference Photo-sensor Adjustment Y 軸干渉 PH の調 整 Y 轴干涉 PH 的调 整 Unit No. N610052923AA 4.2.3 Y-axis Interference Photo-sensor Adjustmen…
NPM-D3
SERVICE MANUAL
4.2 XY Drive Axes
Page 4-14 EJM6D3-MB-04SM-02.DOC
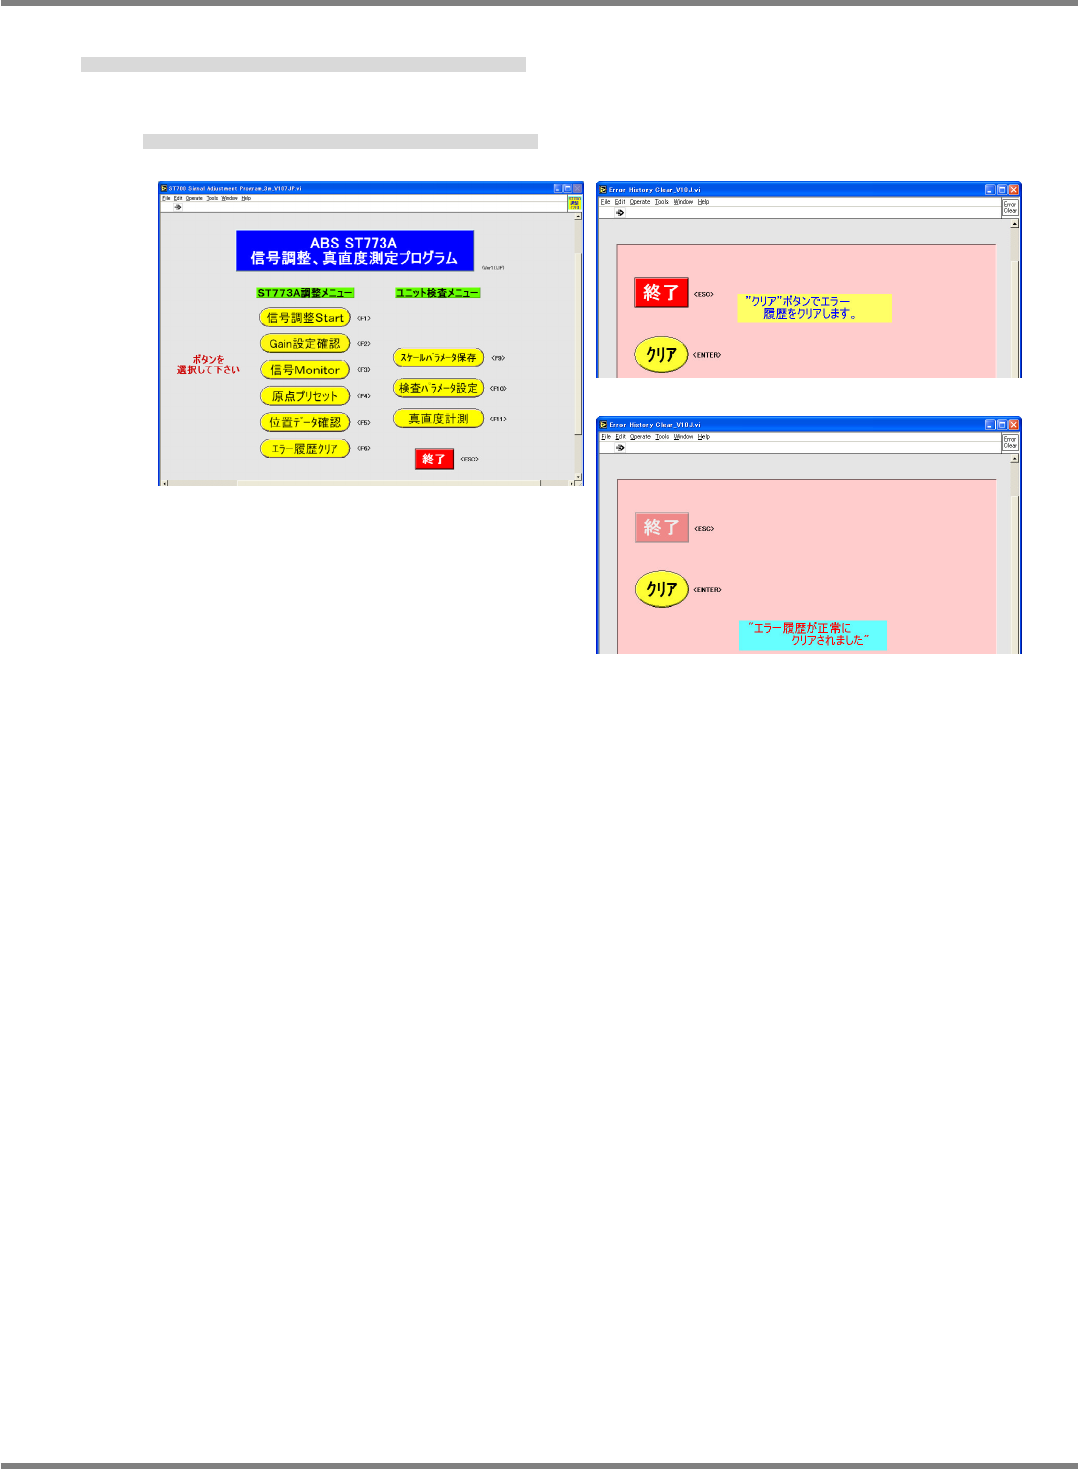
5. Click [Error history clear]. After the screen changes, click [Clear].
[エラー履歴クリア] をクリックし、画面切り替わり後、[クリア] をクリックする。
单击 [清除错误履历] ,等画面切换后,单击 [清除]。
The message in Fig. 11 appears and the menu screen returns.
‘
エラー履歴が正常にクリアされました
’
と表示されメニュー画面に戻る。
会显示
‘错误履历被正常清除了’
并回到菜单画面。
Fig. 11
Fig. 10
Fig. 9
NPM-D3
SERVICE MANUAL
4.2 XY Drive Axes
EJM6D3-MB-04SM-02.DOC Page 4-15
4.2.3 Y-axis Interference Photo-sensor Adjustment
Y 軸干渉 PH の調整
Y 轴干涉 PH 的调整
Unit No.
N610052923AA
4.2.3 Y-axis Interference
Photo-sensor Adjustment
Y
軸干渉
PH
の調整
Y
轴干涉
PH
的调整
Y-axis Interference Photo-sensor Adjustment
Y 軸干渉 PH の調整
Y 轴干涉 PH 的调整
3.
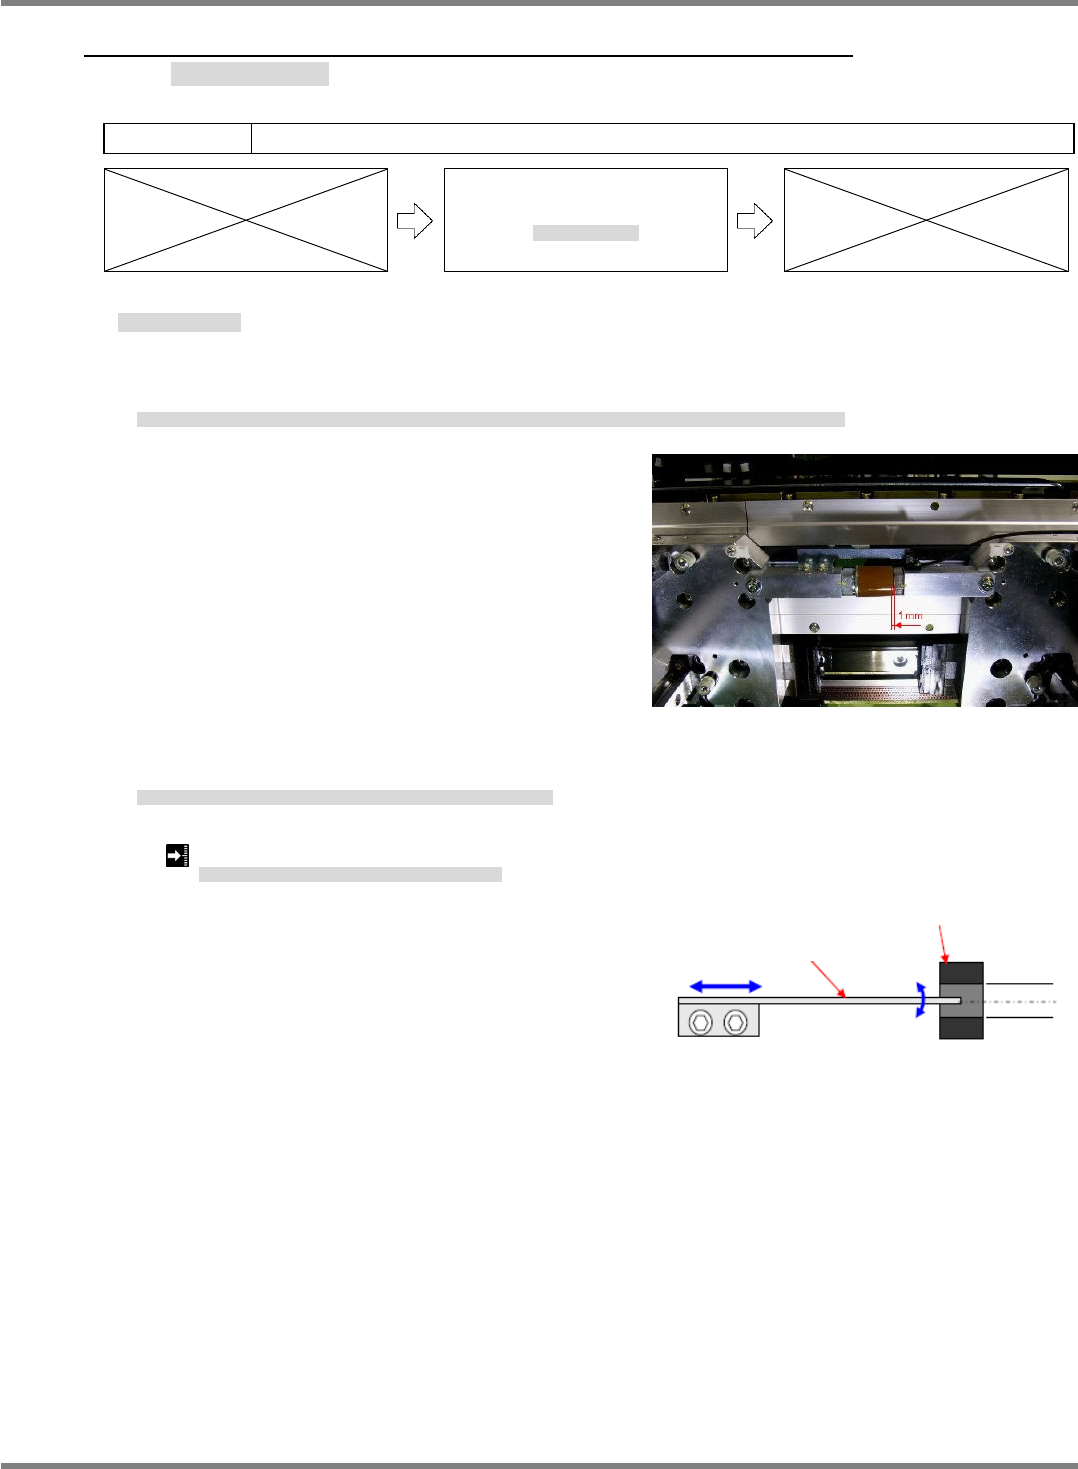
1. Bring the front and rear side beams near to each other by hand so that the clearance between their
respective mechanical stoppers is 1 mm.
FRONT 側ビームと REAR 側のビームを手で近づけ、FRONT 側メカストッパと REAR 側メカストッパのすき間を 1 mm にします。
用手将 FRONT 侧轴和 REAR 侧轴靠近,并使 FRONT 侧的机械止动器和 REAR 侧的机械止动器之间的间隙调整为 1 mm。
2. Adjust the position of the interference sensor dog so that the interference photo-sensor turns ON in this
situation.
このとき、干渉 PH が ON するように干渉センサ DOG の位置を調整します。
此时,为了使干涉 PH 置于 ON,调整干涉传感器 DOG 的位置。
Clearance between front and rear side mechanical stoppers: 1 mm
FRONT
メカストッパと
REAR
メカストッパのすき間
:
FRONT
机械止动器和
REAR
机械止动器之间的间隙
:
Fig. 1
Fig. 2
Y-axis interference dog
Y-axis interference sensor
NPM-D3
SERVICE MANUAL
4.2 XY Drive Axes
Page 4-16 EJM6D3-MB-04SM-02.DOC
4.2.4 Cableveyor Replacement
ケーブルベア交換
电缆支架的交换
Unit No.
N610052923AA
N610052924AA
4.2.4 Cableveyor Replacement
ケーブルベア交換
电缆支架的交换
X-axis Cableveyor Replacement
X 軸ケーブルベアの交換
X 轴电缆支架的交换
4.
1. Turn OFF the power and air.
電源・エアーを OFF にします。
将电源和空气置于 OFF。
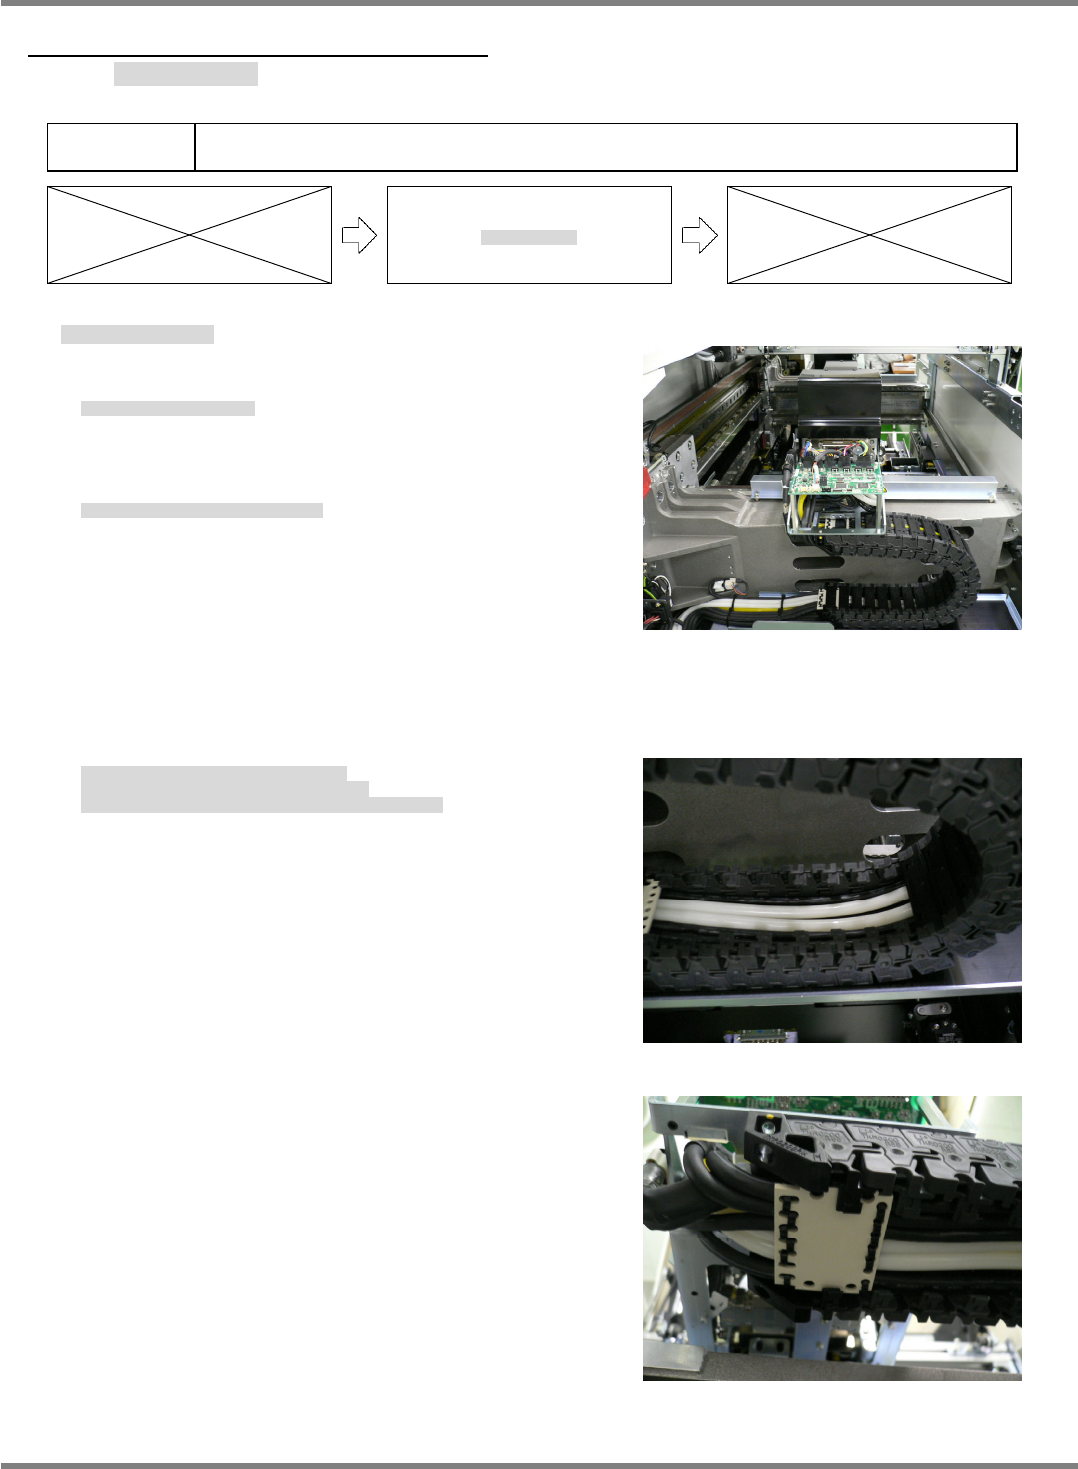
2. Detach the top rear cover from the head. (Fig. 1)
ヘッド上部後方のカバーを外します。(Fig. 1)
拆下头上部后方的盖。(Fig. 1)
3. Detach all inside cableveyor covers. (Fig. 2)
Cut the cable ties that lock the inside cableveyor covers to the cable anchor plate, and detach the inside
cableveyor covers. (Fig. 3)
ケーブルベアの内側の蓋を全て外します。(Fig. 2)
ケーブルベア内側蓋と、ケーブル固定板を止めている
インシュロックを切り、ケーブルベアの内側蓋を外します。(Fig. 3)
拆下电缆支架内侧的全部盖。(Fig. 2)
切断固定电缆支架内侧盖和电缆固定板的捆束带,拆下电缆支架内侧的盖。(Fig. 3)
Fig. 1
Fig. 2
Fig. 3