NPM-D3维修手册.pdf - 第88页
NPM-D3 SERVICE MANUAL 4.5 Sensors Page 4-50 EJM6D3-MB-04SM-02.DOC 8. Detach the multi recognition camera 3D jig. マルチ認識カメラ 3D ジグを取り外す。 拆下多功能识别照相机 3D 治具。 When the dialog shown at right appears, remo ve the multi reco gniti…
NPM-D3
SERVICE MANUAL
4.5 Sensors
EJM6D3-MB-04SM-02.DOC Page 4-49
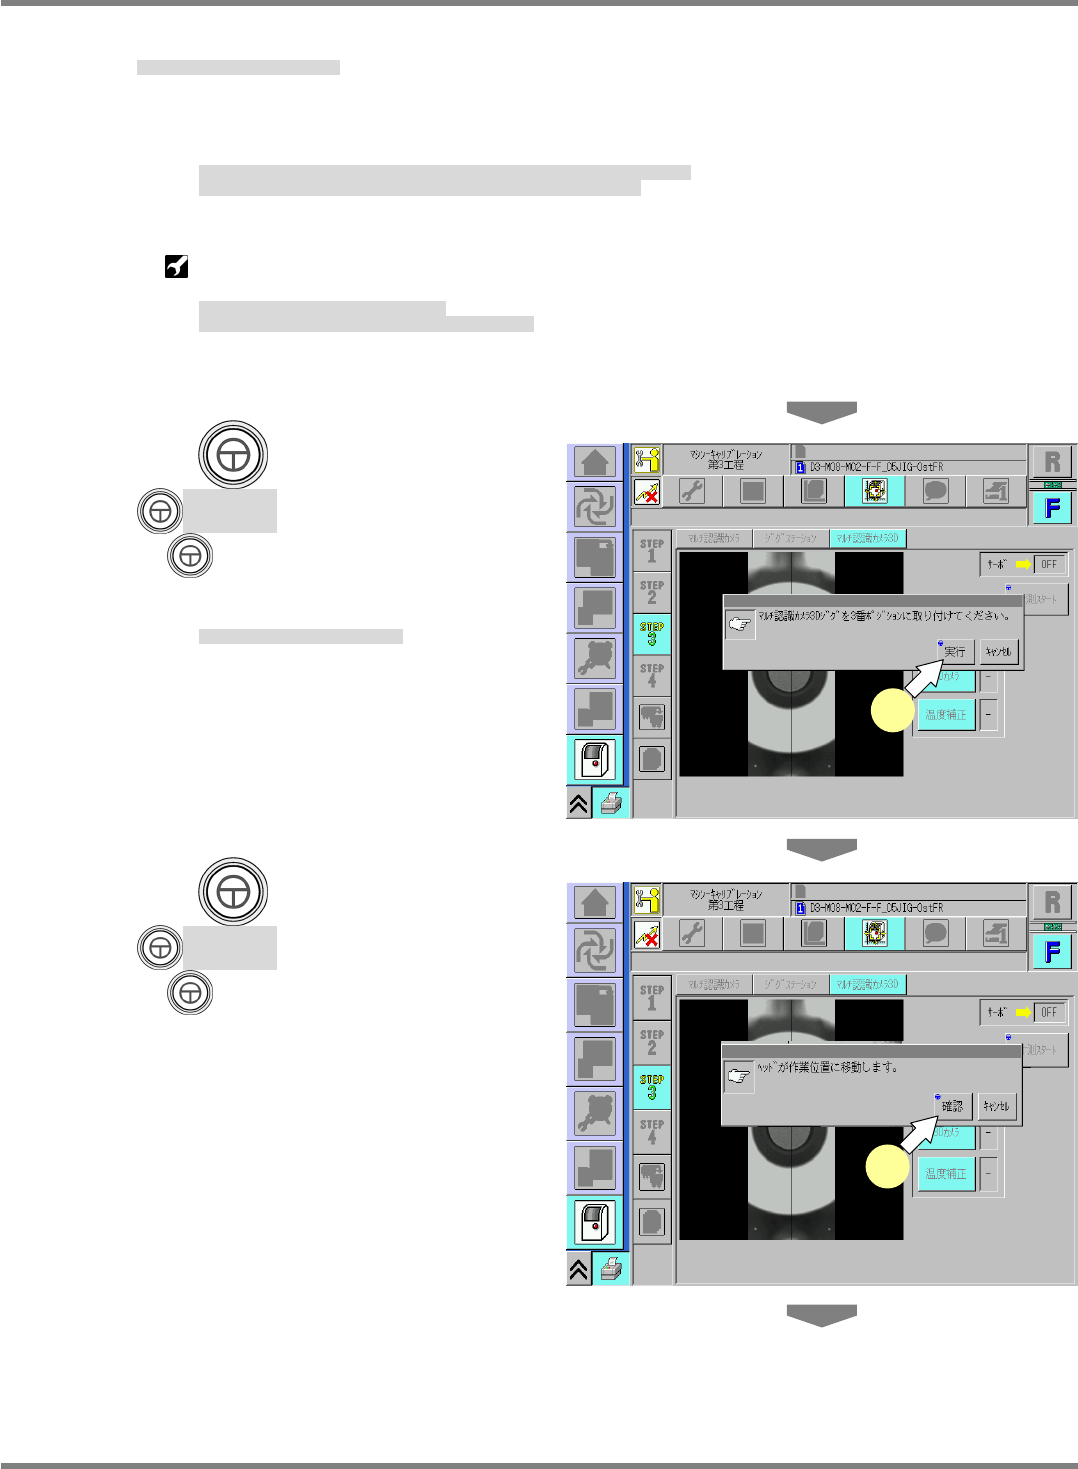
5. Set the multi recognition camera 3D jig.
マルチ認識カメラ 3D ジグを取り付ける。
装上多功能识别照相机 3D 治具。
Remove the light luminosity jig set before, put it back in position and remove the nozzle.
Then, attach the multi recognition camera 3D jig to the position specified in the message dialog.
先に取り付けた、照明輝度ジグを取り外して、所定の位置に戻し、ノズルも取り外します。
それから、マルチ認識カメラ
3D
ジグを、画面に表示された場所に取り付けます。
拆下先前装上的照明亮度治具,将其返回到规定的位置,也拆下吸嘴。
然后,将多功能识别照相机
3D
治具装到画面所示的位置。
Multi recognition camera 3D jig for 8-nozzle head (
N610168315AA
)
Multi recognition camera 3D jig for 2-/3-nozzle head (
N610168316AA
)
マルチ認識カメラ
3D
ジグ
8
ノズルヘッド用
マルチ認識カメラ
3D
ジグ
2
ノズルヘッド、
3
ノズルヘッド用
多功能识别照相机
3D
治具
用于
8
吸嘴头的
多功能识别照相机
3D
治具
用于
2
吸嘴头、
3
吸嘴头的
6.
Press
+ [Yes].
+ [
実行
]
を押す。
按动
+ [
执行
]
。
Calibration starts.
キャリブレーションが開始されます。
开始执行校准。
7.
Press
+ [Yes].
+ [
確認
]
を押す。
按动
+ [
确认
]
。
6
7
NPM-D3
SERVICE MANUAL
4.5 Sensors
Page 4-50 EJM6D3-MB-04SM-02.DOC
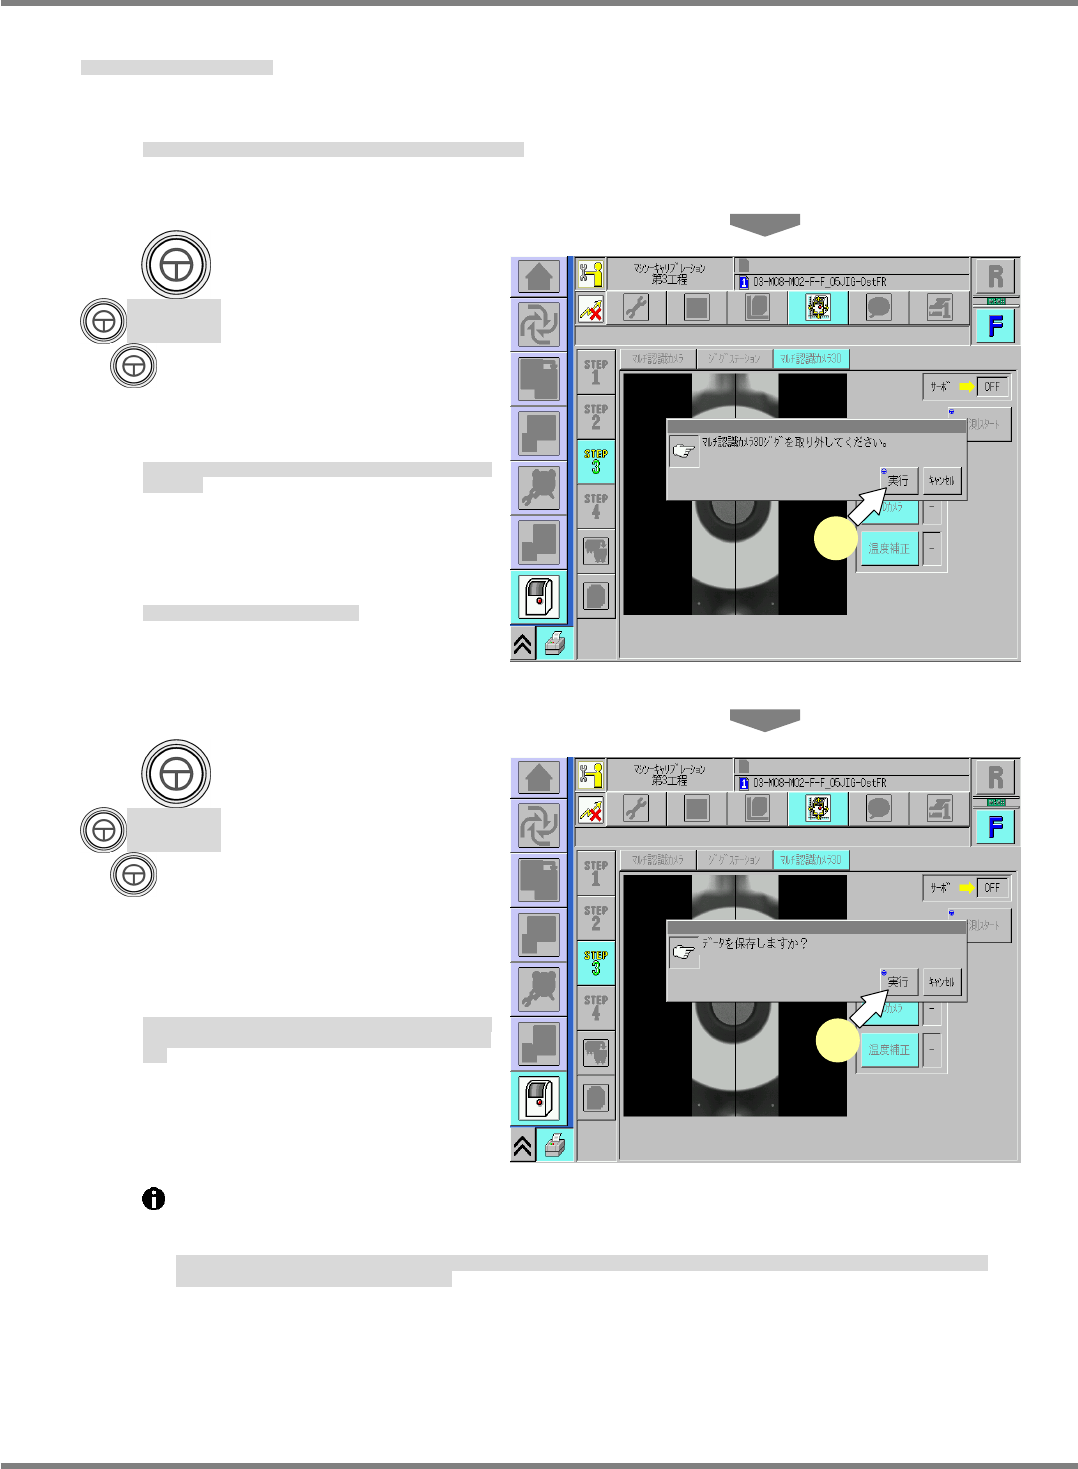
8. Detach the multi recognition camera 3D jig.
マルチ認識カメラ 3D ジグを取り外す。
拆下多功能识别照相机 3D 治具。
When the dialog shown at right appears, remove the multi recognition camera 3D jig.
右のような表示が出たら、マルチ認識カメラ
3D
ジグを取り外します。
显示如右侧所示的画面后,拆下多功能识别照相机
3D
治具。
9.
Press
+ [Yes].
+ [
実行
]
を押す。
按动
+ [
执行
]
。
Make sure that ‘Light’, ‘3D camera’ and
‘Thermal calibrate’ are all OK.
‘
照明
’
、
‘
3D カメラ
’
、
‘
温度補正
’
が
OK
と表示されていることを確
認します。
请确认
‘
照明
’
、
‘3D
照相机
’
、
‘
温度补正
’
都应显示为
OK
。
This completes the calibration
procedure of the multi recognition
camera.
以上でキャリブレーションは終了です。
以上,校准就完成了。
10.
Press
+ [Yes].
+ [
実行
]
を押す。
按动
+ [
执行
]
。
When switching to another process
from this screen, the confirmation
dialog at right appears if the calibration
is successful.
ここから別の操作画面に移る際、
“
データを保存しますか?
”
と表
示されれば、キャリブレーションは正常に終了したことになりま
す。
从这里要转到其他的操作画面时,如果显示
“
要保存数据吗?
”
的
内容时,说明校准正常结束了。
If something is wrong with the calibration, a message to the effect that the calibration result
cannot be saved due to exceeded limit appears. In such a case, review the calibration
conditions and perform calibration once again.
キャリブレーションに問題があった場合には、
“
リミット値を超えていますので保存できません。
”
と表示されます。
キャリブレーションの条件を見直
し、キャリブレーションを再度実施してください。
如果校准有问题时,会显示
“
超过了极限值,不能保存
”
。此时,请调整校准条件,再次实施校准。
9
10
NPM-D3
SERVICE MANUAL
4.6 Optional Units
EJM6D3-MB-04SM-02.DOC Page 4-51
4.6 Optional Units
オプションユニット
选购件装置
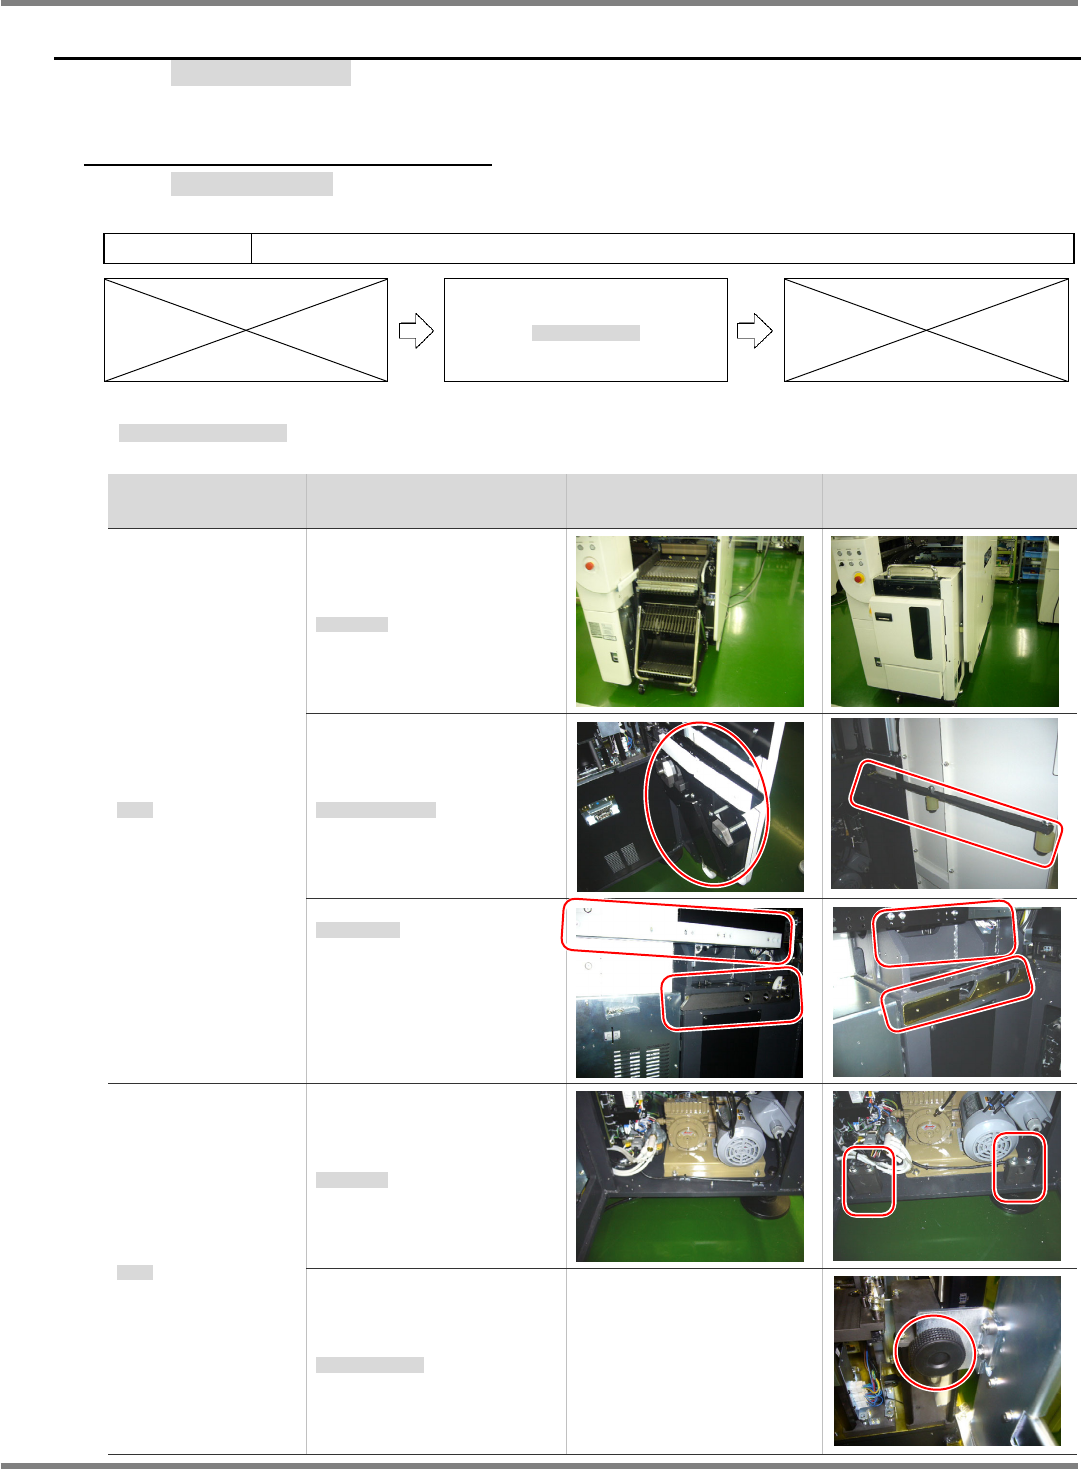
4.6.1 Tray Feeder Coupling
トレイフィーダ連結
托盘料架的连接
Unit No.
N610074920AA
4.6.1 Tray Feeder Coupling
トレイフィーダ連結
托盘料架的连接
Differences between Tape Feeder and Tray Feeder
フィーダ・トレイの相違点
料架和托盘的不同点
Unit
ユニット
装置
Point to change
変更個所
变更位置
Tape feeder spec.
フィーダ仕様
料架规格
Tray feeder spec.
トレイ仕様
托盘规格
Feeder
供給部
供给部
Feeder unit
供給ユニット
供给装置
Feeder cart drive unit
交換台車駆動ユニット
交换台车驱动装置
Feeder cart guide
交換台車ガイド
交换台车导轨
Connections
連結部
连接部
Positioning block
規正ブロック
调整块
Upper fixing bracket
上部固定ブラケット
上部固定托架