MEC-CP842-1.0E.pdf - 第58页
Basic Operati on >> Re moval and Installation of Rotary Holders 4-8 MEC-CP842-1.0E Inst allation Fasten the rotary holde r with the mounting bolts. Confirm that the letter on the aluminu m drum matches the letter o…
Basic Operation >> Removal and Installation of Rotary Holders
MEC-CP842-1.0E 4-7
4.4 Removal and Installation of Rotary Holders
Point
Remove rotary holders from the placing heads as necessary when performing mainte-
nance such as cleaning and lubrication.
Note: The rotary holder is exclusive to the CP-842E/842ME. Do not attempt to use on any other
machines.
Do not use rotary holders from other machines on the CP-842E/842ME. In particular, rotary
holders from CP-7-series machines will interfere with other mechanisms around the turret
and damage the machine.
Rotary holders can be identified as follows.
CP-842E/842ME: No coloring
CP-6, CP-7 machines: Colored body (anodized)
Procedure
Complete the following 3 items before removing a rotary holder.
1 Move the rotary holder to station 9.
2 Move the XY-table towards the front of the machine to improve access.
3 Turn the machine power OFF.
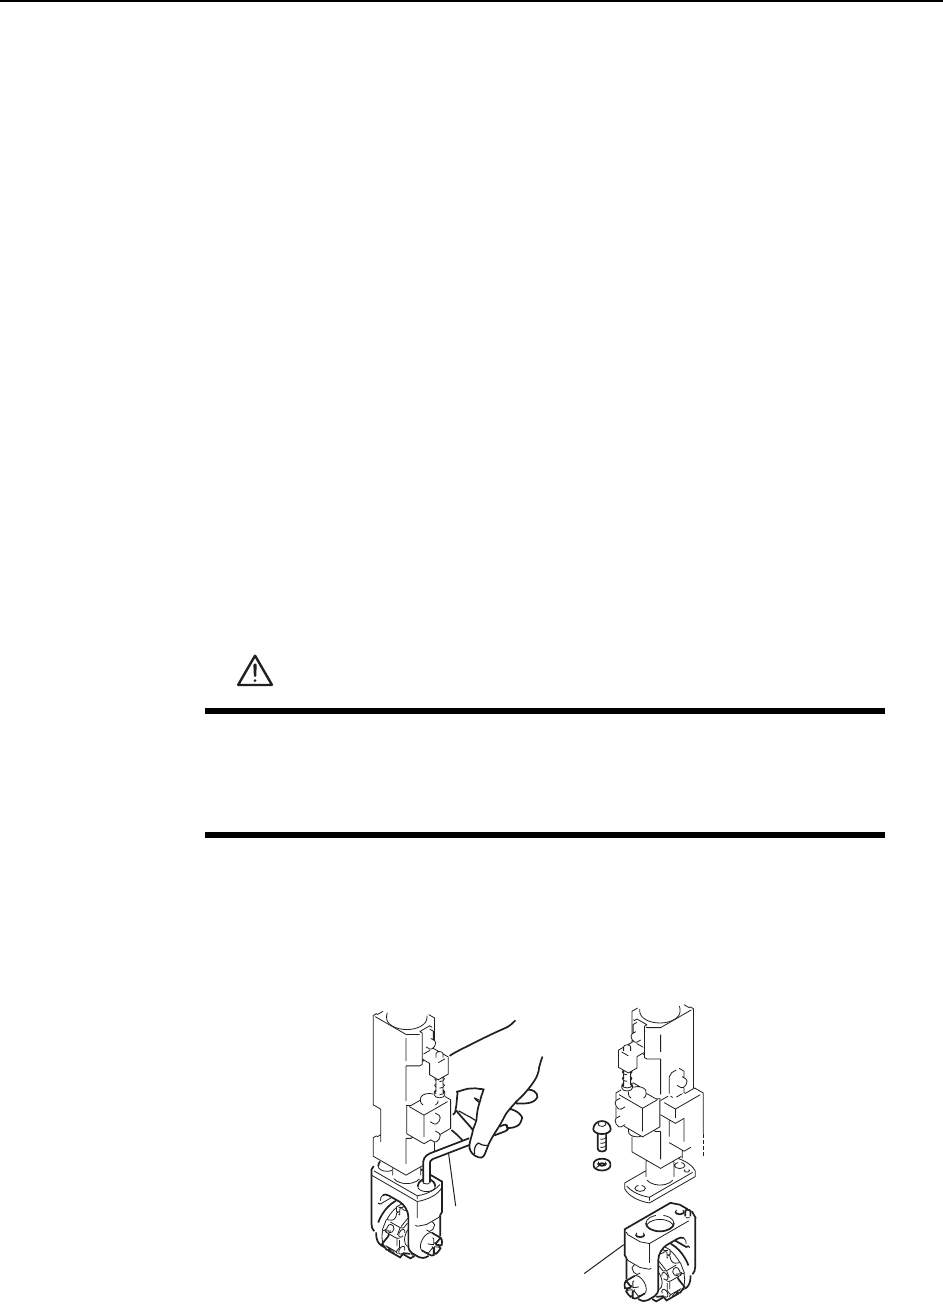
Removal
1 Loosen the rotary holder mounting bolts with an Allen wrench.
2 Pull the rotary holder down to remove it from the shaft.
WARNING
• Turn the main power off before performing this procedure.
• Exercise extreme caution when working on the machine if the cam
is not at its origin (0 deg.). Recoil of the cam axis can endanger
the operator.
Allen wrench
Rotary holder
C746M2011
Basic Operation >> Removal and Installation of Rotary Holders
4-8 MEC-CP842-1.0E
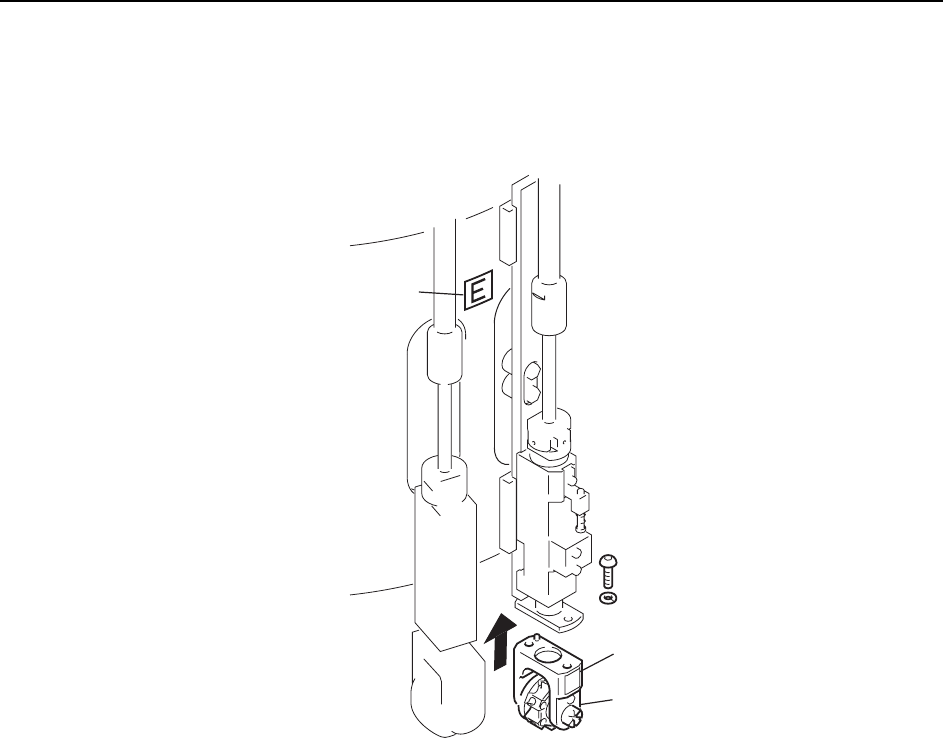
Installation
Fasten the rotary holder with the mounting bolts.
Confirm that the letter on the aluminum drum matches the letter on the rotary holder.
Letter
Letter
E
Rotary holder
C746M2012
Basic Operation >> Changing Pallets (CP-842ME option)
MEC-CP842-1.0E 4-9
4.5 Changing Pallets (CP-842ME option)
Point
The PCU (Pallet Change Unit) enables batch changes of feeder pallets.
Procedure
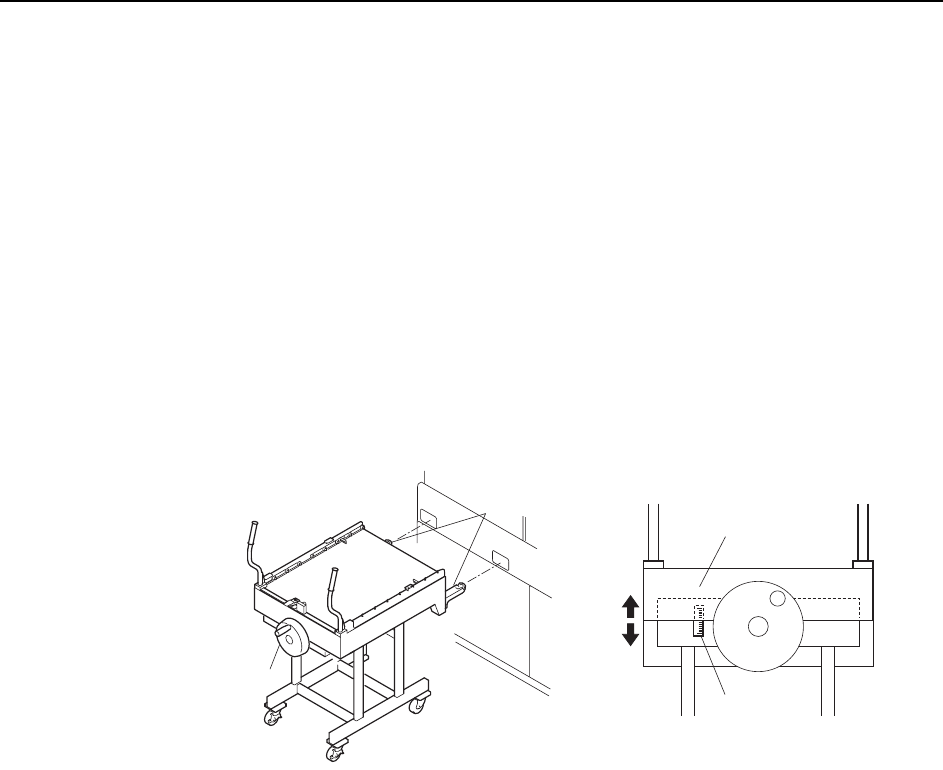
Pallet unloading
1 Align the height of the PCU forks (at the end of the PCU) with the fork slots on
the machine. Turn the handle and raise the upper section of the PCU.
Note: Use the guide seal at the side of the handle as a reference when adjusting the height of the
forks. Adjust so that the lower surface of the plate falls within plus or minus 10 mm of the
standard value.
2 Push the PCU to insert the forks into the machine, then clamp it with the
[Stage1 Clamp] command.
Note: The following explanation describes the D1-axis (stage 1) pallet change.
3 Close the rear door and select the [Stage1 Start] command, then press START.
The D-axis pallet moves to the change position and is unclamped.
4 Open the rear door and pull the pallet out of the machine and onto the PCU.
Caution:
1. Remove the pallet slowly.
2. To avoid damage to the door stoppers, the door should be opened and closed with care.
5 Select the [Stage1 Unclamp] touch-panel command, then slowly retract the
loaded PCU.
Caution:Exercise extreme care when using the PCU to move a fully loaded pallet. A dropped pallet
may result in serious injury or damage to the machine.
C746M2010
Handle
Forks
Plate
Guide seal