2500_Users_Manual - 第103页
Task s and Ki ts 3-28 ProMa ster 25 00 U ser Ma nual Progra mmer In terfa ce — Wh en th is c omman d is s elec ted , Tas kLin k automa tically d isplays a new set of menus so you ca n run diagnostic tests on the programm…

Tasks and Kits
ProMaster 2500 User Manual 3-27
Note: To enable printing a serial number on a label, enter two or more
consecutive percent signs (%) in the text field. You must enter one
percent sign for each digit specified with the
serializ.exe
length (–l)
command line parameter.
Restore Defaults
Selecting this command directs the 2500 to restore its programming
parameters to their original defaults (such as a two pass verify, I/O
address = FFFFFFFF, Security option = 0, and others).
Data and Program
Pull-down Menus
The commands listed on these two menus allow you to select the
individual parameters needed to process devices. These are the same
commands listed in the Edit Task dialog box used to create a Task. These
individual commands are primarily used during troubleshooting and
allow you to quickly change one or two parameters and run a test
without having to create and edit a new Task for each test cycle.
TaskLink’s menus and dialog boxes refer to a file stored on one of the
internal drives (MSM or floppy) as a
Programmer Disk File.
Utilities Pull-down
Menu
Several commands available on the Utilities pull-down menu are used to
perform special operations. The specific commands and their functions
on the 2500 are described below.
–s
Sumcheck calculation flag.
Used to provide a new sumcheck for display on the
TaskLink screen as new serial numbers are generated.
This does not affect device data.
–t
Label text format.
Defines how the serial number will be printed on the
label. The options are either decimal or hexadecimal.
–td = decimal
–th = hexadecimal
Default:
Decimal (–td)
–w
Warning limit.
Sets a warning level before the serial number limit is
reached when an ending serial number is specified. If the
current serial number is within the ending serial number,
minus the warning limit, TaskLink displays a warning
message.
Default:
Zero
Parameter Description

Tasks and Kits
3-28 ProMaster 2500 User Manual
Programmer Interface
— When this command is selected, TaskLink
automatically displays a new set of menus so you can run diagnostic tests
on the programming electronics. Refer to Chapter 5 for more information
on running diagnostics on the programming electronics.
VT100 on Programmer Port
— Select this command when you update
the
Algorithm/System
disk(s). A description of this update procedure is
included with the
ProMaster 2500 User Notes
that are distributed
periodically.
Device List Update
and
Task Database Device Check
— After you
install the new Algorithm disk(s), follow the procedures to update the
device list and then to check the Task database before running your
existing Tasks or creating new ones. If you do not complete all the steps
in the update procedure, TaskLink may occasionally report error
messages indicating that the device in your Task could not be found.
ProMaster Package Update
—You will be notified in the
ProMaster 2500
User Notes
when support for new package types have been added, and
the Notes will instruct you to install new firmware EPROM(S) in the 2500.
TaskLink will need to be updated with the new package type(s) so it can
display them as options in the ProMaster 2500 dialog box. Select this
option to have TaskLink upload the new package information.
Figure 3-17
Utilities Pull-down Menu
Tasks and Kits
ProMaster 2500 User Manual 3-29
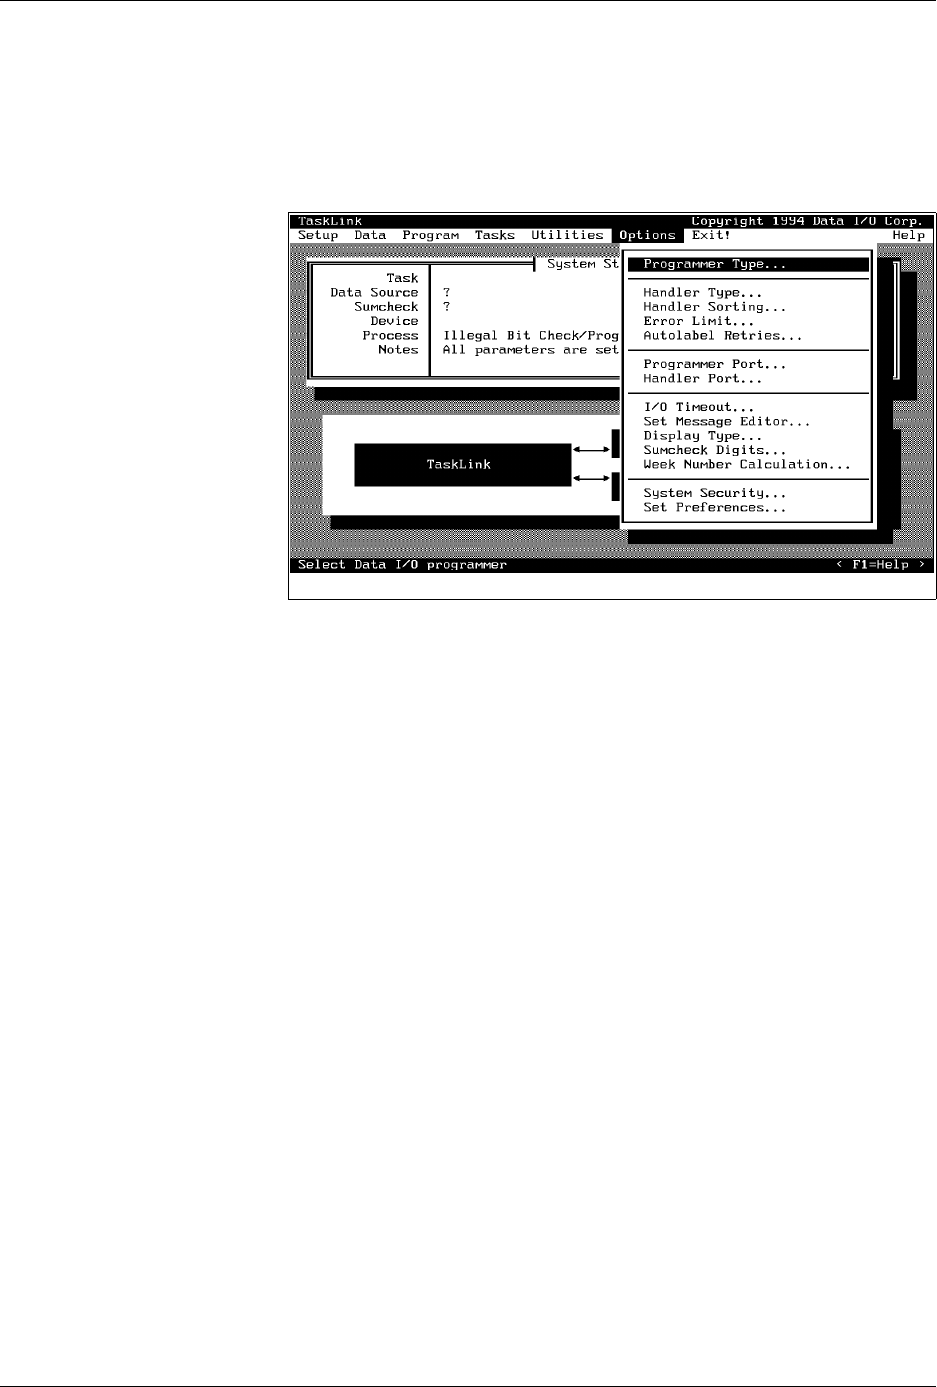
Options Pull-down
Menu
Many of the commands and options displayed on this menu are intended
to be used with other products supported by TaskLink. To get
information on these commands in TaskLink’s online Help, press
F1
.
Only the commands used with the 2500 are described below.
Programmer Type and
Handler Type
Selecting 2500 Text or Graphics automatically selects Handler type. Select
2500 Text when your 2500 has an impact (dot matrix) printer installed.
Select 2500 Graphics when a thermal printer is installed.
Handler Sorting
This screen allows you to direct devices to output categories based on the
result of the programming operation. The 2500 has two output tubes. The
default configuration directs all Category 1 devices (those that have
Passed
programming) into output tube 1 (the right output tube as you are
facing the machine). All devices that fail the program or verify operations
(category 2) are placed in output tube 2.
You may change the routing of devices by changing either its category
from this dialog box or by changing the binning assignments on the
2500’s front panel display. Refer to the System Setup/Handler Setup
Menus to reassign the devices to different output tubes.
Error Limit
When you enter a value other than 0 (zero) in this field, TaskLink will
stop when you get the prescribed number of consecutive programming
errors. For example, if you set the value to 3, any programming error that
occurs on three consecutive devices stops TaskLink, and a failure
message is written on the screen. TaskLink will not stop if the 2500
detects two programming errors and one continuity failure, since they are
not the same. Setting the value to 0 (the default) turns off this feature, and
TaskLink will not stop even if all devices fail with the same error.
ProMaster Retries...
If you experience an error during programming, this parameter instructs
the 2500 to lift the device out of the programming block, insert it again,
and attempt a second device programming operation.
Figure 3-18
Commands Available from the
Options Pull-down Menu