2500_Users_Manual - 第148页
Operation 4-34 ProMa ster 25 00 U ser Ma nual 3. I f the d evic e was too close to th e front of the prog ramming mod ule, press ↑ on the 2500’s keyb oard once or twice . If the device was too close to the back of t he p…
Operation
ProMaster 2500 User Manual 4-33
If the device is not aligned properly, release the
D
key, use the arrow
keys to change the position, and lower the beam into the
programming module to check it again.
When you are satisfied with the left-to-right alignment, check the
front-to-back alignment. See if the device is pushing either the front
or the back contact set much more than the other.
7. If both front and back contact sets are being contacted equally, press
START
to begin processing devices.
If the device is not centered front-to-back,
note
whether it is too close to
the
front
or the
back
, and follow the procedure below to readjust its
position.
Adjust Front-to-back
Position
To realign so the device is inserted into the center of the programming
module (front-to-back axis), follow the steps below.
1. Exit the Task or Kit, restart it, and prepare to check the alignment
again.
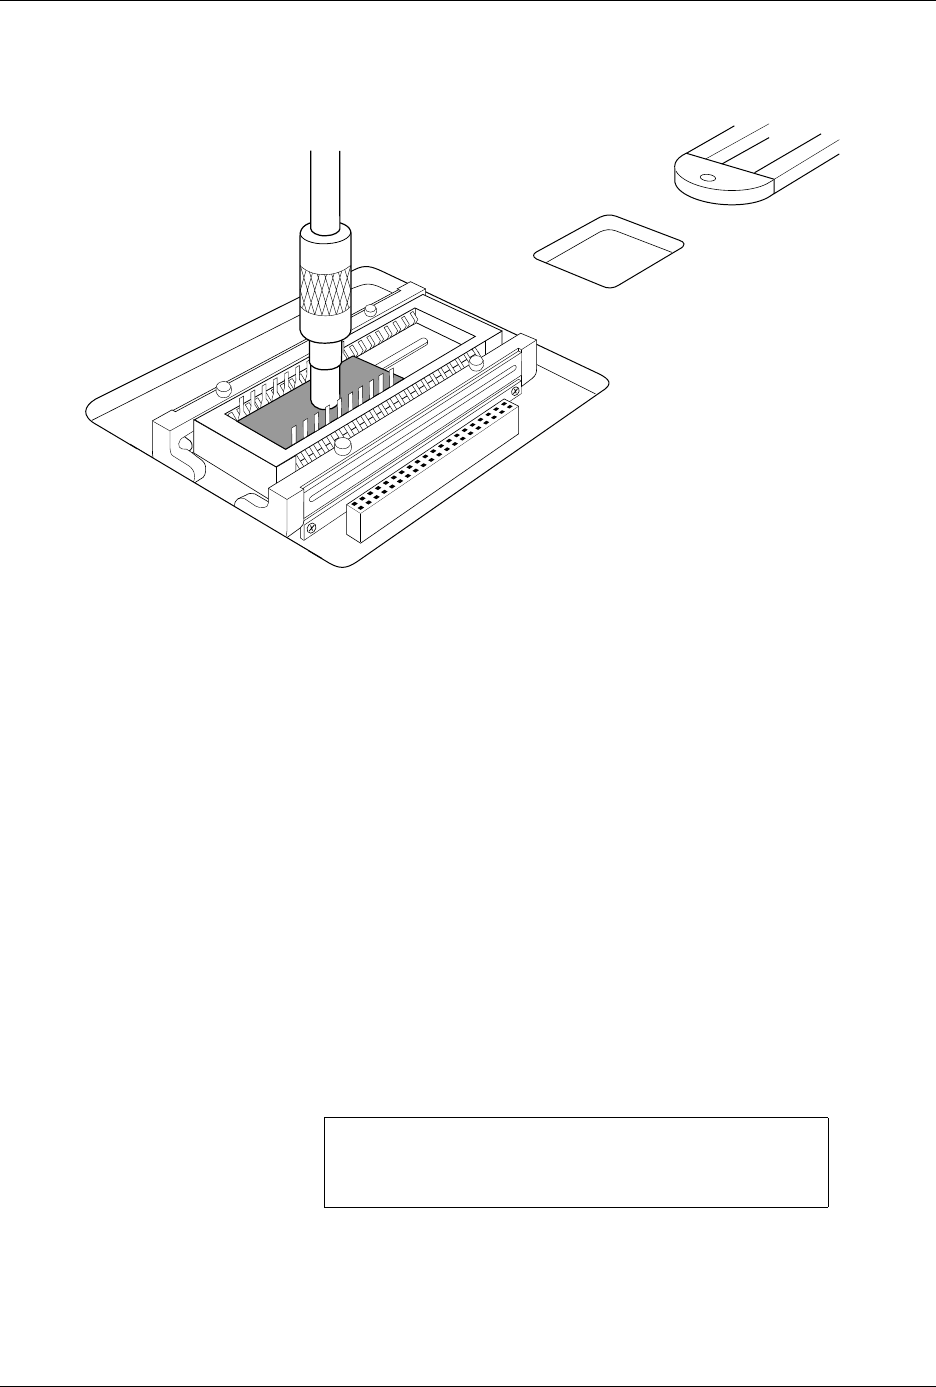
2. The beam will pause above the device and the 2500 displays:
Figure 4-27
DIP Device Alignment
PROGRAM/TEST ONLY
USE ARROW KEYS TO ALIGN BEAM WITH
DEVICE CENTER. PRESS [D] TO LOWER BEAM.
PRESS START TO CONTINUE.
1945-2
Operation
4-34 ProMaster 2500 User Manual
3. If the device was
too close to the front
of the programming module,
press
↑
on the 2500’s keyboard once or twice.
If the device was
too close to the back
of the programming module,
press
↓
once or twice.
4. Press
START
. The beam moves the device over the programming
module and stops.
5. Press and hold
D
on the 2500 keyboard to make certain that the
device is equidistant between the front and back contact sets.
Repeat steps 1 through 5 until the device moves into the center of the
programming module and is not closer to one side of the contacts
than the other.
6. When the alignment is correct, press
START
to continue running the
Task.
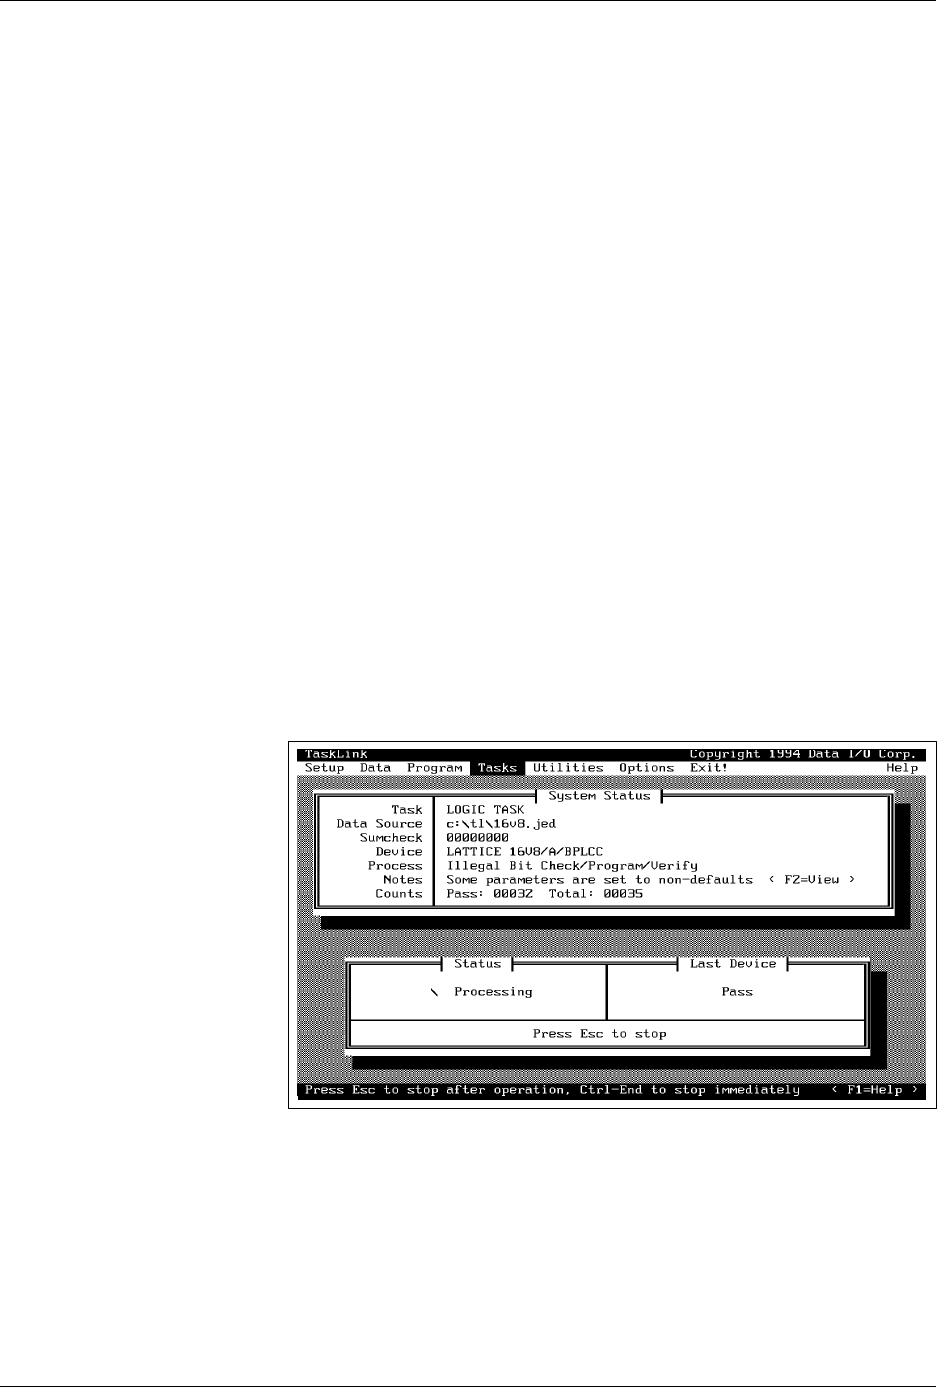
System Status Box
The System Status box is displayed on the PC screen when the 2500 is
processing devices. It continually updates the
Counts
status line with two
number fields:
Pass
and
Total
. Specific error messages are momentarily
displayed in a red box in the
Last Device
status area. All the
programming results are being recorded by TaskLink and will be
displayed in the summary screen when the Task is completed.
TaskLink displays an action symbol (rotating bar) and the words
In
Progress
in the
Status box
. When the operation is complete, the
Last
Device
status box displays Pass and the
Status
box displays the message,
Waiting For Devices
.
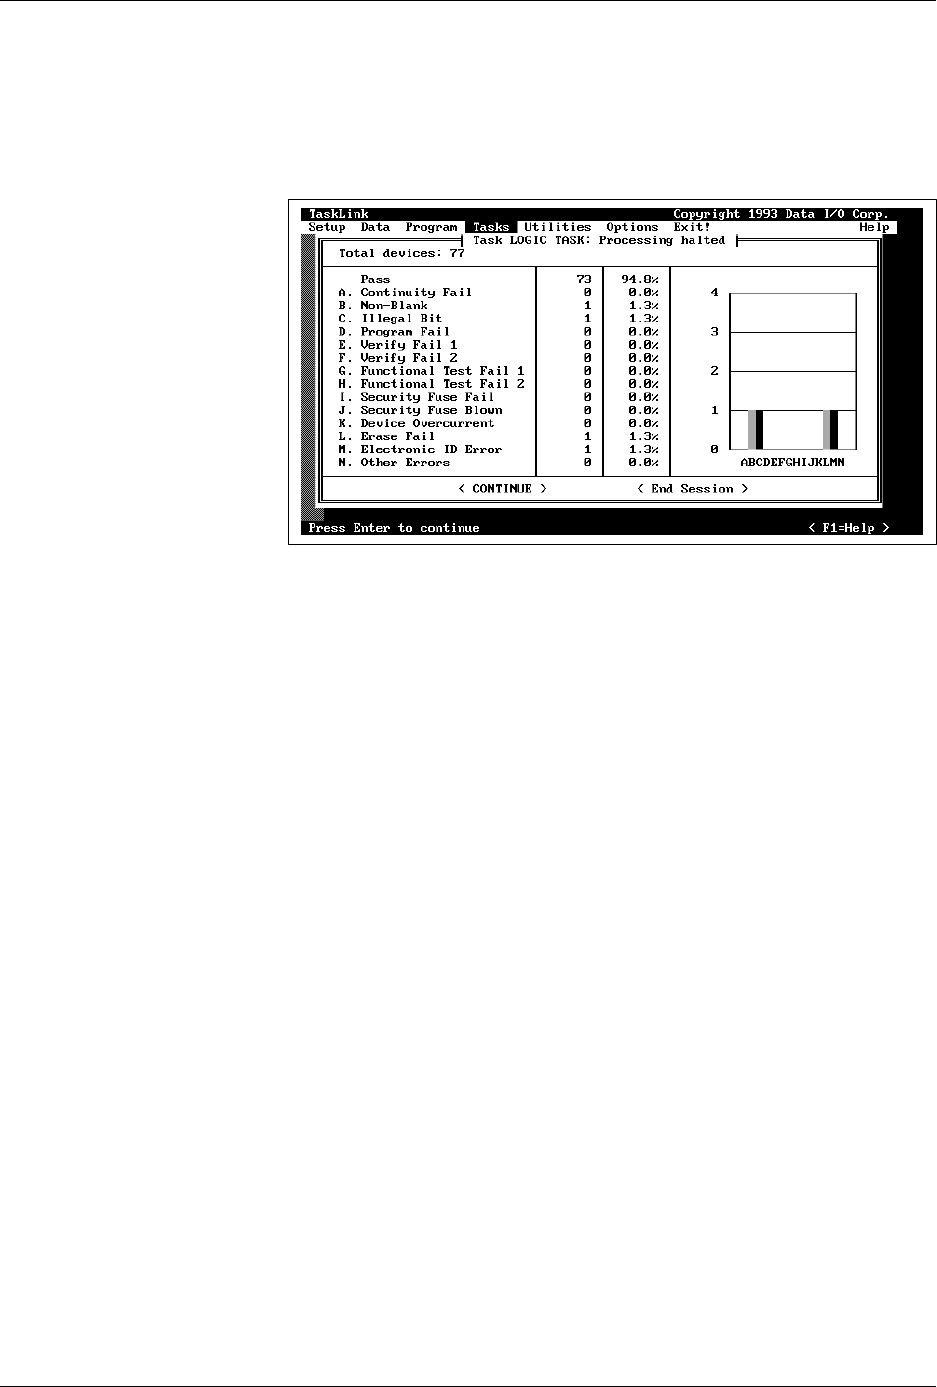
When the number set for pass limit has been reached (or when you
interrupt processing by pressing
Esc
), TaskLink displays a summary
screen that shows the programming result.
Figure 4-28
TaskLink Status Screen During
Device Processing
Operation
ProMaster 2500 User Manual 4-35
Task Summary Screen
The Task summary screen shows the programming yield in terms of the
number of devices that passed and the number that failed for each
specific error. Press
↵
to continue running the Task, or press
T
AB
to select
<End Session>
and
↵
to stop the Task and return to the main TaskLink
screen.
Exiting TaskLink
From the main TaskLink screen, press
T
AB
to select
<EXIT>
and then
press
↵
. A second box appears to confirm that you want to exit TaskLink.
Press
T
AB
to select the
<EXIT>
and then press
↵
again to completely exit
the program and return to the DOS prompt.
Figure 4-29
Task Session Summary Screen