2500_Users_Manual - 第239页
Troubleshoo ting ProM aster 25 00 User Manua l 6-17
Troubleshooting
6-16 ProMaster 2500 User Manual
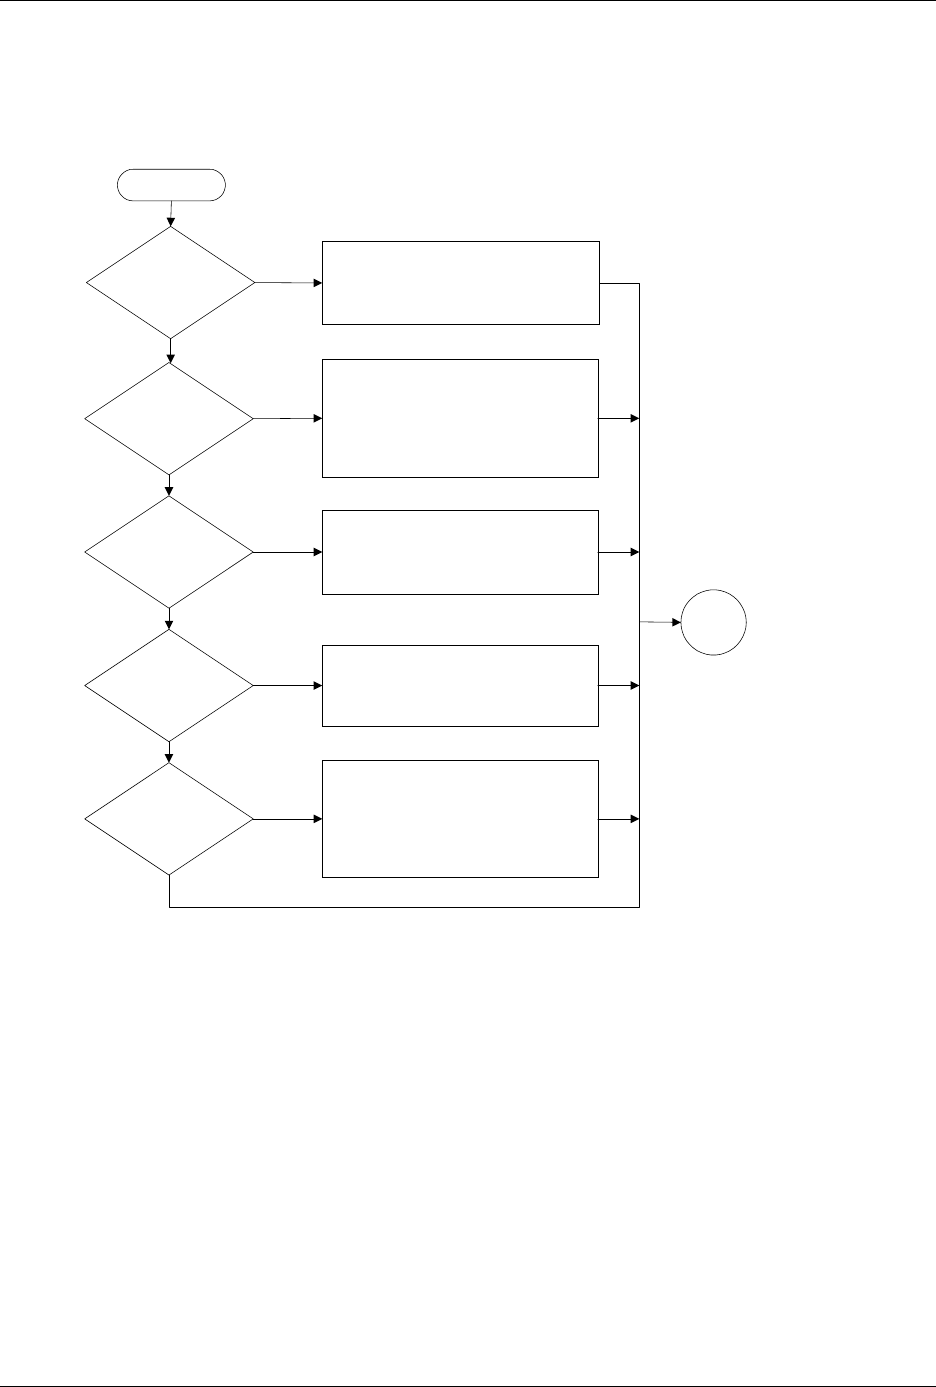
Figure 6-5
Label Printing Problems, Dot Matrix Printer (page numbers are in parentheses)
Are all
characters sharp
and dark?
Check & replace ribbon (5-57)
Check & adjust print head gap (5-24)
Inspect print head for damaged pins
Replace print head (7-12)
Are
all printed
dots straight &
evenly spaced
?
Run Print Test (5-46)
Run Print Only to test label (F-6)
Clean pinch rollers (5-57)
Check operation of labeler motor (5-40)
Check dot split value (2-26)
Check label supply; try different labels
Are all dots
in characters
printed?
Run Print Test (5-46)
Check +24V labeler power supply (5-13)
Replace print head (7-12)
Check/swap cable
Check label supply
Replace ribbon (5-57)
Are all
characters printed
on label?
Run label calibration (2-11)
Check ADC optic adjustment (5-34)
Check labeler motor; check 36V (5-13)
Check label supply
Yes
Yes
Yes
No
No
No
No
Yes
Does
labeler print
anything?
Run Print Test (5-46)
Check labeler power supply (5-13)
Check cables
Replace ribbon (5-57)
No
Yes
Start
Go to
Start

Troubleshooting
ProMaster 2500 User Manual 6-17
Troubleshooting
6-18 ProMaster 2500 User Manual
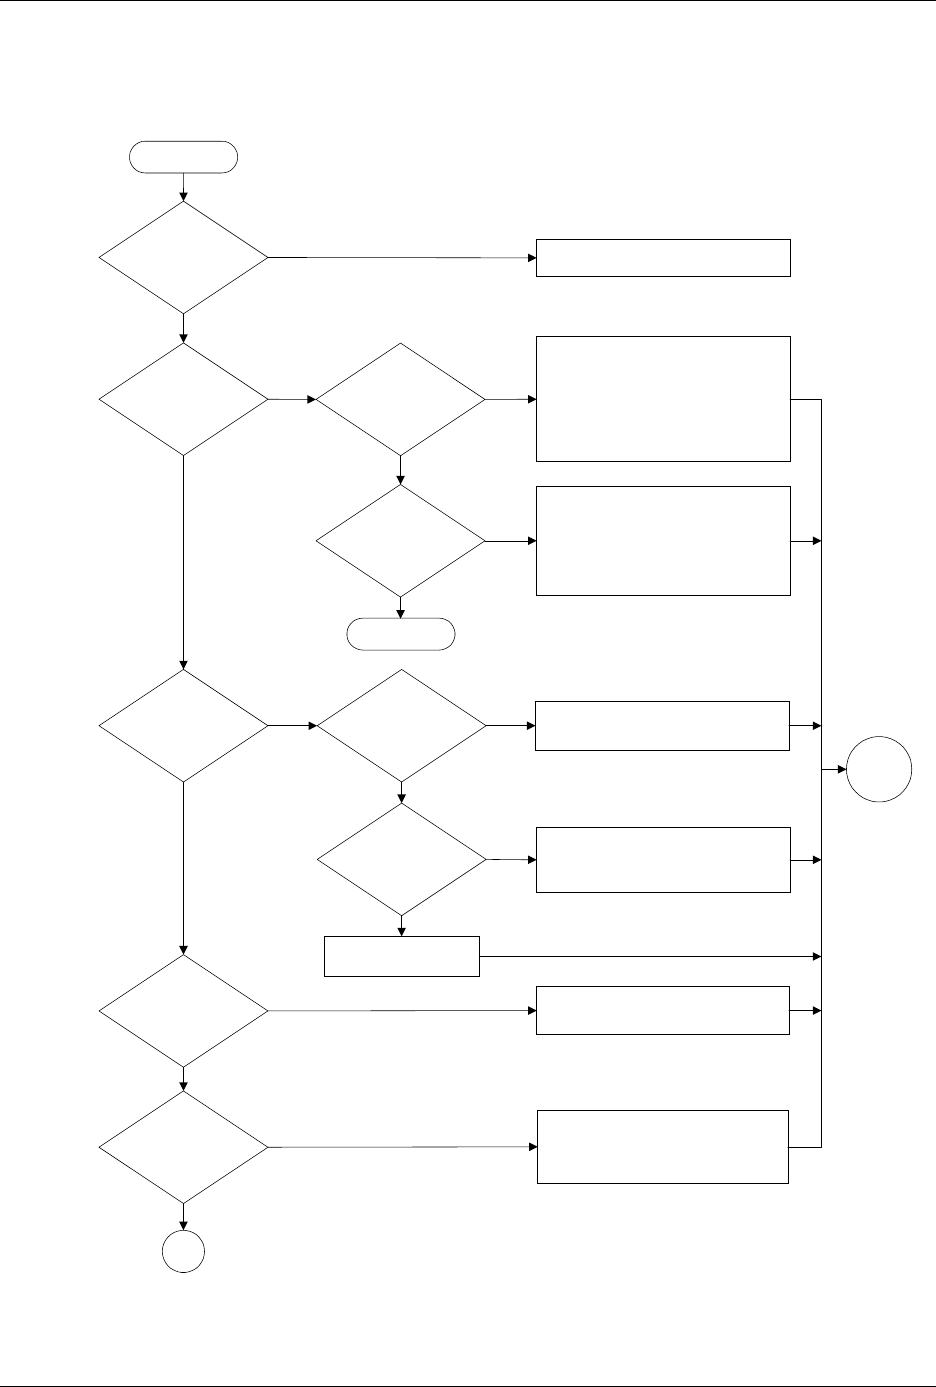
Figure 6-6
Label Application Problems, Dot Matrix Printer (page numbers are in parentheses)
Is label in
wrong position on
device?
Do
labels advance
?
Can you
calibrate labels
?
Are pinch
rollers in operating
position?
No
Yes
No
Yes
No
Yes
Set correct label placement value (2-25)
Check application plate height (2-9)
Ensure press bearings are turning
Check label stock
Put pinch rollers in operating position
(4-19)
Check & adjust ADC optic (5-34)
Check label stock
Yes
Is labeler
motor turning
?
Yes
Check label stock
No
Check labeler motor power supply (5-13)
Run labeler motor test to check motor,
belt, and tensioner pulley (5-40)
No
Does
device align
over labeling
station?
Does beam
move along lead
screw?
Does
beam move
smoothly & align
over labeler
?
End
Does beam
hold device?
See Figure 6-2 (6-8)
Check +90V beam voltage (5-13)
Check motor fuses F5 to F8 (schematic)
Check motor driver circuit U25 to U27
and Q1 to Q4 (schematic)
Check flex coupler (7-21)
Check beam obstruction
Check wiring & connectors
Check for mechanical obstructions
Check +90V beam voltage (5-13)
Check flex coupler (7-21)
Clean & lubricate lead screw (5-63)
Reduce beam motor speed (B-3)
Check wiring & connections
No
No
Yes
Yes
No
No
Yes
Yes
A
Start
Go to
Start