2500_Users_Manual - 第79页
Task s and Ki ts 3-4 ProMa ster 25 00 U ser Ma nual Creating a Task for a Logic Device This section describes how to create a Task for a logic device and describes the necessary parameters. The area on the screen in whic…
Tasks and Kits
ProMaster 2500 User Manual 3-3
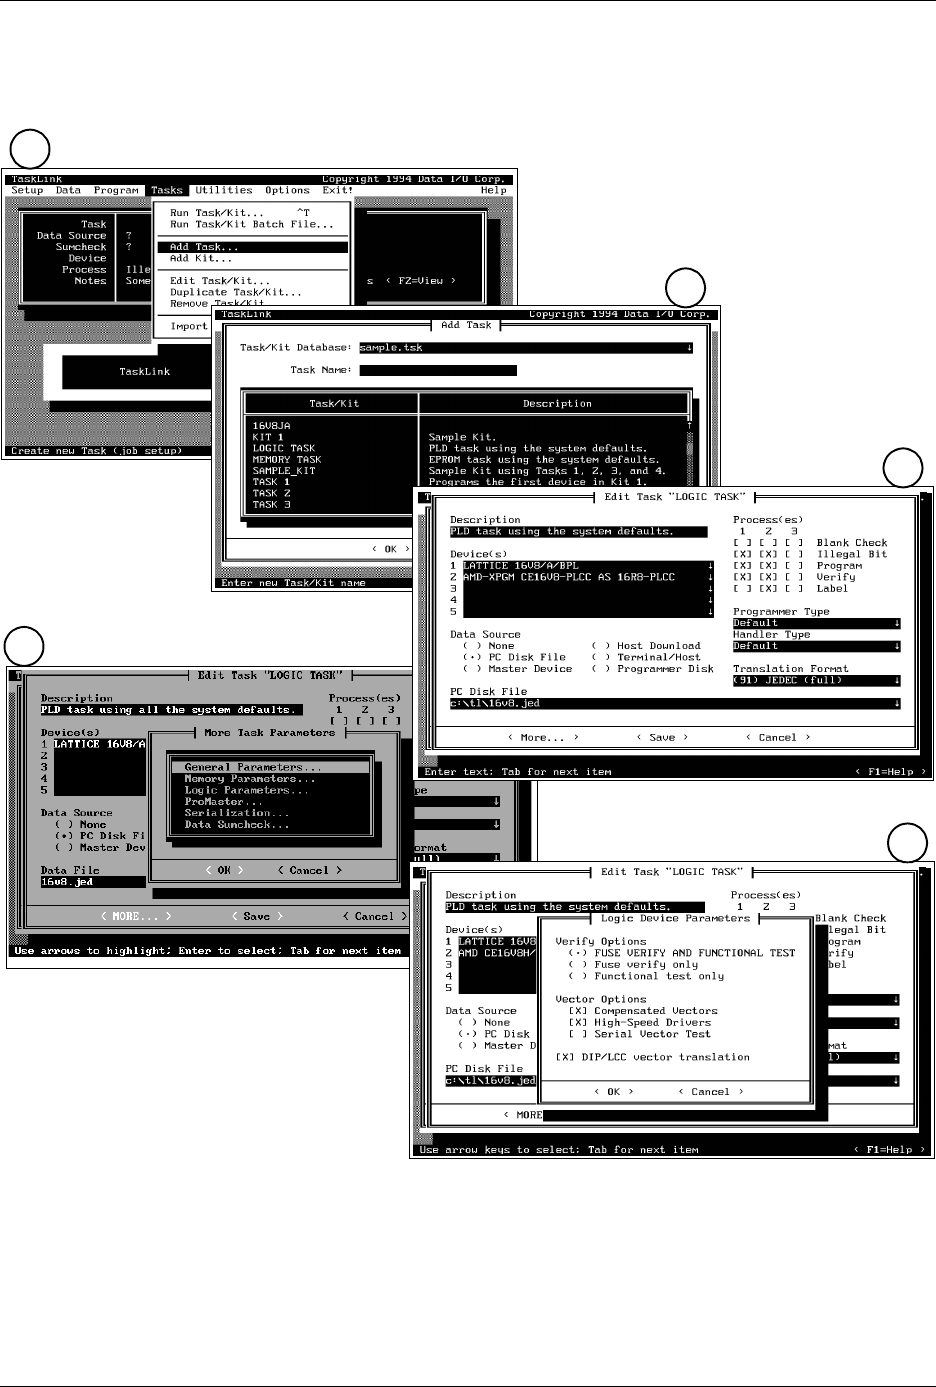
Figure 3-1
Overview of the Steps Involved in Creating Tasks
1
2
3
4
5
Tasks and Kits
3-4 ProMaster 2500 User Manual
Creating a Task for a Logic Device
This section describes how to create a Task for a logic device and
describes the necessary parameters.
The area on the screen in which you enter or select each parameter is
referred to in this manual as the parameter entry field or, simply, field.
Not all of the TaskLink parameter fields must be changed from their
default values. You may accept the default settings on many fields while
creating your Tasks.
There are several parameters or commands that all users must define in
order to create a functioning PLD (or memory device) Task. These are
known as mandatory Task fields and are listed below:
•
Device(s)
— Define device to be programmed.
•
Data Source
— Select the source of data to be programmed into the
device.
•
Process(es)
— Define the operations to be performed on the device.
•
Handling/Labeling Parameters...
— Define the device orientation
and label.
The mandatory fields are shown in the large bold letters in selected
paragraphs below. Parameters that are not shown in large bold letters are
not required for the Task to run and process devices.
Note: This manual is written for users who are using the PC keyboard to make
selections from the TaskLink screens. The same selections can be made
with a mouse by simply moving the mouse pointer over the defined field
and then pressing the mouse button.
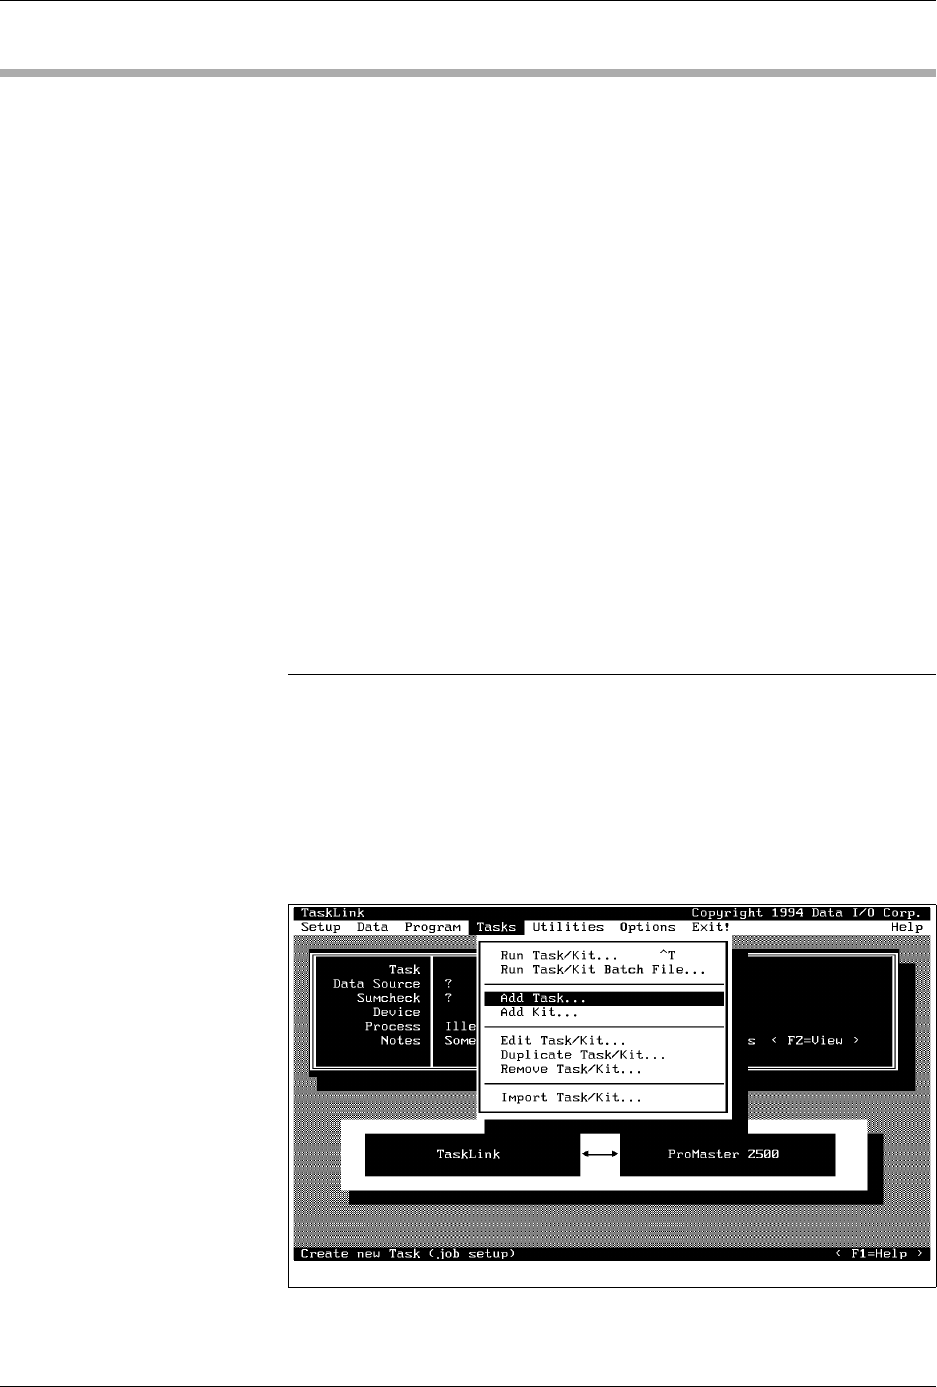
Adding a Task
Start creating a new Task from the main TaskLink screen. To access the
Tasks
menu, press
A
LT
+
T
(Figure 3-2). You can run, add, edit,
duplicate, and remove Tasks or Kits from this menu.
Figure 3-2
Add Task Pull-down Menu
Tasks and Kits
ProMaster 2500 User Manual 3-5
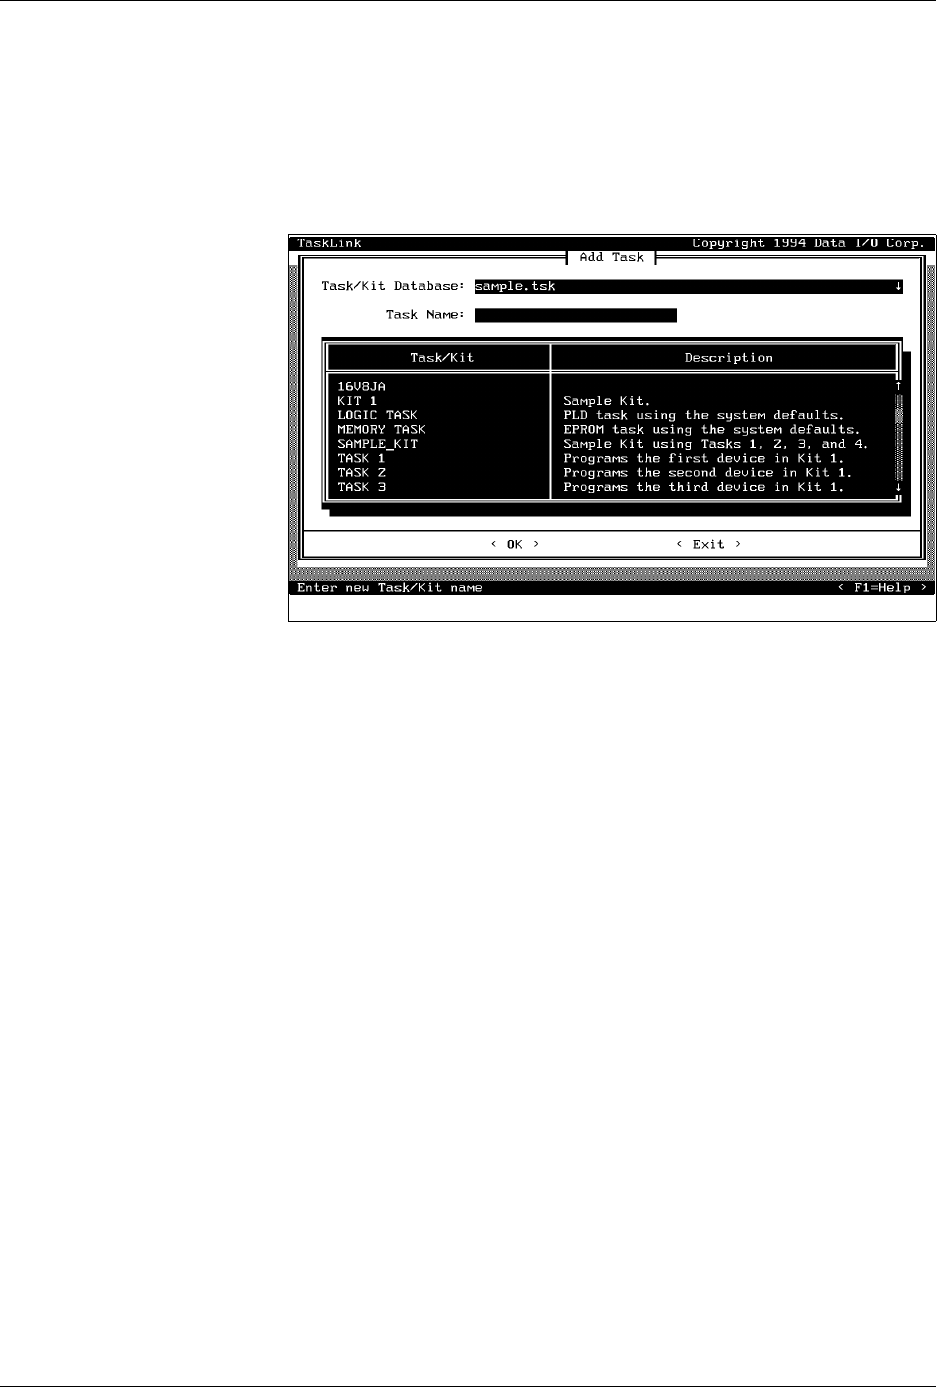
Use the arrow keys (or press
A
) to highlight the
Add Task
option, and
press
↵
to select it. The
Add Task
dialog box appears (see Figure
3-3) with the cursor in the
Name
entry field.
The Tasks and Kits available in the current Task/Kit database file (shown
in the Task/Kit Database entry field at the top of the dialog box) are listed
in the Task/Kit list box.
Selecting Database
Files
TaskLink stores all Tasks and Kits in a database file with a
.tsk
extension.
The file can be given any valid DOS filename. Throughout this manual,
any file with a
.tsk
extension refers to a database file.
You can create as many or as few database files as you want. However,
all the Tasks in a Kit must be from the same database file. Kits are a
special application for Tasks and are described in detail later in this
chapter. You can have up to a maximum of 2500 Tasks/Kits in any
database file.
To change to a different Task database file (
xxxx
.tsk), press
S
HIFT
+
T
AB
to move the screen cursor to the
Task/Kit Database
entry field. Enter the
path and filename of the new database file, or display the file selection
dialog box by pressing
F2
. After you select the file, move the screen
cursor to
< OK >
and press
↵
to accept the new database filename.
Naming a Task/Kit
From the
Task/Kit Name
field, enter a name for the Task you are
creating. This name can be up to 25 printable characters long. Press
↵
to
accept the Task name. The
Edit Task “
Task_name
”
dialog box appears on
the screen with the cursor in the
Description
entry field (see Figure 3-4).
Entering a Task
Description
This optional description field, which can contain up to 40 printable
characters, appears in the Task/Kit list box. Operators can refer to it as
they select a Task to run. For example, a Task named 701-2657-009 could
have the following description: “Device A on Board C for
product_name.
”
Figure 3-3
Add Task Dialog Box